メインコンテンツにスキップ

Toshiba Portege R700-S1312 Fan Replacement

必要な工具と部品

  1. Toshiba Portege R700-S1312 Fan Replacement, Battery: 手順 1、 1の画像 1
    • Locate the battery on the backside of the laptop. The battery is usually located at the bottom.

  2. Toshiba Portege R700-S1312 Fan Replacement: 手順 2、 1の画像 1
    • Locate the battery lock button and push it towards the unlock position.

  3. Toshiba Portege R700-S1312 Fan Replacement: 手順 3、 3の画像 1 Toshiba Portege R700-S1312 Fan Replacement: 手順 3、 3の画像 2 Toshiba Portege R700-S1312 Fan Replacement: 手順 3、 3の画像 3
    • Hold the next lock in the unlock position. Simultaneously pull the battery towards you.

  4. Toshiba Portege R700-S1312 Fan Replacement, Fan: 手順 4、 1の画像 1
    • Begin by removing 14 70mm screws from the back cover of the laptop using a Phillips #00 Screwdriver. Do not attempt to remove the back cover just yet though.

  5. Toshiba Portege R700-S1312 Fan Replacement: 手順 5、 1の画像 1
    • Next, using a Phillips #00 Screwdriver unscrew 2 40mm screws from the RAM cover, and remove the RAM cover.

  6. Toshiba Portege R700-S1312 Fan Replacement: 手順 6、 1の画像 1
    • Next, unscrew 2 40mm screws using a Phillips #00 Screwdriver. The back cover will now be able to be removed with greater ease. Note the previously covered 70mm screw illustrated by a red circle on the image.

  7. Toshiba Portege R700-S1312 Fan Replacement: 手順 7、 2の画像 1 Toshiba Portege R700-S1312 Fan Replacement: 手順 7、 2の画像 2
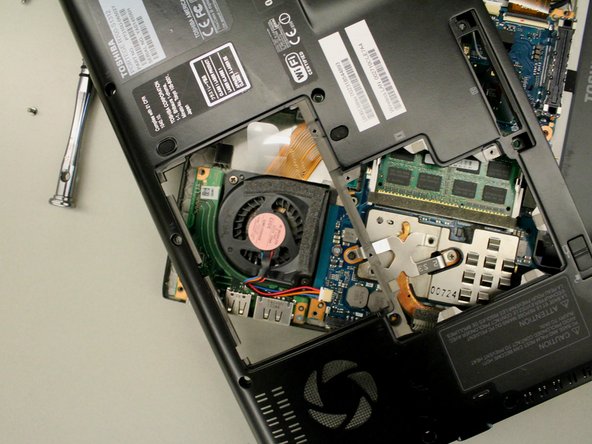
    • The back cover of the laptop can now be removed by gently lifting its edges with your hands. Avoid abrupt removal of the back cover because it is attached internally. Move the cover to the side and the fan will now be visible.

  8. Toshiba Portege R700-S1312 Fan Replacement: 手順 8、 2の画像 1 Toshiba Portege R700-S1312 Fan Replacement: 手順 8、 2の画像 2
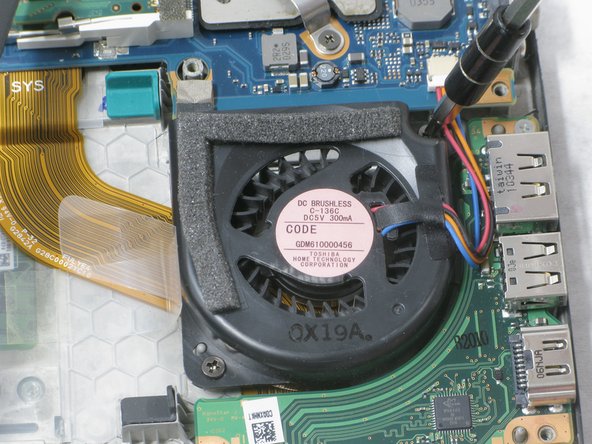
    • Remove the two 50mm screws holding down the fan using a Phillips #00 screwdriver.

  9. Toshiba Portege R700-S1312 Fan Replacement: 手順 9、 1の画像 1
    • Disconnect the fan's power cables from the motherboard by gently pulling the white connector towards the fan and away from the motherboard.

  10. Toshiba Portege R700-S1312 Fan Replacement: 手順 10、 1の画像 1
    • You can now safely remove the fan completely and replace it with your replacement fan.

終わりに

To reassemble your device, follow these instructions in reverse order.

2 の人々がこのガイドを完成させました。

作成者

3人の作成者と共同で作成されました。

Terail Clonts

メンバー登録日: 09/14/16

125 ポイント

1ガイドが承認済み

チーム

Western Carolina University, Team 1-4, Virtue Fall 2016 Western Carolina University, Team 1-4, Virtue Fall 2016人のメンバー

WCU-VIRTUE-F16S1G4

4 メンバー

13のガイドは作成済み

0 件のコメント

コメントを追加

統計データ:

過去 24時間: 0

過去 7 日: 1

過去 30 日: 11

今までの合計 1,527