メインコンテンツにスキップ

Toshiba Portege R205-S209 Heatsink Fan Replacement

必要な工具と部品

  1. Toshiba Portege R205-S209 Heatsink Fan Replacement, Heatsink Fan: 手順 1、 3の画像 1 Toshiba Portege R205-S209 Heatsink Fan Replacement, Heatsink Fan: 手順 1、 3の画像 2 Toshiba Portege R205-S209 Heatsink Fan Replacement, Heatsink Fan: 手順 1、 3の画像 3
    • With the laptop flipped over, unlock the mechanism that is shown in red.

    • Lift and remove the battery out of the device.

  2. Toshiba Portege R205-S209 Heatsink Fan Replacement: 手順 2、 2の画像 1 Toshiba Portege R205-S209 Heatsink Fan Replacement: 手順 2、 2の画像 2
    • Remove the accessory plate by unscrewing the single Phillips #0 screw and lifting up the panel.

  3. Toshiba Portege R205-S209 Heatsink Fan Replacement: 手順 3、 3の画像 1 Toshiba Portege R205-S209 Heatsink Fan Replacement: 手順 3、 3の画像 2 Toshiba Portege R205-S209 Heatsink Fan Replacement: 手順 3、 3の画像 3
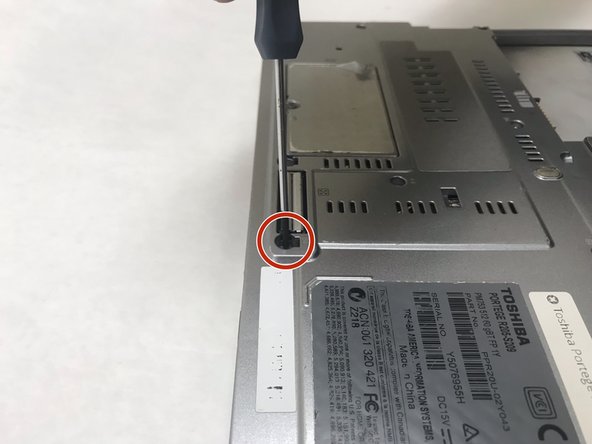
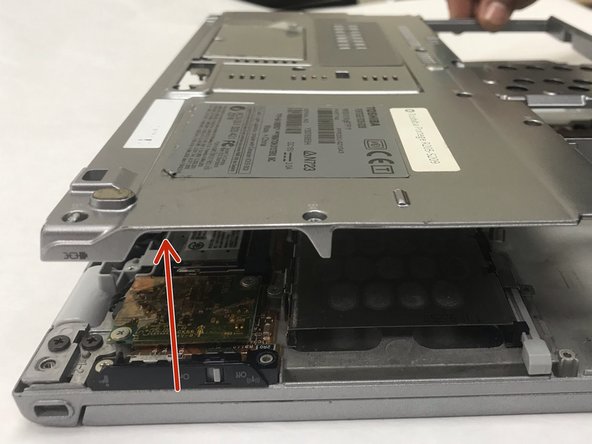
    • Remove the 18 Phillips #0 screws that keep the bottom plate attached to the outer portion of the laptop.

  4. Toshiba Portege R205-S209 Heatsink Fan Replacement: 手順 4、 3の画像 1 Toshiba Portege R205-S209 Heatsink Fan Replacement: 手順 4、 3の画像 2 Toshiba Portege R205-S209 Heatsink Fan Replacement: 手順 4、 3の画像 3
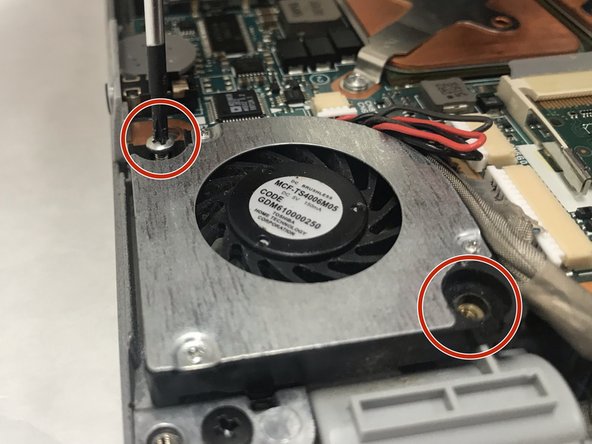
    • Remove the 2 Phillips #0 screws holding the heat sink in place.

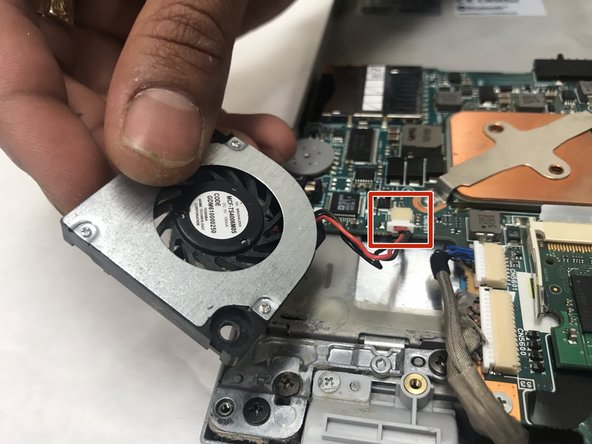
    • Detach the heatsink fan from the motherboard by removing the clip that connects them together and pulling away from the laptop horizontally.

終わりに

To reassemble your device, follow these instructions in reverse order.

作成者

1人の作成者と共同作成されました。

Jason Sizen

メンバー登録日: 04/04/19

193 ポイント

2のガイドは作成済み

チーム

IUPUI, Team S1-G2, Crossman Spring 2019 IUPUI, Team S1-G2, Crossman Spring 2019人のメンバー

IUPUI-CROSSMAN-S19S1G2

3 メンバー

6のガイドは作成済み

0 件のコメント

コメントを追加

統計データ:

過去 24時間: 0

過去 7 日: 5

過去 30 日: 10

今までの合計 142