メインコンテンツにスキップ

Toshiba Portege M400 Screen Replacement

必要な工具と部品

  1. Toshiba Portege M400 Screen Replacement, Screen: 手順 1、 2の画像 1 Toshiba Portege M400 Screen Replacement, Screen: 手順 1、 2の画像 2
    • Using a plastic opening tool, remove all stickers covering the screws.

    • Note: There are 6 locations; 2 at the top corners, 2 at the bottom corners, and 2 more at the bottom, towards the center of the screen.

  2. Toshiba Portege M400 Screen Replacement: 手順 2、 2の画像 1 Toshiba Portege M400 Screen Replacement: 手順 2、 2の画像 2
    • Remove all six 3.8mm screws from the screen using a #1 Phillips screwdriver.

  3. Toshiba Portege M400 Screen Replacement: 手順 3、 2の画像 1 Toshiba Portege M400 Screen Replacement: 手順 3、 2の画像 2
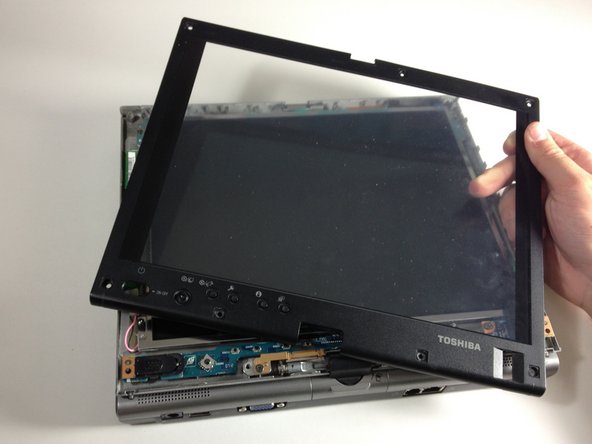
    • With a plastic opening tool, prop the plastic panel up to separate it from the rest of the laptop.

    • Slowly pull the plastic panel from the entire laptop.

  4. Toshiba Portege M400 Screen Replacement: 手順 4、 2の画像 1 Toshiba Portege M400 Screen Replacement: 手順 4、 2の画像 2
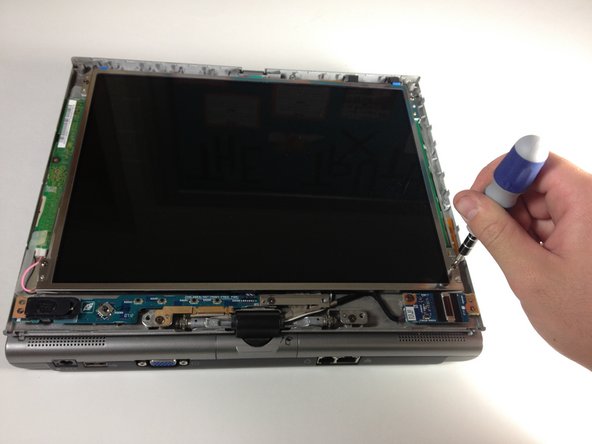
    • Remove the four 5 mm screws with a Phillips #1 screwdriver, each located at the four corners of the screen.

  5. Toshiba Portege M400 Screen Replacement: 手順 5、 2の画像 1 Toshiba Portege M400 Screen Replacement: 手順 5、 2の画像 2
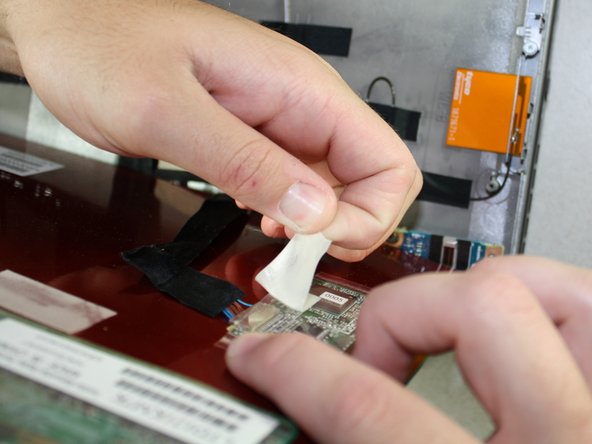
    • Carefully lift up the screen from the rest of the laptop and let it lean towards you, as it is still attached to cords and other wirings.

    • Remove all white tape that hold the cords and wirings together.

  6. Toshiba Portege M400 Screen Replacement: 手順 6、 2の画像 1 Toshiba Portege M400 Screen Replacement: 手順 6、 2の画像 2
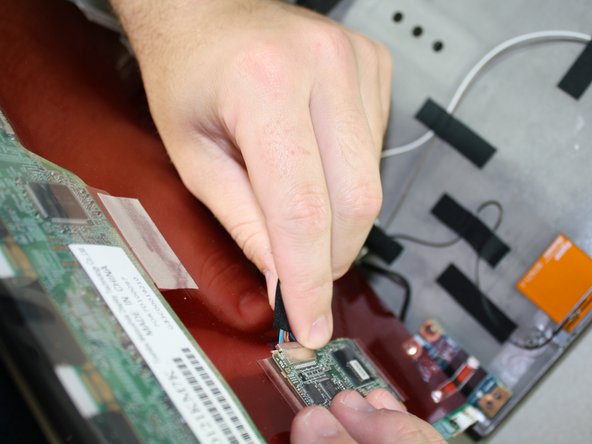
    • Note: Some parts need unplugging. Slowly and carefully unplug each of the components.

  7. Toshiba Portege M400 Screen Replacement: 手順 7、 1の画像 1
    • At this point, the screen should be completely disconnected from the rest of the laptop.

終わりに

To reassemble your device, follow these instructions in reverse order.

ある他の人がこのガイドを完成しました。

作成者

10人の作成者と共同で作成されました。

Varsha Roopreddy

メンバー登録日: 04/19/13

37 ポイント

4のガイドは作成済み

チーム

Cal Poly, Team 4-17, Maness Spring 2013 Cal Poly, Team 4-17, Maness Spring 2013人のメンバー

CPSU-MANESS-S13S4G17

3 メンバー

12のガイドは作成済み

コメント 1 件

Be careful with this procedure, as there are at least 2 different part numbers for the M400, LTD121KM7K has a 32 pin connector, and a different one, LTD121KC6K has a shorter connector for the display which is not compatible. When ordering from Ebay they do not distinguish between them. I would also like a procedure for replacing the complete screen and lid assembly. I can't find it on the net at the moment. Also, be aware that there may be compatibility issues there too.

Elizabeth Donavan - 返信

コメントを追加

統計データ:

過去 24時間: 0

過去 7 日: 0

過去 30 日: 0

今までの合計 1,417