メインコンテンツにスキップ

Toshiba Portege M400 Keyboard Replacement

必要な工具と部品

  1. Toshiba Portege M400 Keyboard Replacement, Keyboard: 手順 1、 1の画像 1
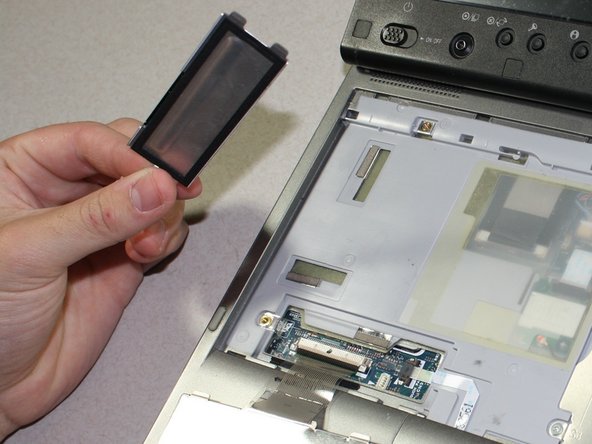
    • Remove the front face plate with a plastic opening tool.

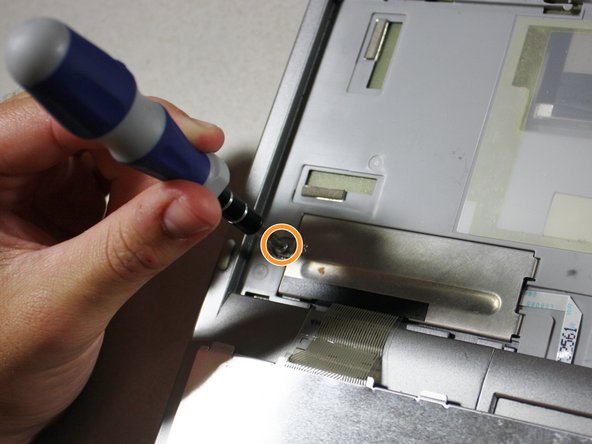
    • Unscrew and remove the two 3.8mm screws labeled B3 with the #1 Phillips screwdriver.

  2. Toshiba Portege M400 Keyboard Replacement: 手順 2、 1の画像 1
    • Lift the keyboard toward you starting from the edge closest to the screen.

    • This ribbon still connects the taptor to the keyboard.

    • Gently place the keyboard on top of the track pad with the keys upside down.

  3. Toshiba Portege M400 Keyboard Replacement: 手順 3、 3の画像 1 Toshiba Portege M400 Keyboard Replacement: 手順 3、 3の画像 2 Toshiba Portege M400 Keyboard Replacement: 手順 3、 3の画像 3
    • Find the white ribbon connector (where the keyboard is still attached to the rest of the laptop).

    • Remove the screw on the metal plate that keeps the ribbon from sliding out.

    • Gently remove the metal plate and set it aside.

  4. Toshiba Portege M400 Keyboard Replacement: 手順 4、 2の画像 1 Toshiba Portege M400 Keyboard Replacement: 手順 4、 2の画像 2
    • Dislodge the white ribbon connector from the two clips holding it in place using the plastic opening tools.

    • Pull out the white ribbon connector with your fingers.

終わりに

To reassemble your device, follow these instructions in reverse order.

ある他の人がこのガイドを完成しました。

作成者

12人の作成者と共同で作成されました。

Varsha Roopreddy

メンバー登録日: 04/19/13

37 ポイント

4のガイドは作成済み

チーム

Cal Poly, Team 4-17, Maness Spring 2013 Cal Poly, Team 4-17, Maness Spring 2013人のメンバー

CPSU-MANESS-S13S4G17

3 メンバー

12のガイドは作成済み

0 件のコメント

コメントを追加

統計データ:

過去 24時間: 0

過去 7 日: 5

過去 30 日: 13

今までの合計 1,035