メインコンテンツにスキップ

Toshiba Portege M300 Hard Drive Replacement

必要な工具と部品

  1. Toshiba Portege M300 Hard Drive Replacement, Battery: 手順 1、 1の画像 1
    • Turn the computer over onto its back.

  2. Toshiba Portege M300 Hard Drive Replacement: 手順 2、 2の画像 1 Toshiba Portege M300 Hard Drive Replacement: 手順 2、 2の画像 2
    • Slide the lock on the left side to the unlock position.

    • Slide the lock on the right side to the unlock position until there is a clicking sound.

  3. Toshiba Portege M300 Hard Drive Replacement: 手順 3、 2の画像 1 Toshiba Portege M300 Hard Drive Replacement: 手順 3、 2の画像 2
    • Remove the battery by sliding it away from the laptop.

    • Make sure the two locks from the previous step are in the unlocked position while sliding the battery away.

  4. Toshiba Portege M300 Hard Drive Replacement, Hard Drive: 手順 4、 3の画像 1 Toshiba Portege M300 Hard Drive Replacement, Hard Drive: 手順 4、 3の画像 2 Toshiba Portege M300 Hard Drive Replacement, Hard Drive: 手順 4、 3の画像 3
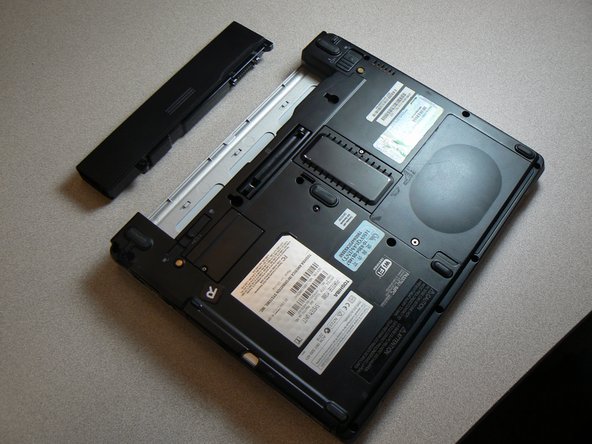
    • Turn the computer over onto the back.

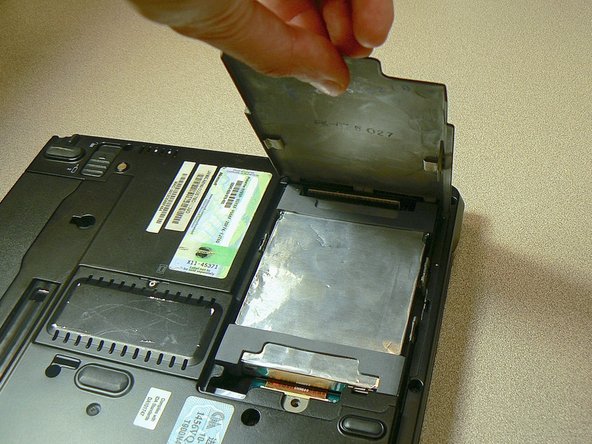
    • Use a Phillips #1 screwdriver to remove the screw from the hard drive cover.

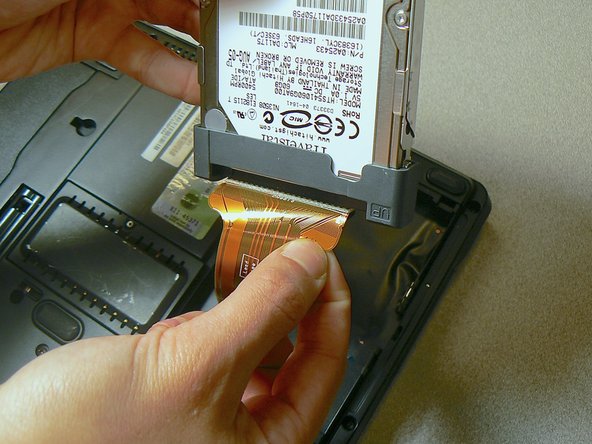
    • Lift and remove the cover.

  5. Toshiba Portege M300 Hard Drive Replacement: 手順 5、 3の画像 1 Toshiba Portege M300 Hard Drive Replacement: 手順 5、 3の画像 2 Toshiba Portege M300 Hard Drive Replacement: 手順 5、 3の画像 3
    • Carefully remove the hard drive from the IDE cable by pulling on the black connector.

    • Do not pull the orange cable.

  6. Toshiba Portege M300 Hard Drive Replacement: 手順 6、 2の画像 1 Toshiba Portege M300 Hard Drive Replacement: 手順 6、 2の画像 2
    • Remove the two gray rubber covers from both ends of the hard drive.

終わりに

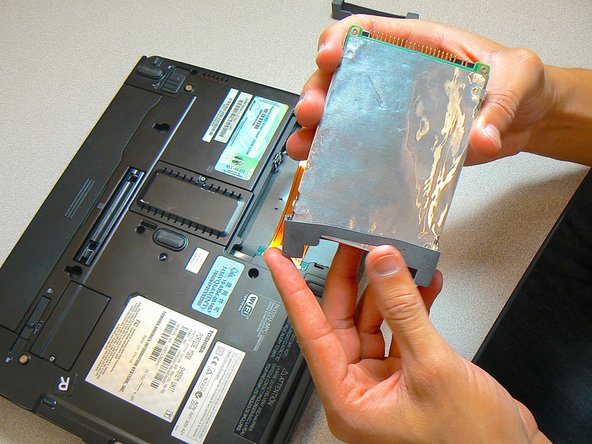
To reassemble your device, follow these instructions in reverse order.

5 の人々がこのガイドを完成させました。

作成者

7人の作成者と共同で作成されました。

Alison Wendt

メンバー登録日: 04/18/13

135 ポイント

6のガイドは作成済み

チーム

Cal Poly, Team 21-51, Johann Spring 2013 Cal Poly, Team 21-51, Johann Spring 2013人のメンバー

CPSU-JOHANN-S13S21G51

3 メンバー

18のガイドは作成済み

0 件のコメント

コメントを追加

統計データ:

過去 24時間: 0

過去 7 日: 2

過去 30 日: 11

今までの合計 2,368