メインコンテンツにスキップ

Toshiba Excite 7 Rear Facing Camera Replacement

必要な工具と部品

  1. Toshiba Excite 7 Rear Facing Camera Replacement, Battery Removal: 手順 1、 3の画像 1 Toshiba Excite 7 Rear Facing Camera Replacement, Battery Removal: 手順 1、 3の画像 2 Toshiba Excite 7 Rear Facing Camera Replacement, Battery Removal: 手順 1、 3の画像 3
    • Remove the back cover.

    • Work your fingernail or flat object under the cover’s seal. Start at the top right corner just above the front facing camera this is the device “Weak Spot”.

    • After you pry open the first clip slide the flat object along the perimeter of the cover until the cover is removable. You should hear the clips pop open.

  2. Toshiba Excite 7 Rear Facing Camera Replacement, Remove Tape: 手順 2、 2の画像 1 Toshiba Excite 7 Rear Facing Camera Replacement, Remove Tape: 手順 2、 2の画像 2
    • Remove any black tape from the device.

    • Keep the tape, you will need to put it back on when you are done.

  3. Toshiba Excite 7 Rear Facing Camera Replacement, Unplug Wires: 手順 3、 2の画像 1 Toshiba Excite 7 Rear Facing Camera Replacement, Unplug Wires: 手順 3、 2の画像 2
    • Unplug the wires from the battery.

    • The battery is the black rectangle in the middle of the device. The device has two wiring harnesses attached to it, one just above the battery and one just to the right.

  4. Toshiba Excite 7 Rear Facing Camera Replacement, remove screws: 手順 4、 2の画像 1 Toshiba Excite 7 Rear Facing Camera Replacement, remove screws: 手順 4、 2の画像 2
    • Unscrew the battery from the device.

    • The device has 5 screws to remove, keep the screws.

  5. Toshiba Excite 7 Rear Facing Camera Replacement, Unclip and remove battery: 手順 5、 2の画像 1 Toshiba Excite 7 Rear Facing Camera Replacement, Unclip and remove battery: 手順 5、 2の画像 2
    • The battery has one clip you will need to remove. The clip is located at the bottom right corner of the battery just above the right speaker. The speakers and wires are not secured to the battery, they may fall off.

    • Push the clip back then lift the battery up.

  6. Toshiba Excite 7 Rear Facing Camera Replacement, Removing Circuit board: 手順 6、 1の画像 1
    • Remove the the remaining 3 screws to unfasten circuit board. Keep the screws.

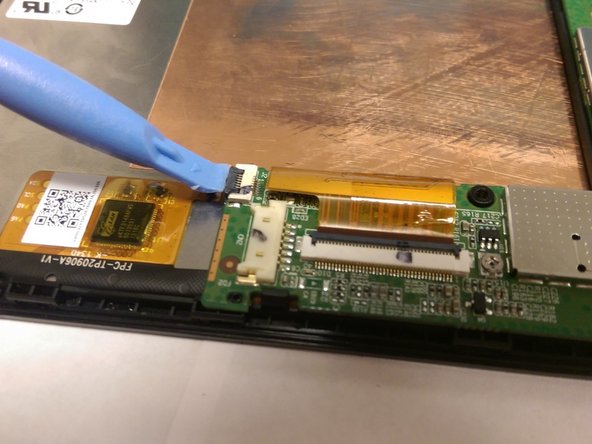
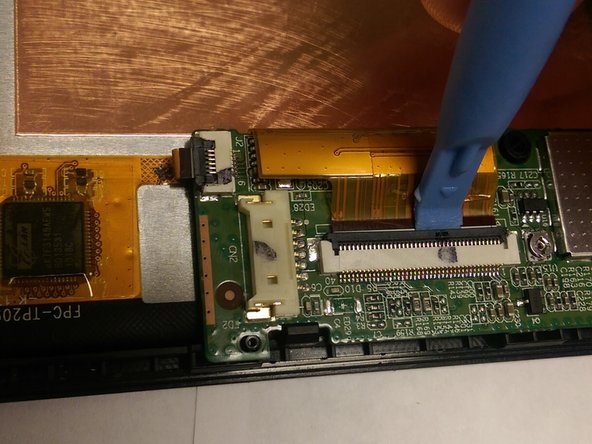
  7. Toshiba Excite 7 Rear Facing Camera Replacement, Unplugging Data Cable: 手順 7、 3の画像 1 Toshiba Excite 7 Rear Facing Camera Replacement, Unplugging Data Cable: 手順 7、 3の画像 2 Toshiba Excite 7 Rear Facing Camera Replacement, Unplugging Data Cable: 手順 7、 3の画像 3
    • The screen is connected to the circuit board by 2 “Data Cables” (orange ribbons). Data cables include 3 working components, data cables, the white harness plug, and the black lever.

    • Gently flip the black lock up with an opening tool and unplug data cables.

  8. Toshiba Excite 7 Rear Facing Camera Replacement, Remove circuit board: 手順 8、 1の画像 1
    • Use an opening tool to remove the circuit board by gently coaxing it from the clips located just to the right of the circuit board.

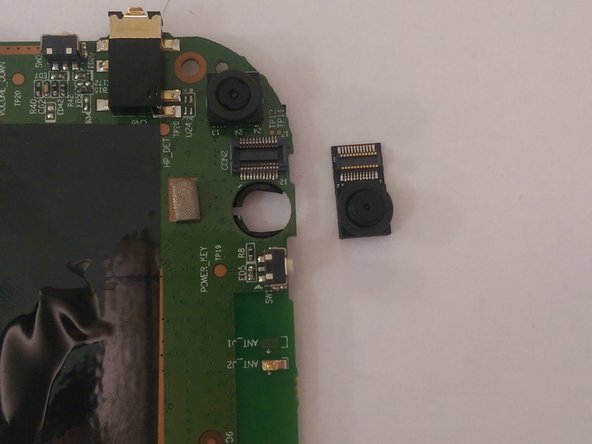
  9. Toshiba Excite 7 Rear Facing Camera Replacement, Removing rear facing camera: 手順 9、 2の画像 1 Toshiba Excite 7 Rear Facing Camera Replacement, Removing rear facing camera: 手順 9、 2の画像 2
    • Flip the circuit board over, the rear facing camera is the black rectangle in the upper right corner of the circuit board.

    • Gently unplug the camera from the circuit board and plug the new camera in.

終わりに

To reassemble your device, follow these instructions in reverse order.

作成者

6人の作成者と共同で作成されました。

Martin Bucheli

メンバー登録日: 01/15/15

264 ポイント

2のガイドは作成済み

チーム

USF Tampa, Team 1-3, Tanski Winter 2015 USF Tampa, Team 1-3, Tanski Winter 2015人のメンバー

USFT-TANSKI-W15S1G3

4 メンバー

12のガイドは作成済み

0 件のコメント

コメントを追加

統計データ:

過去 24時間: 0

過去 7 日: 0

過去 30 日: 0

今までの合計 183