メインコンテンツにスキップ

Toshiba Excite 10 AT300 Rear-Facing Camera Replacement

必要な工具と部品

  1. Toshiba Excite 10 AT300 Rear-Facing Camera Replacement, Remove SD Card: 手順 1、 1の画像 1
    • Remove the SD card from the SD card slot.

  2. Toshiba Excite 10 AT300 Rear-Facing Camera Replacement, Open the Tablet: 手順 2、 3の画像 1 Toshiba Excite 10 AT300 Rear-Facing Camera Replacement, Open the Tablet: 手順 2、 3の画像 2 Toshiba Excite 10 AT300 Rear-Facing Camera Replacement, Open the Tablet: 手順 2、 3の画像 3
    • Use the opening tool to separate the front and rear panels by slipping the tool underneath the screen edge and sliding it around the entire device.

    • Make sure you unclip all of the clips on the back panel, or pulling it off will be difficult and may damage the tablet.

  3. Toshiba Excite 10 AT300 Rear-Facing Camera Replacement, Disconnect Speaker Wires: 手順 3、 3の画像 1 Toshiba Excite 10 AT300 Rear-Facing Camera Replacement, Disconnect Speaker Wires: 手順 3、 3の画像 2 Toshiba Excite 10 AT300 Rear-Facing Camera Replacement, Disconnect Speaker Wires: 手順 3、 3の画像 3
    この手順で使用する道具:
    Tweezers
    $4.99
    購入する
    • Remove the speaker cable from its socket by gripping both sides of the white connector piece with tweezers and pulling straight out.

    • Be careful not to rip the wires out of the white connector piece.

  4. Toshiba Excite 10 AT300 Rear-Facing Camera Replacement, Remove Screws: 手順 4、 2の画像 1 Toshiba Excite 10 AT300 Rear-Facing Camera Replacement, Remove Screws: 手順 4、 2の画像 2
    • Using a #00 Phillips screwdriver, remove the following screws:

    • Five 3mm Phillips #00 screws

  5. Toshiba Excite 10 AT300 Rear-Facing Camera Replacement, Remove Battery Cable: 手順 5、 3の画像 1 Toshiba Excite 10 AT300 Rear-Facing Camera Replacement, Remove Battery Cable: 手順 5、 3の画像 2 Toshiba Excite 10 AT300 Rear-Facing Camera Replacement, Remove Battery Cable: 手順 5、 3の画像 3
    この手順で使用する道具:
    Tweezers
    $4.99
    購入する
    • Gently lift the battery, pulling away from the tab holding it in place at the bottom.

    • While holding the battery up, use a pair of tweezers to remove the battery cable from its connector.

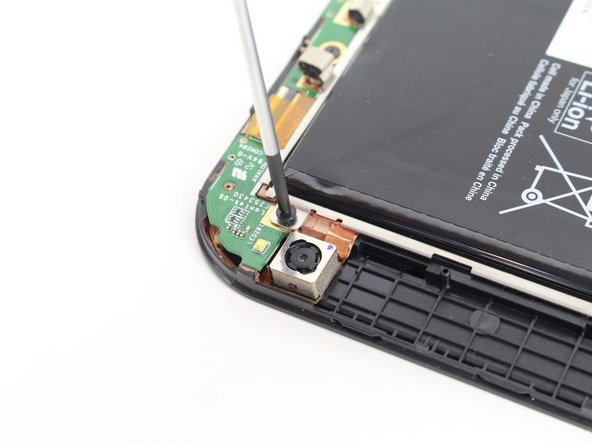
  6. Toshiba Excite 10 AT300 Rear-Facing Camera Replacement, Remove screw and yellow tape: 手順 6、 1の画像 1
    この手順で使用する道具:
    Tweezers
    $4.99
    購入する
    • Using a #00 Philips screwdriver, remove the screw attaching daughter board.

    • Remove the yellow tape using a pair of tweezers.

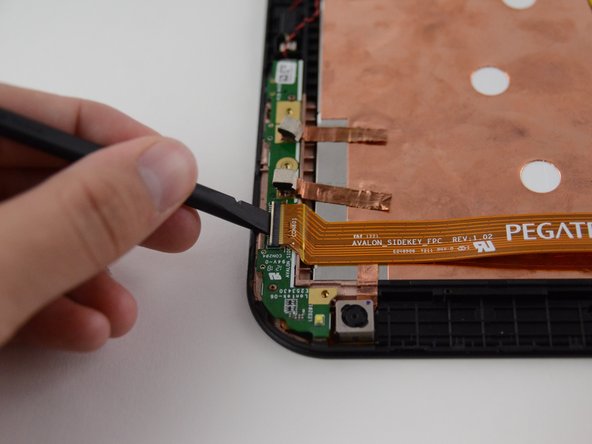
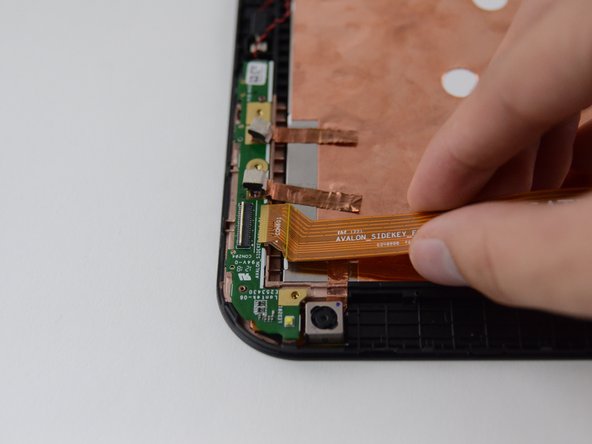
  7. Toshiba Excite 10 AT300 Rear-Facing Camera Replacement, Remove Ribbon Cable: 手順 7、 3の画像 1 Toshiba Excite 10 AT300 Rear-Facing Camera Replacement, Remove Ribbon Cable: 手順 7、 3の画像 2 Toshiba Excite 10 AT300 Rear-Facing Camera Replacement, Remove Ribbon Cable: 手順 7、 3の画像 3
    • Unlock the ribbon cable housing using tweezers and/or a spudger.

    • Gently pull the ribbon cable out of its housing using the tweezers or your hands.

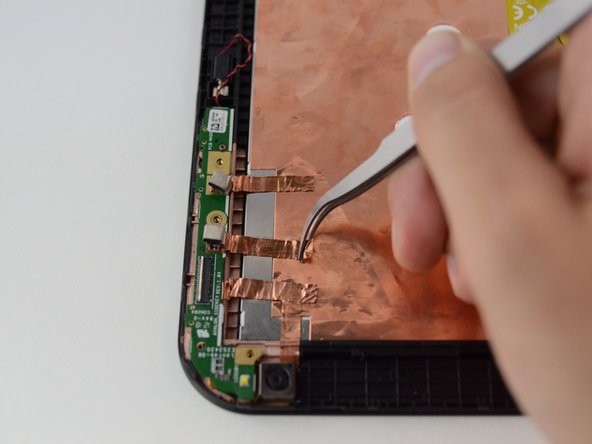
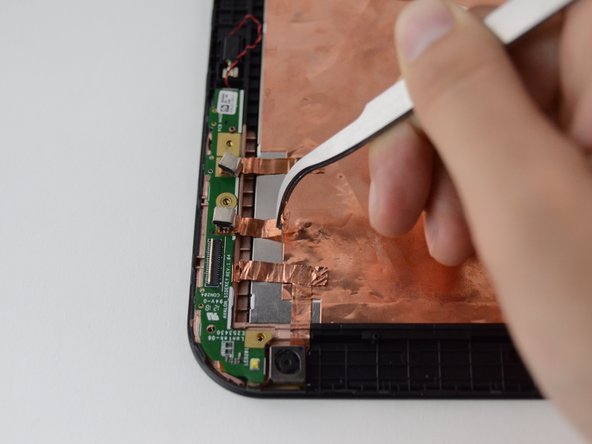
  8. Toshiba Excite 10 AT300 Rear-Facing Camera Replacement, Remove copper foil wires: 手順 8、 3の画像 1 Toshiba Excite 10 AT300 Rear-Facing Camera Replacement, Remove copper foil wires: 手順 8、 3の画像 2 Toshiba Excite 10 AT300 Rear-Facing Camera Replacement, Remove copper foil wires: 手順 8、 3の画像 3
    • Pull copper tape away from the back, keeping it connected to the green rear camera board.

    • Be careful not to rip the copper tape.

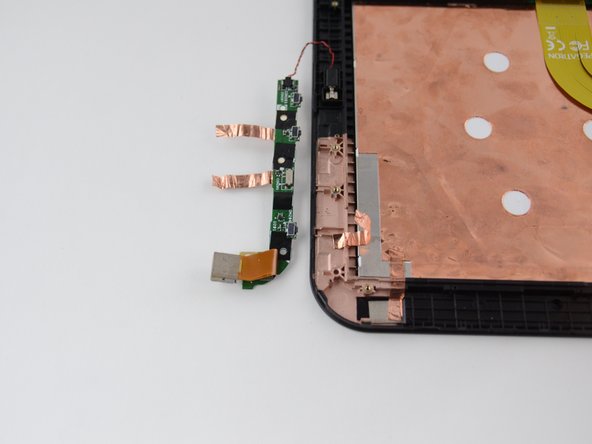
  9. Toshiba Excite 10 AT300 Rear-Facing Camera Replacement, Remove the daughter board: 手順 9、 2の画像 1 Toshiba Excite 10 AT300 Rear-Facing Camera Replacement, Remove the daughter board: 手順 9、 2の画像 2
    • Using your hands remove daughter board by lifting it off of the tablet chassis. Flip it over and place it next to the tablet face-down.

    • Do not disconnect the red and black wires connecting it to the vibrating mechanism.

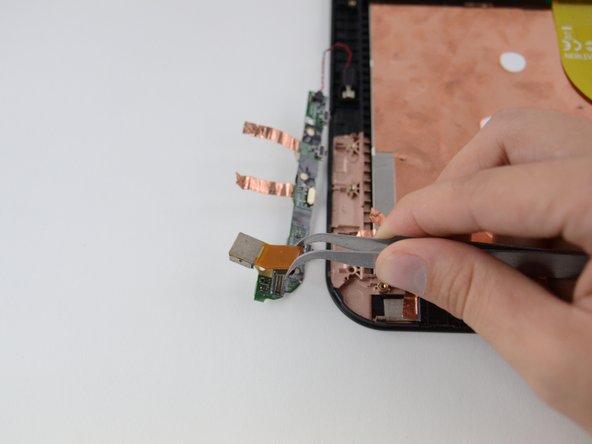
  10. Toshiba Excite 10 AT300 Rear-Facing Camera Replacement: 手順 10、 2の画像 1 Toshiba Excite 10 AT300 Rear-Facing Camera Replacement: 手順 10、 2の画像 2
    • Gently pinch the ribbon cable connector between two fingers or with tweezers and pull it straight outwards. The ribbon cable connector should disconnect and the camera can now be replaced.

終わりに

To reassemble your device, follow these instructions in reverse order.

作成者

5人の作成者と共同で作成されました。

Gus Holz

メンバー登録日: 10/09/14

297 ポイント

2のガイドは作成済み

チーム

Cal Poly, Team 14-26, Maness Fall 2014 Cal Poly, Team 14-26, Maness Fall 2014人のメンバー

CPSU-MANESS-F14S14G26

4 メンバー

12のガイドは作成済み

0 件のコメント

コメントを追加

統計データ:

過去 24時間: 0

過去 7 日: 4

過去 30 日: 11

今までの合計 513