メインコンテンツにスキップ

Toshiba Chromebook 2 Charging Port Replacement

必要な工具と部品

  1. Toshiba Chromebook 2 Charging Port Replacement, Back Cover: 手順 1、 1の画像 1
    • Remove all external devices from the Toshiba Chromebook 2.

  2. Toshiba Chromebook 2 Charging Port Replacement: 手順 2、 1の画像 1
    • Close the Toshiba Chromebook 2 and turn it over so that the bottom of the laptop is facing upwards toward you with the lettering on the bottom facing right side up.

  3. Toshiba Chromebook 2 Charging Port Replacement: 手順 3、 2の画像 1 Toshiba Chromebook 2 Charging Port Replacement: 手順 3、 2の画像 2
    • Remove the 8 visible Phillips 8.25 mm screws using the Phillips #0 screwdriver.

  4. Toshiba Chromebook 2 Charging Port Replacement: 手順 4、 2の画像 1 Toshiba Chromebook 2 Charging Port Replacement: 手順 4、 2の画像 2
    • Remove 2 hidden Phillips 8.25 mm screws located underneath the rubber grips at the back (opposite the hinges) with the Phillips #0 screwdriver.

    • The rubber grips are glued in place, so you'll need to peel them up with a spudger or other pry tool.

  5. Toshiba Chromebook 2 Charging Port Replacement: 手順 5、 1の画像 1
    • Remove the back panel by pulling up on 2 adjacent corners.

  6. Toshiba Chromebook 2 Charging Port Replacement, Charging Port: 手順 6、 1の画像 1
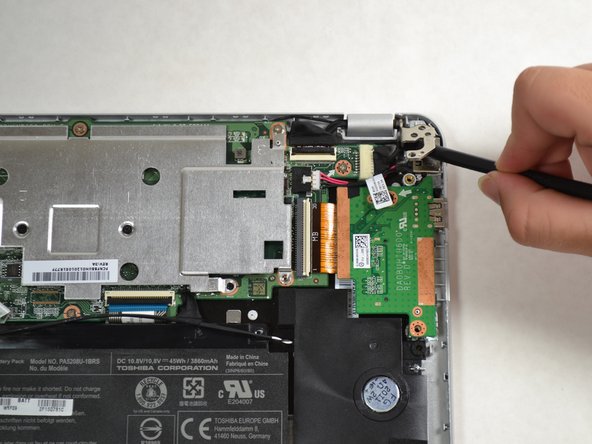
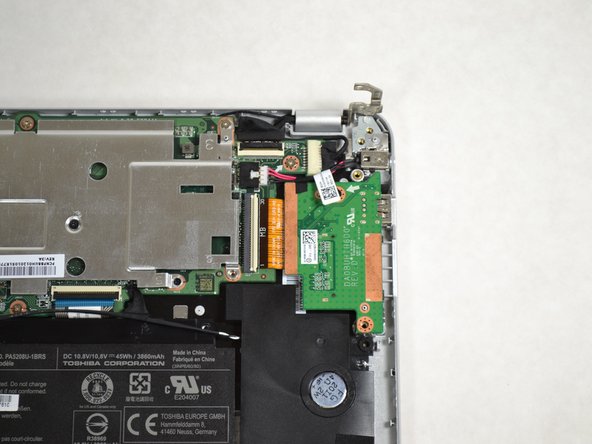
    • The changing port is located on the left side of the computer, when flipped over and the back cover is taken off, the port will be in the top right corner.

    • In order to access the port, the metal hinge in the top right corner must be lifted up.

  7. Toshiba Chromebook 2 Charging Port Replacement: 手順 7、 3の画像 1 Toshiba Chromebook 2 Charging Port Replacement: 手順 7、 3の画像 2 Toshiba Chromebook 2 Charging Port Replacement: 手順 7、 3の画像 3
    • Pry the metal hinge up with the spudger tool by sticking the flat end under the bottom of the hinge and leverage it up.

    • Open the hinge all the way until it is sticking straight up.

  8. Toshiba Chromebook 2 Charging Port Replacement: 手順 8、 2の画像 1 Toshiba Chromebook 2 Charging Port Replacement: 手順 8、 2の画像 2
    • Press down on the white clip with the pointed side of the spudger tool and softly pull the wires out of the socket by pulling horizontally away from the clip to disconnect the charging port from the motherboard.

  9. Toshiba Chromebook 2 Charging Port Replacement: 手順 9、 1の画像 1
    • Pull the charging port out by pulling up on the cable that connects the port to the motherboard.

終わりに

To reassemble your device, follow these instructions in reverse order.

10 の人々がこのガイドを完成させました。

作成者

3人の作成者と共同で作成されました。

Jason Lomsdalen

メンバー登録日: 10/06/16

389 ポイント

1ガイドが承認済み

チーム

Cal Poly, Team 10-4, Livingston Fall 2016 Cal Poly, Team 10-4, Livingston Fall 2016人のメンバー

CPSU-LIVINGSTON-F16S10G4

4 メンバー

11のガイドは作成済み

3 件のコメント

ok… but what's the part for the charging port itself to replace??

Brian “Deminox” Preston - 返信

The power port part # is either SIQDD0BUHAD000(shorter) or SIQDD0BUIAD000(longer) depending on which model you have.

Tim Nolte - 返信

I removed the damaged port, but don't know which part to order. The third line on the tag is 150104 and all the parts I see when googling have different numbers. The SIQ number is the same.

RS from LA1 - 返信

コメントを追加

統計データ:

過去 24時間: 0

過去 7 日: 4

過去 30 日: 7

今までの合計 3,166