メインコンテンツにスキップ

Toshiba CB35-C3300 Chromebook 2 Fan replacement

必要な工具と部品

  1. Toshiba CB35-C3300 Chromebook 2 Fan replacement, Back Cover: 手順 1、 2の画像 1 Toshiba CB35-C3300 Chromebook 2 Fan replacement, Back Cover: 手順 1、 2の画像 2
    • Remove the 2 rubber foot pads from the bottom (opposite the hinge) with the small Plastic Opening tool.

  2. Toshiba CB35-C3300 Chromebook 2 Fan replacement: 手順 2、 2の画像 1 Toshiba CB35-C3300 Chromebook 2 Fan replacement: 手順 2、 2の画像 2
    • Remove the 10 7.1 mm screws using Phillips #1 screwdriver.

  3. Toshiba CB35-C3300 Chromebook 2 Fan replacement: 手順 3、 1の画像 1
    • Loosen the back cover by using a plastic opening tool all the way around the device.

    • There are areas all along the sides of the device that help aid in this.

    • Be careful when prying, and go slow. The silver plastic frame around the dull gray plastic bottom is fragile and easily dented from prying pressure.

  4. Toshiba CB35-C3300 Chromebook 2 Fan replacement: 手順 4、 2の画像 1 Toshiba CB35-C3300 Chromebook 2 Fan replacement: 手順 4、 2の画像 2
    • Remove the back cover by gently lifting up on one side of the device.

    • The easiest side to lift up on is the one with the removed rubber foot pads.

  5. Toshiba CB35-C3300 Chromebook 2 Fan replacement, Battery: 手順 5、 2の画像 1 Toshiba CB35-C3300 Chromebook 2 Fan replacement, Battery: 手順 5、 2の画像 2
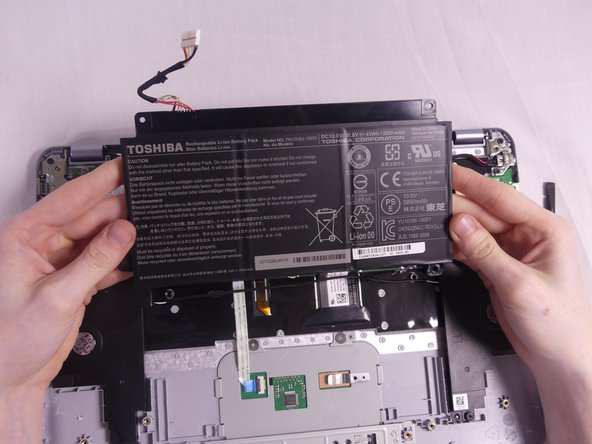
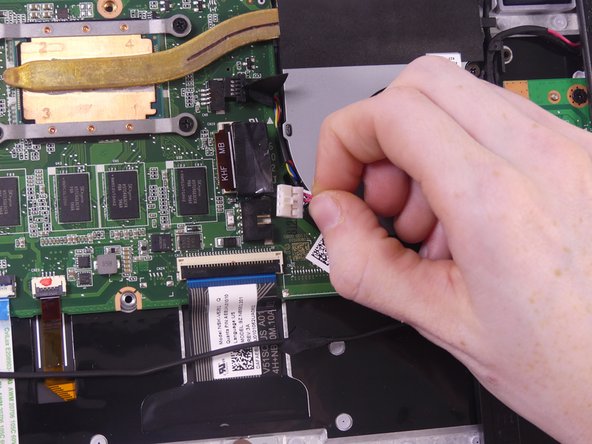
    • Remove the tape holding the speaker wire to the battery on both sides using a small opening tool.

  6. Toshiba CB35-C3300 Chromebook 2 Fan replacement: 手順 6、 2の画像 1 Toshiba CB35-C3300 Chromebook 2 Fan replacement: 手順 6、 2の画像 2
    • Remove the 4 Phillips 3.2 mm screws holding the battery in place, with the Phillips #1 screwdriver.

  7. Toshiba CB35-C3300 Chromebook 2 Fan replacement: 手順 7、 3の画像 1 Toshiba CB35-C3300 Chromebook 2 Fan replacement: 手順 7、 3の画像 2 Toshiba CB35-C3300 Chromebook 2 Fan replacement: 手順 7、 3の画像 3
    • To disconnect the wire from the mother board, gently press down with the flat end of Spudger and pull on the wire.

    • Gently shaking the wire from left to right helps with the wire removal

  8. Toshiba CB35-C3300 Chromebook 2 Fan replacement: 手順 8、 2の画像 1 Toshiba CB35-C3300 Chromebook 2 Fan replacement: 手順 8、 2の画像 2
    • Remove the battery by gently pulling on the bottom corners.

    • Be careful to move the battery's wire under the speaker's wire.

  9. Toshiba CB35-C3300 Chromebook 2 Fan replacement, Fan: 手順 9、 1の画像 1
    • Locate the fan

  10. Toshiba CB35-C3300 Chromebook 2 Fan replacement: 手順 10、 1の画像 1
    • Unscrew the 4 Phillip screws using a Phillips # 1 Screwdriver.

    • These screws only loosen partially, they do not disconnect.

  11. Toshiba CB35-C3300 Chromebook 2 Fan replacement: 手順 11、 3の画像 1 Toshiba CB35-C3300 Chromebook 2 Fan replacement: 手順 11、 3の画像 2 Toshiba CB35-C3300 Chromebook 2 Fan replacement: 手順 11、 3の画像 3
    • The top wire is the fan's wire. Remove it by pulling it from the motherboard.

  12. Toshiba CB35-C3300 Chromebook 2 Fan replacement: 手順 12、 3の画像 1 Toshiba CB35-C3300 Chromebook 2 Fan replacement: 手順 12、 3の画像 2 Toshiba CB35-C3300 Chromebook 2 Fan replacement: 手順 12、 3の画像 3
    • To remove the Wifi PCB wire lift up the hinged flap with your finger or with the aid of the spudger tool.

    • After the flap is lifted, pull the wire up out of the connector socket.

  13. Toshiba CB35-C3300 Chromebook 2 Fan replacement: 手順 13、 2の画像 1 Toshiba CB35-C3300 Chromebook 2 Fan replacement: 手順 13、 2の画像 2
    • Remove the headphone jack wire by pulling it out of the connector socket.

  14. Toshiba CB35-C3300 Chromebook 2 Fan replacement: 手順 14、 1の画像 1
    • Remove the Phillip 3.6 mm screw from the fan using a Phillips #1 screwdriver.

  15. Toshiba CB35-C3300 Chromebook 2 Fan replacement: 手順 15、 1の画像 1
    • Lift up on the metal plate that hold the screws to start removing the fan.

  16. Toshiba CB35-C3300 Chromebook 2 Fan replacement: 手順 16、 3の画像 1 Toshiba CB35-C3300 Chromebook 2 Fan replacement: 手順 16、 3の画像 2 Toshiba CB35-C3300 Chromebook 2 Fan replacement: 手順 16、 3の画像 3
    • Once lifted, you will notice that there are two wires tucked under plastic tunnels on the right side of the fan. Remove these wires.

    • These wires require you to gently pull them out of there tunnel.

    • Once the wires are removed the fan should be removed entirely.

終わりに

To reassemble your device, follow these instructions in reverse order.

3 の人々がこのガイドを完成させました。

作成者

3人の作成者と共同で作成されました。

Jillian Thomas

メンバー登録日: 10/14/17

209 ポイント

4のガイドは作成済み

チーム

USF Tampa, Team S1-G121, Cagle Fall 2017 USF Tampa, Team S1-G121, Cagle Fall 2017人のメンバー

USFT-CAGLE-F17S1G121

3 メンバー

14のガイドは作成済み

4 件のコメント

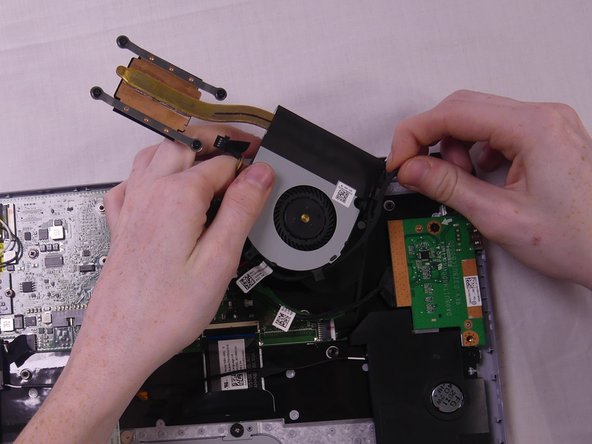
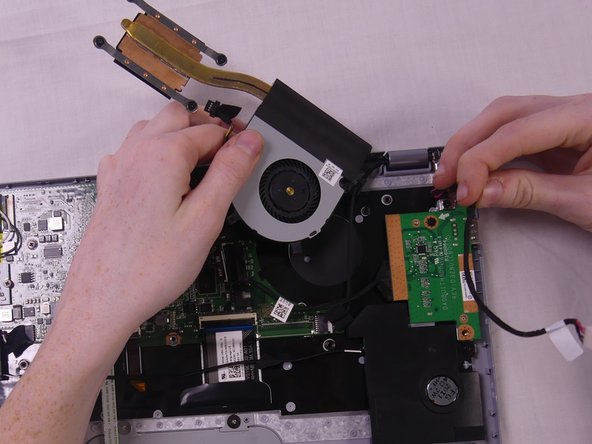
Where do you purchase a replacement fan?

Taylor Wilson - 返信

Replacement fans are readily available on eBay for $5-15. Just search for: Toshiba CB35 Chromebook Fan

faba - 返信

Can anyone explain why the battery needs to be removed? I don’t see how it would interfere with fan removal and replacement.

faba - 返信

I was able to replace my fan without removing the battery (skip steps 5-8). Also able to skip steps 12 (Wifi PCB wire) and 13 (headphone jack wire) by carefully moving those wires out of the way while removing the fan. Note that when removing the heat sink, the the old thermal paste should be cleaned off and new paste applied (it may come on the new heat sink). The fan I bought on eBay was a C30 model with different heat sink, but I was able to swap the old heat sink onto the new fan. Final note when reassembling - the rubber footpads are NOT interchangeable. One has a small round hole and the other has a short slot.

faba - 返信

コメントを追加

統計データ:

過去 24時間: 0

過去 7 日: 3

過去 30 日: 6

今までの合計 975