メインコンテンツにスキップ

このバージョンは誤った内容を含んでいる可能性があります。最新の承認済みスナップショットに切り替えてください。

必要な工具と部品

  1. この手順は未翻訳です。 翻訳を手伝う。

    : 手順 1、 1の画像 1
    • Slip a small plastic opening tool underneath the screen bezel, gently sliding it around the inside edge.

    • Starting at the corners, carefully pry up the screen bezel.

  2. この手順は未翻訳です。 翻訳を手伝う。

    : 手順 2、 1の画像 1
    • Remove the four Phillips #00 screws around the edge of the screen.

  3. この手順は未翻訳です。 翻訳を手伝う。

    : 手順 3、 3の画像 1 : 手順 3、 3の画像 2 : 手順 3、 3の画像 3
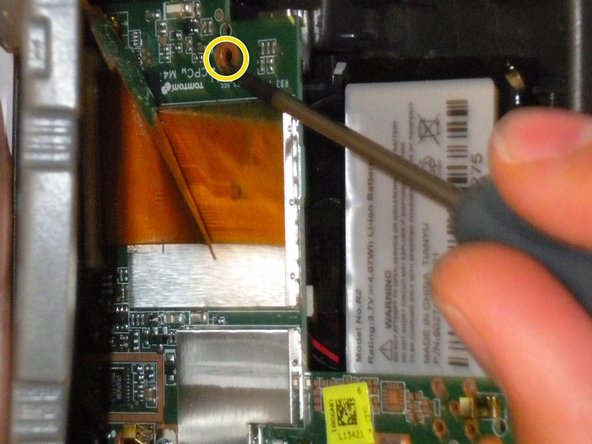
    • Slide a small plastic opening tool under the top portion of the metal frame and gently lift it up.

    • Slide the plastic opening tool around the inner edge of the metal frame until it feels loose.

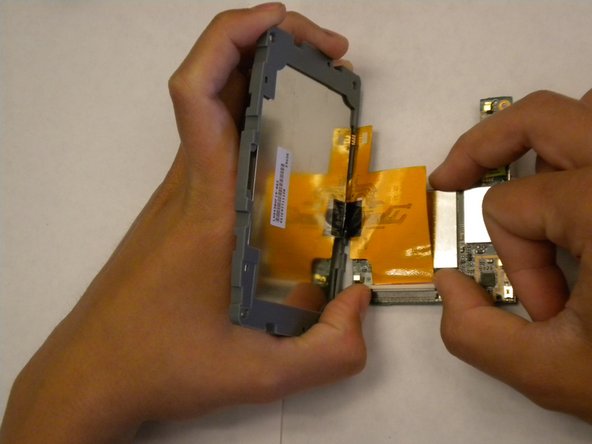
    • It may take some time to release the frame from the housing. Some force may be necessary—but be careful not to bend the frame's fragile interior bracket.

    • Remove the frame from the housing.

  4. この手順は未翻訳です。 翻訳を手伝う。

    : 手順 4、 2の画像 1 : 手順 4、 2の画像 2
    • Lifting from the upper edge of the screen, tilt the screen away from the device.

    • Tilt the screen slowly. Flipping the screen up too quickly may damage the display cable.

  5. この手順は未翻訳です。 翻訳を手伝う。

    : 手順 5、 2の画像 1 : 手順 5、 2の画像 2
    • Remove the three Phillips #00 screws connecting the motherboard to the plastic housing:

    • Two Phillips #00 screws are located at the bottom of the first picture.

    • The third screw is hidden under the orange ribbon cable, near the screen.

    • You may have to carefully lift the screen in order to reach this screw.

  6. この手順は未翻訳です。 翻訳を手伝う。

    : 手順 6、 2の画像 1 : 手順 6、 2の画像 2
    • Flip the screen and motherboard over.

    • Gripping the plastic casing, disconnect the battery cable connector from the motherboard.

    • Disconnect the speaker cable connector from the motherboard.

    • Remove the motherboard and screen from the housing.

  7. この手順は未翻訳です。 翻訳を手伝う。

    : 手順 7、 3の画像 1 : 手順 7、 3の画像 2 : 手順 7、 3の画像 3
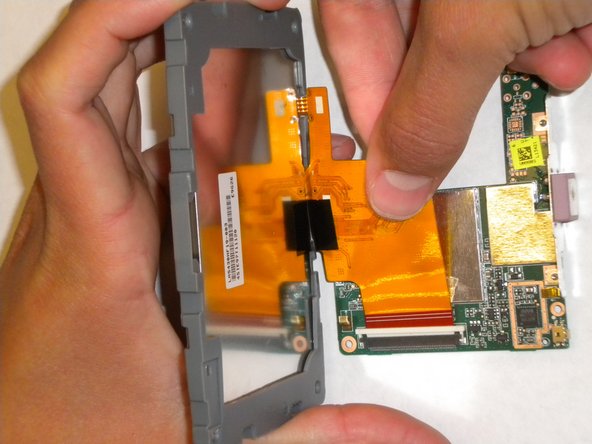
    • Using your thumbs or the flat end of a spudger, push back the white tabs on the display cable ZIF connector.

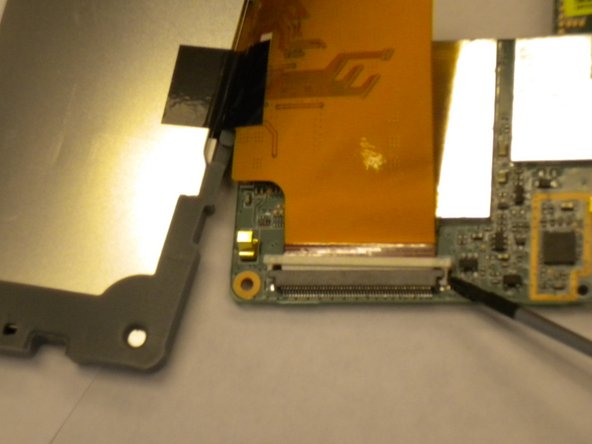
    • Gently pull the orange display cable out of the ZIF connector.

    • The display cable should slide out easily, but it may still have some adhesive on the underside. If you feel resistance, gently lift up on the ribbon cable while pulling it from the socket.

  8. この手順は未翻訳です。 翻訳を手伝う。

    : 手順 8、 1の画像 1
    • Remove the motherboard from the device.

ゴール

ある他の人がこのガイドを完成しました。

作成者

7人の作成者と共同で作成されました。

Sean Higginson

メンバー登録日: 04/21/10

209 ポイント

2のガイドは作成済み

チーム

Cal Poly, Team 33-84, Johann Spring 2010 Cal Poly, Team 33-84, Johann Spring 2010人のメンバー

CPSU-JOHANN-S10S33G84

4 メンバー

5のガイドは作成済み

0 件のコメント

コメントを追加

統計データ:

過去 24時間: 1

過去 7 日: 6

過去 30 日: 12

今までの合計 7,294