メインコンテンツにスキップ

TomTom One 310 LCD and Touchscreen Replacement

必要な工具と部品

  1. TomTom One 310 LCD and Touchscreen Replacement, LCD and Touchscreen: 手順 1、 3の画像 1 TomTom One 310 LCD and Touchscreen Replacement, LCD and Touchscreen: 手順 1、 3の画像 2 TomTom One 310 LCD and Touchscreen Replacement, LCD and Touchscreen: 手順 1、 3の画像 3
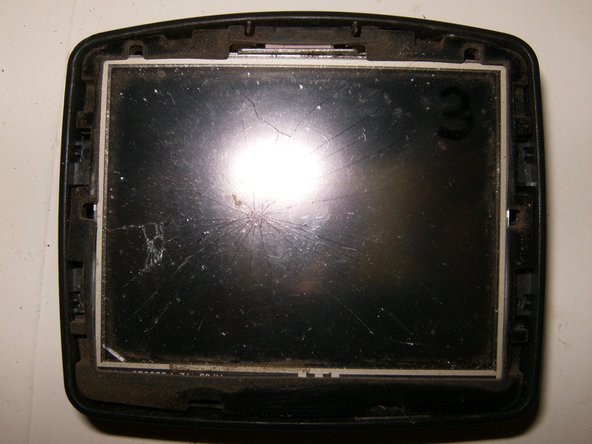
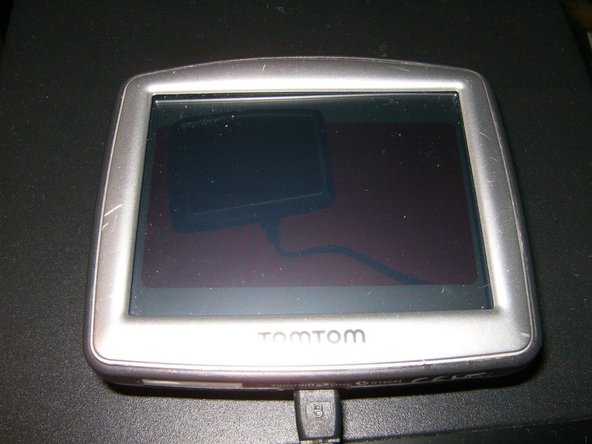
    • Here is the TomTom with a clearly visible damage. The LCD did work, but for obvious reasons the digitizer did not.

    • Use a plastic opening tool and insert it between the outside of the bezel and the plastic case. It will need some effort, but the plastic of the case does have enough give to make it possible.

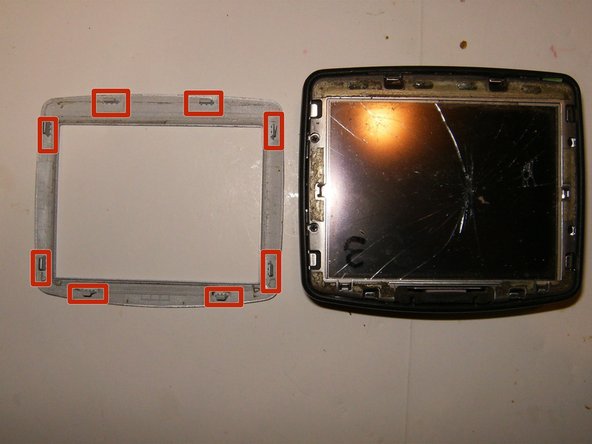
    • Continue to work the tool around the bezel. There are multiple plastic tabs that need to be released

  2. TomTom One 310 LCD and Touchscreen Replacement: 手順 2、 3の画像 1 TomTom One 310 LCD and Touchscreen Replacement: 手順 2、 3の画像 2 TomTom One 310 LCD and Touchscreen Replacement: 手順 2、 3の画像 3
    • Continue to move the tool to the outside edges,

    • then along the sides

    • and finally the top.

  3. TomTom One 310 LCD and Touchscreen Replacement: 手順 3、 3の画像 1 TomTom One 310 LCD and Touchscreen Replacement: 手順 3、 3の画像 2 TomTom One 310 LCD and Touchscreen Replacement: 手順 3、 3の画像 3
    • Once all the tabs are released, carefully lift the bezel up and remove it.

    • Now the 8 holding tabs are visible

    • Remove the 4 Phillips screws that connect the LCD holder

  4. TomTom One 310 LCD and Touchscreen Replacement: 手順 4、 3の画像 1 TomTom One 310 LCD and Touchscreen Replacement: 手順 4、 3の画像 2 TomTom One 310 LCD and Touchscreen Replacement: 手順 4、 3の画像 3
    • Here are the four coarse threaded 3mm long screws.

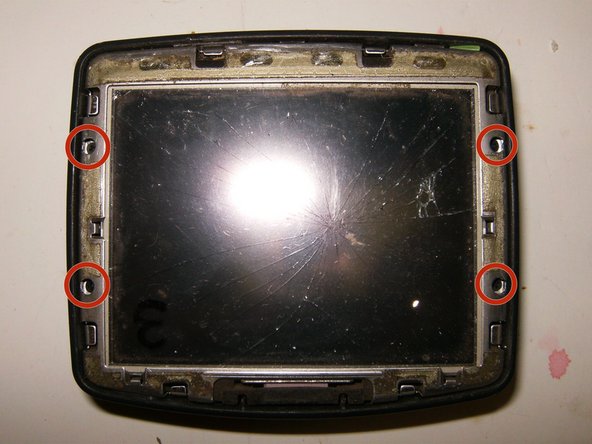
    • The LCD holder shows three metal tabs on the bottom that hold it to the plastic case. Use the plastic opening tool to clear those tabs.

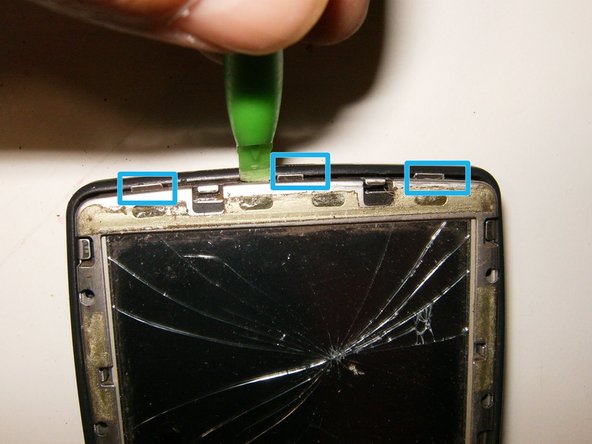
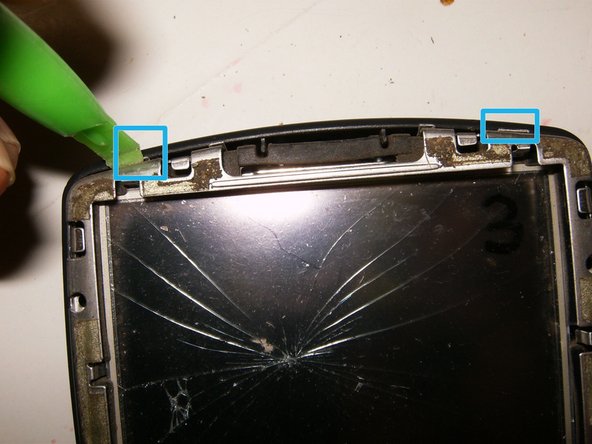
    • There are two metal tabs at the top that hold it to the plastic case.Use the plastic opening tool to clear those tabs.

  5. TomTom One 310 LCD and Touchscreen Replacement: 手順 5、 3の画像 1 TomTom One 310 LCD and Touchscreen Replacement: 手順 5、 3の画像 2 TomTom One 310 LCD and Touchscreen Replacement: 手順 5、 3の画像 3
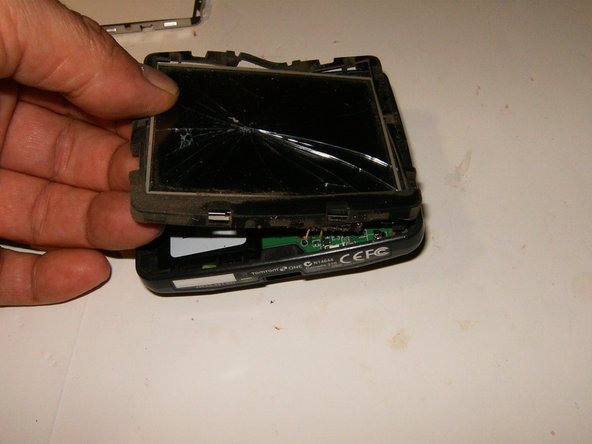
    • Remove the LCD holder

    • Here is the LCD without the holder. There is a rubber gasket placed around the outside of the LCD. Note its position

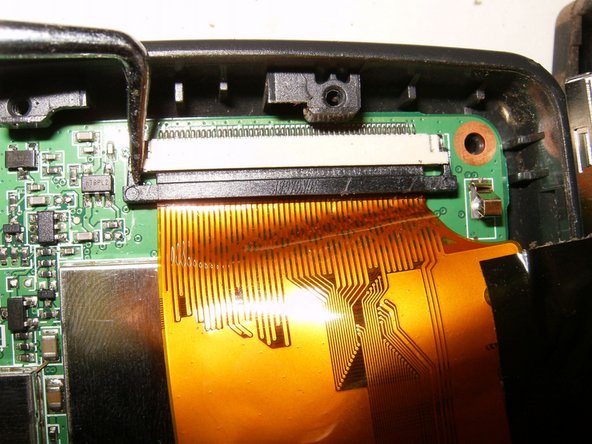
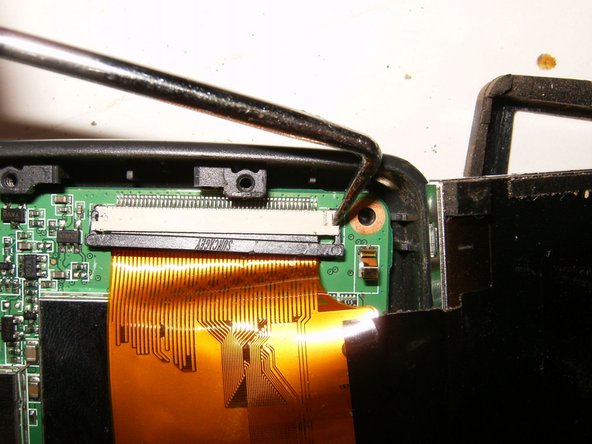
    • Lift the LCD gently out of the plastic case and fold it toward the bottom of the case. The display cable is still connected and may tear if this is done in either the wrong direction or to forceful.

  6. TomTom One 310 LCD and Touchscreen Replacement: 手順 6、 3の画像 1 TomTom One 310 LCD and Touchscreen Replacement: 手順 6、 3の画像 2 TomTom One 310 LCD and Touchscreen Replacement: 手順 6、 3の画像 3
    • LCD flipped toward the bottom of the case. The display cable is still connected.

    • Use a pick or similar tool to gently move the locking tab. First the bottom,

    • Then the top until the locking tab is released and the display cable can be removed.

  7. TomTom One 310 LCD and Touchscreen Replacement: 手順 7、 2の画像 1 TomTom One 310 LCD and Touchscreen Replacement: 手順 7、 2の画像 2
    • Remove the display assembly. A new display assembly can now be installed.

    • Final result is a refreshed looking and working TomTom

終わりに

To reassemble your device, follow these instructions in reverse order.

作成者

2人の作成者と共同で作成されました。

oldturkey03

メンバー登録日: 09/29/10

781,172 ポイント

119のガイドは作成済み

チーム

Global Fixers Global Fixers人のメンバー

Community

32 メンバー

530のガイドは作成済み

コメント 1 件

How to fix my windows

marilyn - 返信

コメントを追加

統計データ:

過去 24時間: 0

過去 7 日: 1

過去 30 日: 1

今までの合計 1,036