メインコンテンツにスキップ

TomTom GO 500 Motherboard Replacement

必要な工具と部品

  1. TomTom GO 500 Motherboard Replacement, TomTom GO 500 Opening the Device: 手順 1、 1の画像 1
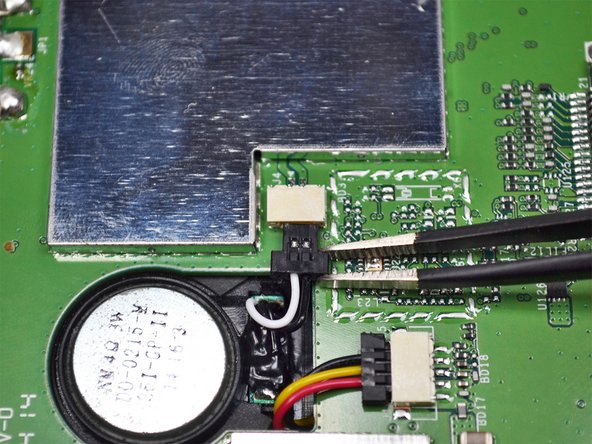
    • Unscrew the two 3mm screws at the base of the device using the Torx T5 screwdriver.

  2. TomTom GO 500 Motherboard Replacement: 手順 2、 2の画像 1 TomTom GO 500 Motherboard Replacement: 手順 2、 2の画像 2
    • Using the plastic opening tools, insert one opening tool into the gap between the screen casing and the motherboard casing. Then insert the other tool into one of the adjacent sides and slide it around the top.

    • There are 14 latches that need to be undone.

    • The latches break easily during the opening process so we recommend purchasing a new screen casing if they break.

  3. TomTom GO 500 Motherboard Replacement: 手順 3、 1の画像 1
    • With the screen casing unlatched, locate the right side where the two connectors are.

  4. TomTom GO 500 Motherboard Replacement: 手順 4、 3の画像 1 TomTom GO 500 Motherboard Replacement: 手順 4、 3の画像 2 TomTom GO 500 Motherboard Replacement: 手順 4、 3の画像 3
    • Unlatch the connectors using the plastic opening tool.

    • The orange rectangular connector may have come off in the process of removing the screen casing.

  5. TomTom GO 500 Motherboard Replacement: 手順 5、 2の画像 1 TomTom GO 500 Motherboard Replacement: 手順 5、 2の画像 2
    • Separate the screen casing from the motherboard casing.

  6. TomTom GO 500 Motherboard Replacement, Motherboard: 手順 6、 1の画像 1
    • Unscrew the five 4mm screws using the Phillips #0 screwdriver.

  7. TomTom GO 500 Motherboard Replacement: 手順 7、 2の画像 1 TomTom GO 500 Motherboard Replacement: 手順 7、 2の画像 2
    • Unplug the connector shown near the center of the motherboard using the tweezers.

  8. TomTom GO 500 Motherboard Replacement: 手順 8、 2の画像 1 TomTom GO 500 Motherboard Replacement: 手順 8、 2の画像 2
    • Unplug the second connector using the plastic opening tool.

  9. TomTom GO 500 Motherboard Replacement: 手順 9、 2の画像 1 TomTom GO 500 Motherboard Replacement: 手順 9、 2の画像 2
    • Remove the motherboard from the casing.

終わりに

To reassemble your device, follow these instructions in reverse order.

4 の人々がこのガイドを完成させました。

作成者

2人の作成者と共同で作成されました。

jkl

メンバー登録日: 09/22/16

486 ポイント

2のガイドは作成済み

チーム

UC Davis, Team 2-5, Oliver Fall 2016 UC Davis, Team 2-5, Oliver Fall 2016人のメンバー

UCD-OLIVER-F16S2G5

5 メンバー

9のガイドは作成済み

0 件のコメント

コメントを追加

統計データ:

過去 24時間: 1

過去 7 日: 3

過去 30 日: 21

今までの合計 1,568