メインコンテンツにスキップ

Toilet Tree TTP-TRIM-1 Power button Replacement

必要な工具と部品

  1. Toilet Tree TTP-TRIM-1 Power button Replacement, Battery: 手順 1、 2の画像 1 Toilet Tree TTP-TRIM-1 Power button Replacement, Battery: 手順 1、 2の画像 2
    • Twist the battery cap found on the bottom of the device counterclockwise.

  2. Toilet Tree TTP-TRIM-1 Power button Replacement: 手順 2、 1の画像 1
    • Remove the battery

  3. Toilet Tree TTP-TRIM-1 Power button Replacement, Power button: 手順 3、 2の画像 1 Toilet Tree TTP-TRIM-1 Power button Replacement, Power button: 手順 3、 2の画像 2
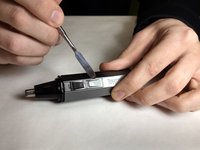
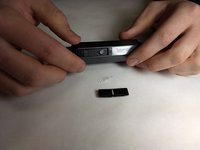
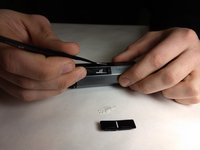
    • Using the metal spudger, wedge underneath the button and gently pry it out.

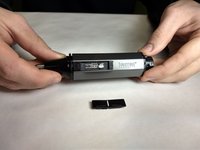
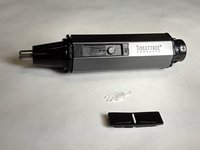
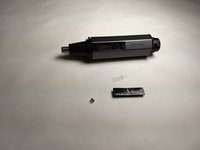
    • Note orientation of the switch, so that it can be replaced properly.

  4. Toilet Tree TTP-TRIM-1 Power button Replacement: 手順 4、 3の画像 1 Toilet Tree TTP-TRIM-1 Power button Replacement: 手順 4、 3の画像 2 Toilet Tree TTP-TRIM-1 Power button Replacement: 手順 4、 3の画像 3
    • Underneath the button lies two small components. We will reference them as the o-ring assembly and clear tab. Take note of their orientation.

    • Continue disassembly by prying the clear tab upwards.

  5. Toilet Tree TTP-TRIM-1 Power button Replacement: 手順 5、 3の画像 1 Toilet Tree TTP-TRIM-1 Power button Replacement: 手順 5、 3の画像 2 Toilet Tree TTP-TRIM-1 Power button Replacement: 手順 5、 3の画像 3
    • Using the tweezers, take the o-ring switch assembly out of the trimmer.

終わりに

To reassemble your device, follow these instructions in reverse order.

作成者

1人の作成者と共同作成されました。

samuel fontanez

メンバー登録日: 11/06/17

301 ポイント

3のガイドは作成済み

チーム

IUPUI, Team S1-G5, Harley Fall 2017 IUPUI, Team S1-G5, Harley Fall 2017人のメンバー

IUPUI-HARLEY-F17S1G5

4 メンバー

3のガイドは作成済み

0 件のコメント

コメントを追加

統計データ:

過去 24時間: 1

過去 7 日: 2

過去 30 日: 2

今までの合計 196