メインコンテンツにスキップ

Timex T132 "iMac" Alarm Clock Disassembly

必要な工具と部品

  1. Timex T132 "iMac" Alarm Clock Disassembly, Battery: 手順 1、 1の画像 1
    • To prevent any injury, unplug the power cord from the outlet so the device is powered off.

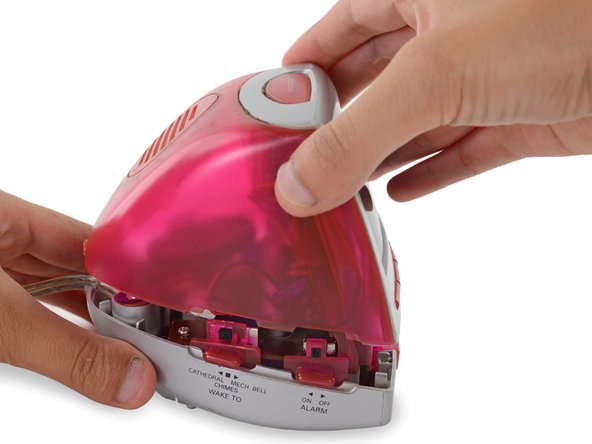
    • Hold the clock so it is upside down. You should be able to view its caution labels.

    • Wedge the small tip plastic opening tool between the battery cover and the edge of its slot.

    • Firmly push against the battery cover (away from its outer edge) until it slides off of the base clock.

  2. Timex T132 "iMac" Alarm Clock Disassembly: 手順 2、 3の画像 1 Timex T132 "iMac" Alarm Clock Disassembly: 手順 2、 3の画像 2 Timex T132 "iMac" Alarm Clock Disassembly: 手順 2、 3の画像 3
    • Rotate the device so the clock's display is facing away from you.

    • Use the flat end of the spudger to pry out the battery.

    • Once fully lifted, grab the end of the battery and pull out the rest of the battery.

    • Do not remove the battery all the way because it is still connected. Doing so may result in damaging the power wires.

  3. Timex T132 "iMac" Alarm Clock Disassembly: 手順 3、 1の画像 1
    • Place the clock upside down on a flat surface.

    • Because the device is irregularly shaped, you may have to manually or externally balance it.

    • Grab the blue connector covering tab near the power wires and peel the snap connector off the battery terminals to disconnect it.

    • Do not pull out the snap connector and its wires because it is still connected to the device. Doing so may result in damaging the power wires.

    • Remove the battery.

  4. Timex T132 "iMac" Alarm Clock Disassembly, Timex T132 "iMac" Alarm Clock Disassembly: 手順 4、 1の画像 1
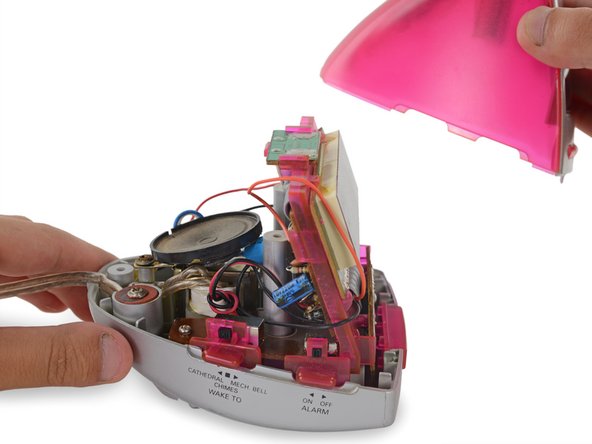
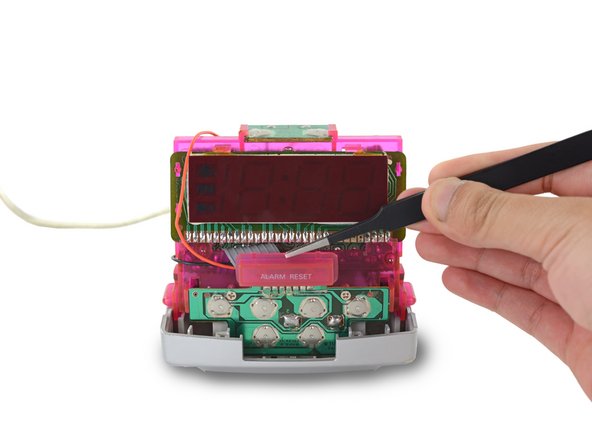
    • Remove the three, 11mm Phillips #1 screws that secure the housing onto the base of the clock.

    • The housing may begin to separate once the screws are removed.

  5. Timex T132 "iMac" Alarm Clock Disassembly: 手順 5、 3の画像 1 Timex T132 "iMac" Alarm Clock Disassembly: 手順 5、 3の画像 2 Timex T132 "iMac" Alarm Clock Disassembly: 手順 5、 3の画像 3
    • Support the base and top cover of the clock.

    • Turn over the clock and place it base-down on a flat surface.

    • Support the back of the base with one hand and grasp the housing with the other.

    • Lift and separate the housing from the base of the clock.

    • You may have to wiggle the housing prior to lifting it.

  6. Timex T132 "iMac" Alarm Clock Disassembly: 手順 6、 3の画像 1 Timex T132 "iMac" Alarm Clock Disassembly: 手順 6、 3の画像 2 Timex T132 "iMac" Alarm Clock Disassembly: 手順 6、 3の画像 3
    • Rotate the clock so you are viewing the LCD display.

    • Use your fingers or the tweezers to secure the lip of the ALARM RESET button located at the middle of the base and remove the button from its compartment.

終わりに

To reassemble your device, follow these instructions in reverse order.

ある他の人がこのガイドを完成しました。

作成者

1人の作成者と共同作成されました。

Tyler Price

メンバー登録日: 04/07/14

1,038 ポイント

6のガイドは作成済み

チーム

Cal Poly, Team 6-2, Forte Spring 2014 Cal Poly, Team 6-2, Forte Spring 2014人のメンバー

CPSU-FORTE-S14S6G2

5 メンバー

20のガイドは作成済み

0 件のコメント

コメントを追加

統計データ:

過去 24時間: 0

過去 7 日: 1

過去 30 日: 5

今までの合計 611