メインコンテンツにスキップ

Texas Instruments TI-5130 Power Cord Replacement

必要な工具と部品

  1. Texas Instruments TI-5130 Power Cord Replacement, Power Cord: 手順 1、 2の画像 1 Texas Instruments TI-5130 Power Cord Replacement, Power Cord: 手順 1、 2の画像 2
    • Flip the calculator over and remove the 4 main 10mm screws with a PH1 screwdriver.

  2. Texas Instruments TI-5130 Power Cord Replacement: 手順 2、 2の画像 1 Texas Instruments TI-5130 Power Cord Replacement: 手順 2、 2の画像 2
    • Remove the top cover.

    • Gently pull up on the power cord to remove it from the back cover.

  3. Texas Instruments TI-5130 Power Cord Replacement: 手順 3、 2の画像 1 Texas Instruments TI-5130 Power Cord Replacement: 手順 3、 2の画像 2
    • This step is optional; however it makes it easier to work.

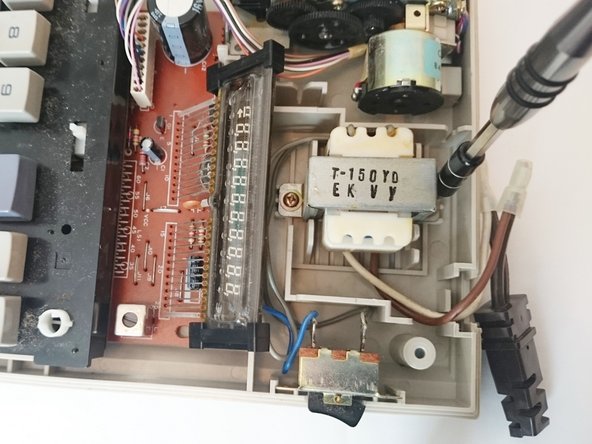
    • Using a PH1 screwdriver remove the two 10mm screws that hold down the transformer.

    • Gently remove the transformer.

    • Make sure that the calculator is not plugged in.

  4. Texas Instruments TI-5130 Power Cord Replacement: 手順 4、 2の画像 1 Texas Instruments TI-5130 Power Cord Replacement: 手順 4、 2の画像 2
    • Use a wire cutter to cut off the white cap and expose the wires. Try to cut close to the tip of the white cap - to leave as much wire as possible.

    • Note that there are 2 sets of wires connected to the power cord. Do each set of wires separately.

  5. Texas Instruments TI-5130 Power Cord Replacement: 手順 5、 2の画像 1 Texas Instruments TI-5130 Power Cord Replacement: 手順 5、 2の画像 2
    • Use a wire stripper to remove 1/2” of the protective covering on each of the wires.

  6. Texas Instruments TI-5130 Power Cord Replacement: 手順 6、 2の画像 1 Texas Instruments TI-5130 Power Cord Replacement: 手順 6、 2の画像 2
    • Twist the exposed section of the 2 wires together.

    • Twist a new cap over the exposed wires. Make sure that the cap covers all of the exposed wire.

    • Repeat steps 4-6 for the second set of wires.

  7. Texas Instruments TI-5130 Power Cord Replacement: 手順 7、 1の画像 1
    • Replace the transformer and ensure that the new wire caps fit in the space shown.

    • Plug in the new power cord and test the calculator before replacing the top cover.

終わりに

To reassemble your device, follow these instructions in reverse order.

ある他の人がこのガイドを完成しました。

作成者

1人の作成者と共同作成されました。

Shannon Perkins

メンバー登録日: 09/17/15

652 ポイント

3のガイドは作成済み

チーム

USF Sarasota-Manatee, Team 1-2, Stewart Fall 2015 USF Sarasota-Manatee, Team 1-2, Stewart Fall 2015人のメンバー

USFSM-STEWART-F15S1G2

5 メンバー

17のガイドは作成済み

0 件のコメント

コメントを追加

統計データ:

過去 24時間: 0

過去 7 日: 0

過去 30 日: 13

今までの合計 498