はじめに
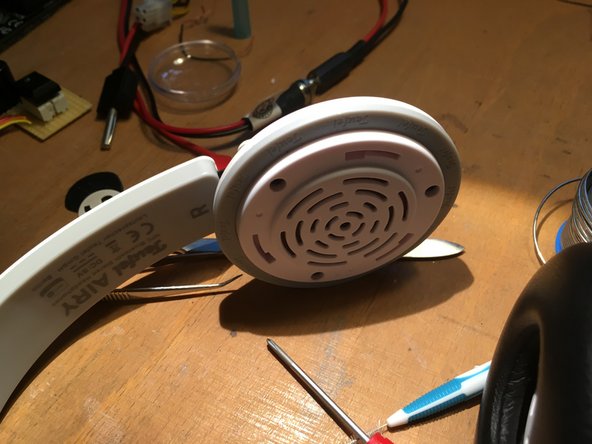
The Airy is a pretty decent set of headphones in terms of sound and functionality. However, manufacturing quality and, as you will see, reparability are suboptimal.
The battery pack on my first pair of Airys broke down after a few months. On the second and third pairs a speaker died. Eventually, Teufel refused to ship replacements.
Left with a dead speaker (no "on sound", no sound via cable or bluetooth) it seemed plausible that there was probably a wiring problem, which is investigated and fixed here.
必要な工具と部品
-
-
Unfortunately, the right case is glued shut on the volume wheel. Hence, the opening will be destructive to some parts of the case. To open it, a thin dentist spetula comes in handy.
-
First, you have to pry off the silver ring around the "T". The entire circular logo will come off, breaking off the center of the letter T, which is glued to a central axis inside the case. Unfortunatley, this action will probably also scratch the outer white circle of the volume wheel.
-
Once the center part is off, the entire white rotating volume wheel will come off easily. Just pull it from its axis by hand.
-
Next, you can open the case separating the top and bottom shells. This is best done by sticking some type of spatula (a guitar pick works well) into the rim between the two shells to unhook all four latches near the corners of the case.
-
Notice the silvery thingy on top of the central axis is a remainder of the broken T.
-
-
-
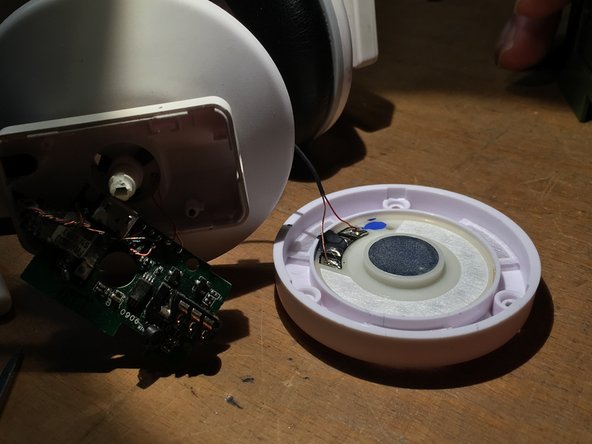
Unscrew two tiny Phillips screws holding down the PCB (on the mini-USB side).
-
On the opposite side of the USB-Port (microphone side), the PCB is tugged under two latches. Pull the PCB from the housing by lifting it on its USB side.
-
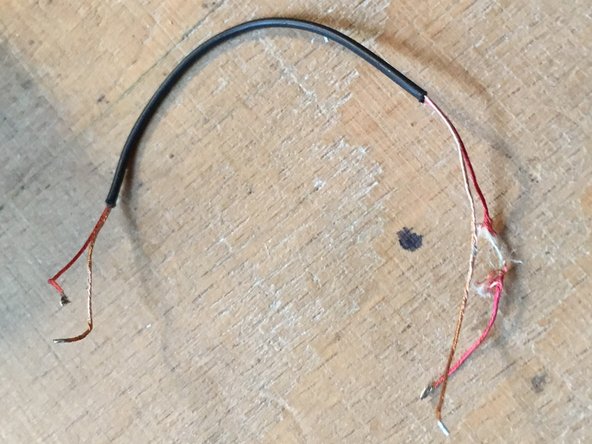
Turning over the PCB will reveal the speaker cable pair, penetrating the case near the center axis. Pulling out these wires a little further reveals the culprit: the red wire is destroyed by chafing. Obviously, these headphones were not sufficiently tested for vibration.
-
-
-
Remove the speaker cushion by twisting it counter clockwise until it unlocks.
-
Pull off the gray rubber ring
-
Remove the speaker cover by unscrewing three Phillips screws
-
-
-
-
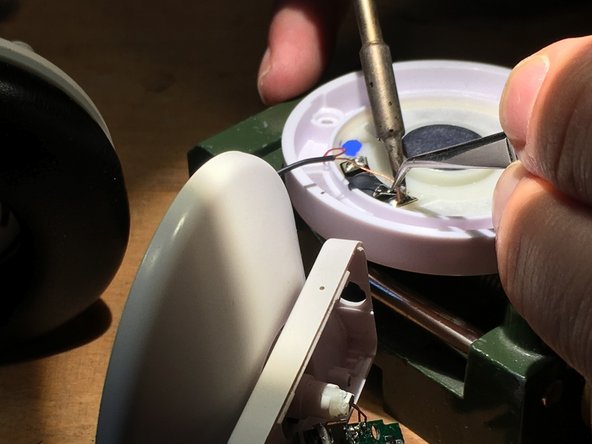
Unsolder both wires. Plus is the red wire which is connected next to the blue dot.
-
In case you have problems getting the solder sufficiently fluid to remove the wire, try adding a little tiny bit of lead solder. It will help it melt.
-
-
-
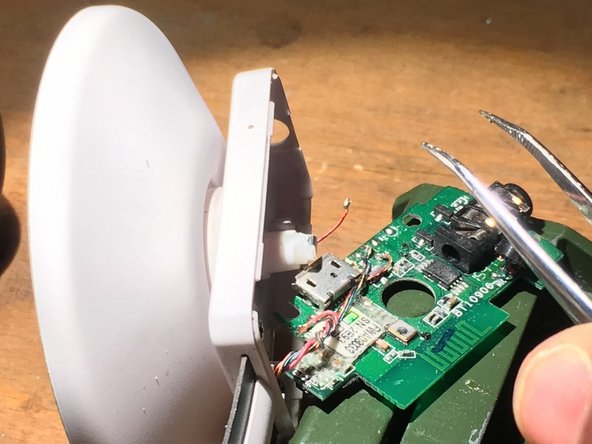
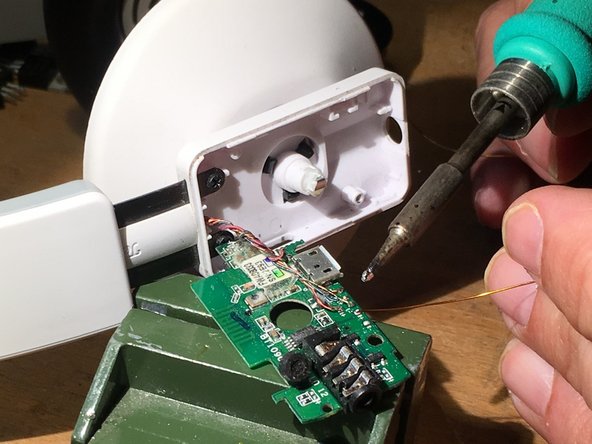
Unsolder speaker wires from PCB
-
Remove the broken wire bundle. The picture indicates that a longer protective sleeve could have prevented chafing damage.
-
-
-
What we had was 0.3mm diameter wire, which is already insulated. On this type of wire you can remove the insulation coating where you want contact by boiling it off with a soldering iron
-
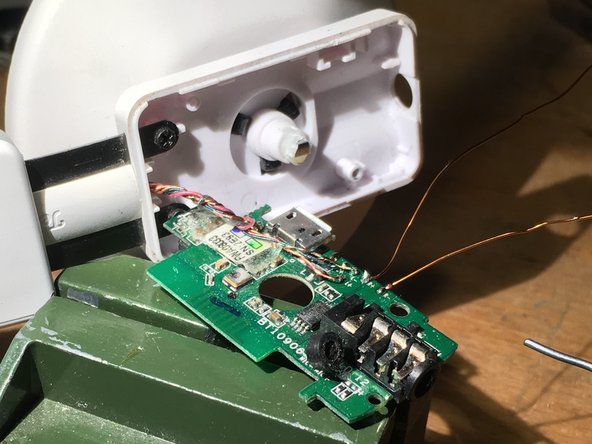
The old wires will indicate the length you need. They seem rather long and you can make the replacement shorter. But don't get too short. You need some slack for reassembly.
-
Solder both wires to the PCB contacts and fit the other end through the hole near the center axis. If you have two same colored wires, mark one of them before you put them through the hole, so you know which is plus and which is ground.
-
-
-
Solder the other end to the speaker. Make sure to solder the right wire to the right contact
-
Test if the speaker works again.
-
Then, reassemble the headphones as far as possible. When reinserting the PCB, be careful with the microphone. Also make sure you place the PCB under the latches before you insert the screws.
-
-
-
The volume wheel will not stay in place because we had to break off the T logo. You need to find something to hold down the wheel, while still having it turnable.
-
I am sure you can think of something prettier. What we did is:
-
Find a tiny, tiny screw which will cut its way into plastic
-
Drill a hole in what's left of the center axis
-
Reinsert what's left of the "T" disc into the volume wheel, add a washer to hold it down and bolt it down.
-
Thanks Frank for all your help!
-


To reassemble your device, follow these instructions in reverse order.
To reassemble your device, follow these instructions in reverse order.