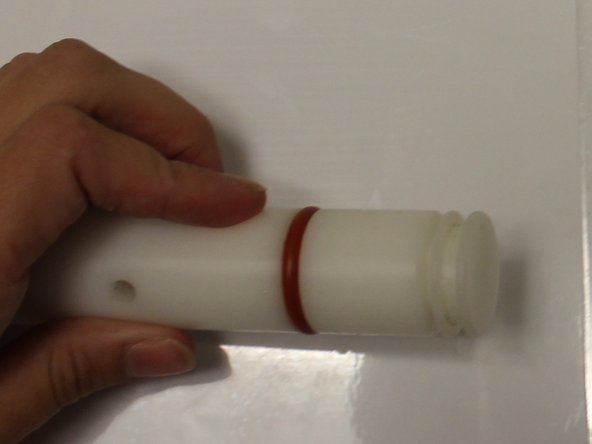
メインコンテンツにスキップ

Taylor 342D-27 O-Ring Replacement

必要な工具と部品

  1. Taylor 342D-27 O-Ring  Replacement, Taylor 342D-27 O-Ring: 手順 1、 1の画像 1
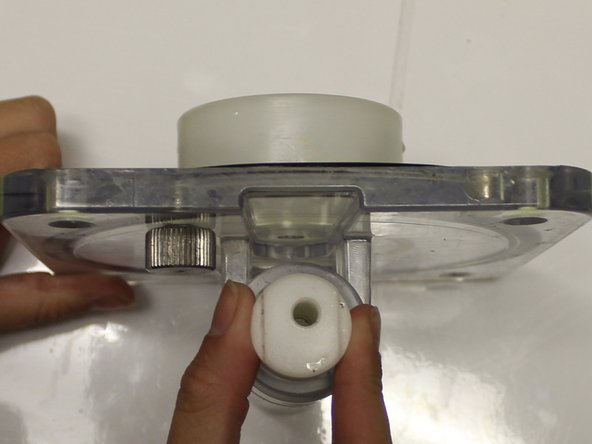
    • Make sure the switch for the machine is straight down in the off position and that all contents have been emptied.

  2. Taylor 342D-27 O-Ring  Replacement: 手順 2、 1の画像 1
    • Lift the pin that rests behind the door upwards to remove it.

  3. Taylor 342D-27 O-Ring  Replacement: 手順 3、 1の画像 1
    • Remove all 4 nuts from the front of the machine by turning them counter clockwise until they release.

  4. Taylor 342D-27 O-Ring  Replacement: 手順 4、 1の画像 1
    • Pull the door towards yourself/away from the Taylor to loosen it and remove it.

  5. Taylor 342D-27 O-Ring  Replacement: 手順 5、 1の画像 1
    • Remove the valve pin handle on the top of the valve by lifting it upward and away from the valve.

  6. Taylor 342D-27 O-Ring  Replacement: 手順 6、 3の画像 1 Taylor 342D-27 O-Ring  Replacement: 手順 6、 3の画像 2 Taylor 342D-27 O-Ring  Replacement: 手順 6、 3の画像 3
    • Push the valve draw handle all the way to the right or until the flat lines on the top of the valve are perpendicular to the door face.

    • The value draw handle may need to be removed in this step as well if the lines on the top are not parallel. To remove the value draw handle pull it away from the valve

  7. Taylor 342D-27 O-Ring  Replacement: 手順 7、 1の画像 1
    • Remove the ice buster by wiggling it until it releases, then pulling it away from the valve.

  8. Taylor 342D-27 O-Ring  Replacement: 手順 8、 1の画像 1
    • Push the valve up using your thumb to remove. Once there is enough of the valve out of the top of the door to hold on to, pull it out.

  9. Taylor 342D-27 O-Ring  Replacement: 手順 9、 2の画像 1 Taylor 342D-27 O-Ring  Replacement: 手順 9、 2の画像 2
    • Take off the broken o-ring using the o-ring removal tool. To remove, place the end of the removal tool under the o-ring and bring it out the other side.

    • If the o-ring has snapped and is not longer intact, you can use your fingers to remove the broken pieces.

  10. Taylor 342D-27 O-Ring  Replacement: 手順 10、 1の画像 1
    • Put a new, well lubed, o-ring back on the valve. The o-ring removal tool can be used in this step or just using pressure with your hands.

終わりに

To reassemble your device, follow these instructions in reverse order.

ある他の人がこのガイドを完成しました。

作成者

1人の作成者と共同作成されました。

Katy

メンバー登録日: 06/29/18

201 ポイント

1ガイドが承認済み

チーム

0 件のコメント

コメントを追加

統計データ:

過去 24時間: 0

過去 7 日: 5

過去 30 日: 20

今までの合計 538