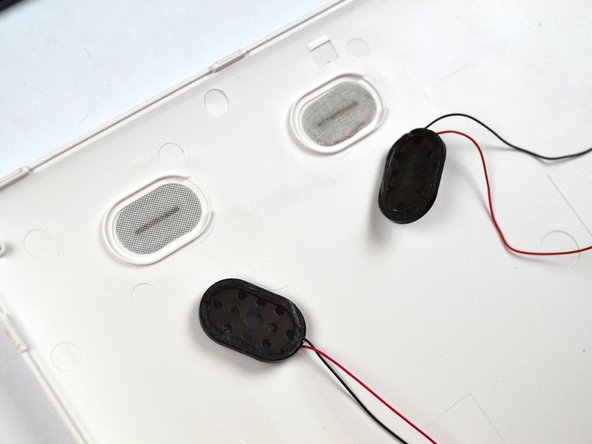
メインコンテンツにスキップ

Tagital T10 Speaker Replacement

必要な工具と部品

  1. Tagital T10 Speaker Replacement, Speaker: 手順 1、 1の画像 1
    • Always make sure your device is completely powered off before performing repairs.

    • Remove the two 4mm screws at the top of the device.

  2. Tagital T10 Speaker Replacement: 手順 2、 2の画像 1 Tagital T10 Speaker Replacement: 手順 2、 2の画像 2
    • Carefully remove the back cover by using a plastic opening tool, moving all the way around the perimeter of the tablet.

    • Set the back cover aside.

    • The speakers are attached to the inside back cover, and are connected by wires to the motherboard of the tablet. Carefully set the back cover aside so that you do not rip the wires free.

  3. Tagital T10 Speaker Replacement: 手順 3、 3の画像 1 Tagital T10 Speaker Replacement: 手順 3、 3の画像 2 Tagital T10 Speaker Replacement: 手順 3、 3の画像 3
    • Locate where the speaker's wires connect to the motherboard.

    • Heat the solder to soften it and disconnect the wires using the soldering tool.

  4. Tagital T10 Speaker Replacement: 手順 4、 2の画像 1 Tagital T10 Speaker Replacement: 手順 4、 2の画像 2
    • Remove the old speakers from the back cover with the plastic prying tool.

終わりに

To reassemble your device, follow these instructions in reverse order.

ある他の人がこのガイドを完成しました。

作成者

3人の作成者と共同で作成されました。

Cody D'Amato

メンバー登録日: 09/26/16

303 ポイント

2のガイドは作成済み

チーム

USF Tampa, Team 14-5, Eyestone Fall 2016 USF Tampa, Team 14-5, Eyestone Fall 2016人のメンバー

USFT-EYESTONE-F16S14G5

4 メンバー

10のガイドは作成済み

0 件のコメント

コメントを追加

統計データ:

過去 24時間: 1

過去 7 日: 5

過去 30 日: 5

今までの合計 183