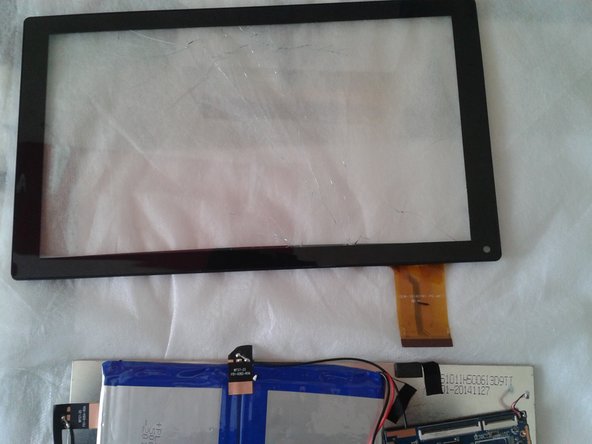
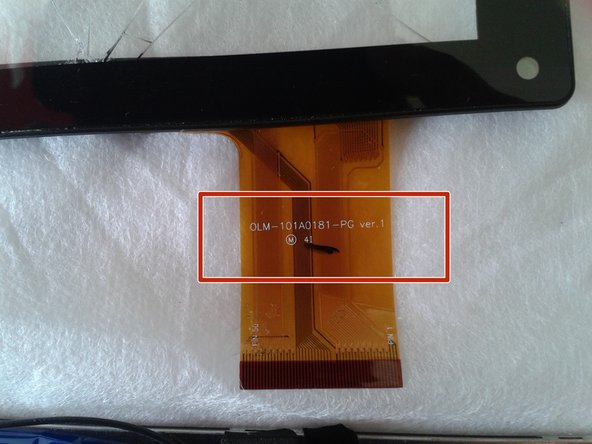
メインコンテンツにスキップ

Tablet Chuwe 10.1 Touch Screen Replacement

必要な工具と部品

  1. Tablet Chuwe 10.1 Touch Screen Replacement, Touch Screen: 手順 1、 2の画像 1 Tablet Chuwe 10.1 Touch Screen Replacement, Touch Screen: 手順 1、 2の画像 2
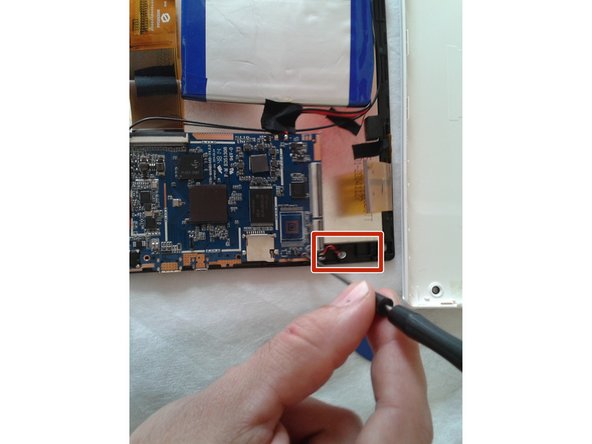
    • We must use a plastic guitar pick or in the case that you do not have one, a plastic card can do us helpful (credit card)

  2. Tablet Chuwe 10.1 Touch Screen Replacement: 手順 2、 3の画像 1 Tablet Chuwe 10.1 Touch Screen Replacement: 手順 2、 3の画像 2 Tablet Chuwe 10.1 Touch Screen Replacement: 手順 2、 3の画像 3
    • Slowly, insert the pick pressing it and swinging it along the perimeter of the tablet's body

  3. Tablet Chuwe 10.1 Touch Screen Replacement: 手順 3、 1の画像 1
    • Carefully loosen with your fingers the back and place the tablet face down on a flat and clean surface tablet

  4. Tablet Chuwe 10.1 Touch Screen Replacement: 手順 4、 1の画像 1
    • the speaker is screwed next to the touch chassis, we must release the screw and place it in a visible place, the speaker will remain with adhesive tape next to the battery

  5. Tablet Chuwe 10.1 Touch Screen Replacement: 手順 5、 1の画像 1
    • With the help of the pua or the fingers, we must release the data FLEX from the connection, making a small upward pressure

  6. Tablet Chuwe 10.1 Touch Screen Replacement: 手順 6、 1の画像 1
    • Careful! The FLEX cable that joins the front and rear camera, will be completely loose, we must place it in a clean place for later assembly.

  7. Tablet Chuwe 10.1 Touch Screen Replacement: 手順 7、 1の画像 1
    • we will have a third FLEX on the motherboard, we must do the same method to press up on the connector until it is released, carefully these FLEX are easy to break.

  8. Tablet Chuwe 10.1 Touch Screen Replacement: 手順 8、 2の画像 1 Tablet Chuwe 10.1 Touch Screen Replacement: 手順 8、 2の画像 2
    • now with the help of a Phillips screwdriver, we must release the three screws that hold the base plate of the touch screen chassis, and the sensor with positive and negative cables, we can help with the fingers in a smooth way.

  9. Tablet Chuwe 10.1 Touch Screen Replacement: 手順 9、 2の画像 1 Tablet Chuwe 10.1 Touch Screen Replacement: 手順 9、 2の画像 2
    • carefully, we already have the loose base plate of the touch chassis, we look at the various grips that connect the touch screen with the LCD and with the tine and small balancing we are doing pressure to separate touch and LCD screen.

  10. Tablet Chuwe 10.1 Touch Screen Replacement: 手順 10、 3の画像 1 Tablet Chuwe 10.1 Touch Screen Replacement: 手順 10、 3の画像 2 Tablet Chuwe 10.1 Touch Screen Replacement: 手順 10、 3の画像 3
    • Following these steps we have loosen our LCD screen and the carcass of the touch screen, now we must look for the reference number that appears on the FLEX cable of the touch screen so we can order a new one

終わりに

In order to reassemble your device, follow these instructions in reverse order

15 の人々がこのガイドを完成させました。

以下の翻訳者の皆さんにお礼を申し上げます:

es en

100%

これらの翻訳者の方々は世界を修理する私たちのサポートをしてくれています。 あなたも貢献してみませんか?
翻訳を始める ›

作成者

2人の作成者と共同で作成されました。

Fran Ruiz

メンバー登録日: 11/14/15

515 ポイント

1ガイドが承認済み

2 件のコメント

No mention of the adhesive needed to reattach the screen.

Jan - 返信

garcias por la ayuda

jorge alejandro - 返信

コメントを追加

統計データ:

過去 24時間: 2

過去 7 日: 18

過去 30 日: 70

今までの合計 3,749