メインコンテンツにスキップ

TDK Life on Record Trek 360 Handle Replacement

必要な工具と部品

  1. TDK Life on Record Trek 360 Handle Replacement, Disassembling TDK Life on Record bottom panel: 手順 1、 1の画像 1
    • Remove the four rubber feet of the device using a metal spudger.

  2. TDK Life on Record Trek 360 Handle Replacement: 手順 2、 2の画像 1 TDK Life on Record Trek 360 Handle Replacement: 手順 2、 2の画像 2
    • Remove the four 9 mm Phillips #0 screws located under the feet of the device.

    • Remove the four 9 mm Torx #8 screws located on each side of the bottom the device.

  3. TDK Life on Record Trek 360 Handle Replacement: 手順 3、 2の画像 1 TDK Life on Record Trek 360 Handle Replacement: 手順 3、 2の画像 2
    • Pull the bottom cover of the device towards you.

  4. TDK Life on Record Trek 360 Handle Replacement: 手順 4、 2の画像 1 TDK Life on Record Trek 360 Handle Replacement: 手順 4、 2の画像 2
    • Remove the four 13 mm Phillips #1 screws.

  5. TDK Life on Record Trek 360 Handle Replacement: 手順 5、 2の画像 1 TDK Life on Record Trek 360 Handle Replacement: 手順 5、 2の画像 2
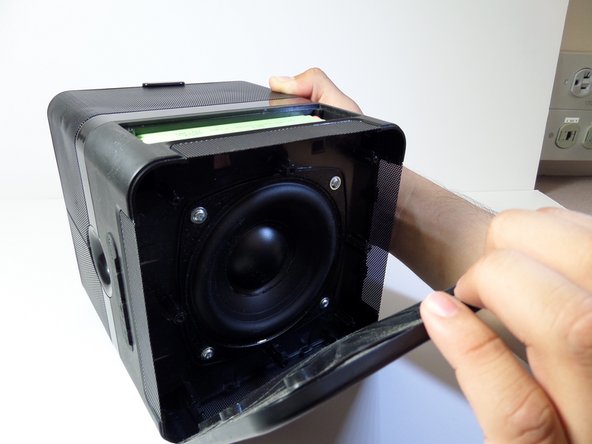
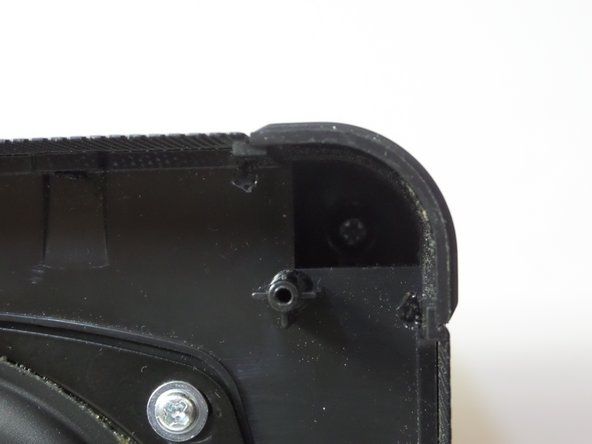
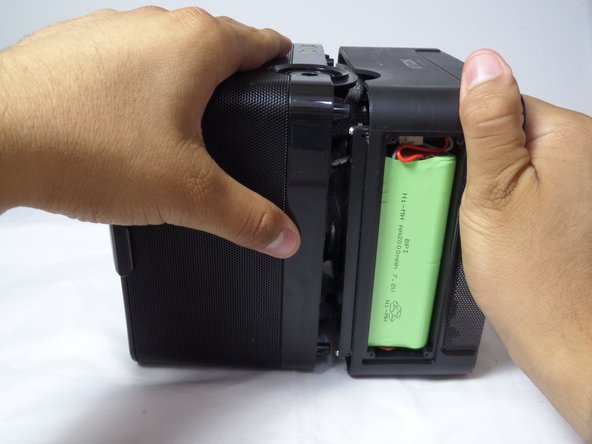
    • Use one hand to grip the device from the side of the handle, and use the other hand to grip the side of the device that contains the woofer

    • The woofer is the circular component located at the bottom of the device after the bottom cover has been removed

    • Pull apart the compartments by applying force in opposite directions.

    • Do not pull with extreme force!! There are many electrical wires inside the device that can become damaged if the bottom panel is removed without care

  6. TDK Life on Record Trek 360 Handle Replacement: 手順 6、 1の画像 1
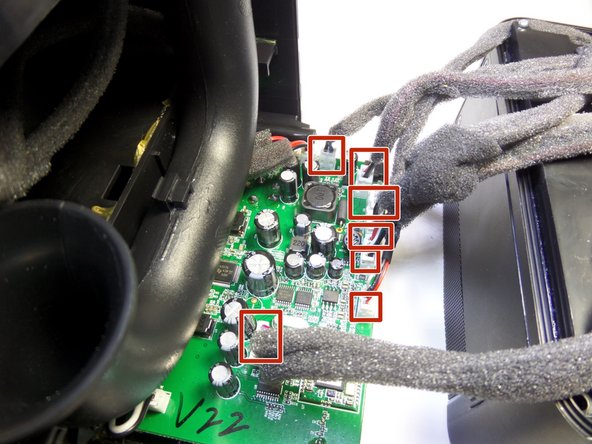
    • Disconnect the seven cables attached to the motherboard.

    • Do not use too much force when pulling on the wires. Pulling with too much force can damage the wires.

  7. TDK Life on Record Trek 360 Handle Replacement, Air Vent Tube: 手順 7、 1の画像 1
    • Remove the four 8 mm Phillips #1 screws.

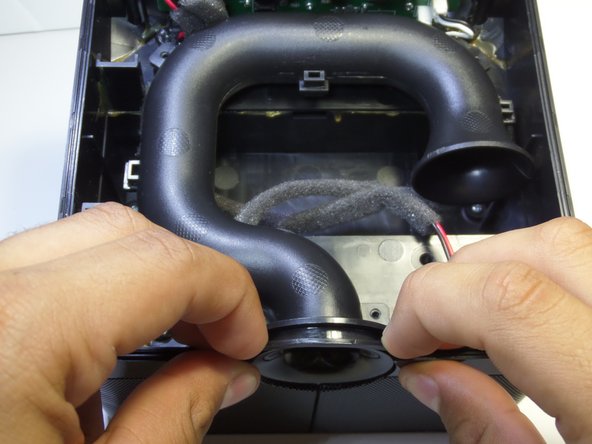
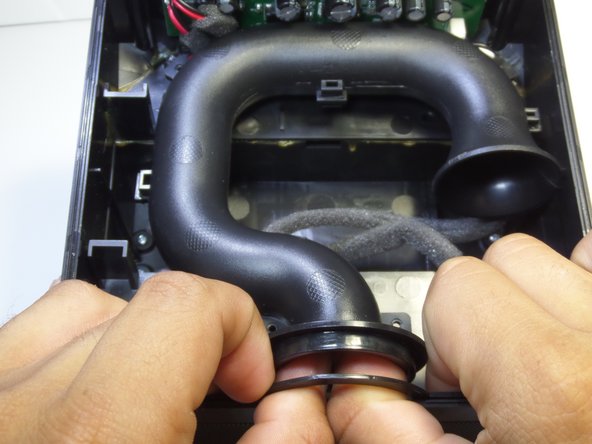
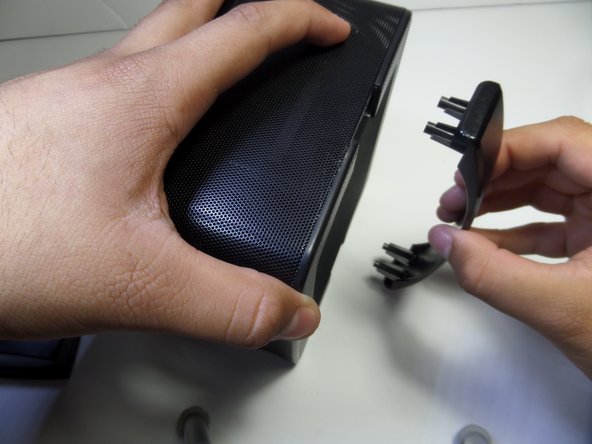
  8. TDK Life on Record Trek 360 Handle Replacement: 手順 8、 3の画像 1 TDK Life on Record Trek 360 Handle Replacement: 手順 8、 3の画像 2 TDK Life on Record Trek 360 Handle Replacement: 手順 8、 3の画像 3
    • place your hands on each side of the air vent and then place your index finger on the thin plastic half circle that holds the vent in place.

    • Pull the plastic half circle towards you.

    • Put both of your hands inside the tube as shown and push away from you.

  9. TDK Life on Record Trek 360 Handle Replacement, Motherboard: 手順 9、 2の画像 1 TDK Life on Record Trek 360 Handle Replacement, Motherboard: 手順 9、 2の画像 2
    • Remove the four wired clips by pulling on the wires.

    • Remove the three 6 mm Phillips #1 screws.

  10. TDK Life on Record Trek 360 Handle Replacement: 手順 10、 1の画像 1
    • Remove the volume control knob, which is located at the front of the speaker, by pulling it towards you.

  11. TDK Life on Record Trek 360 Handle Replacement: 手順 11、 1の画像 1
    • Using tweezers, turn the nut counter-clockwise and remove the nut.

  12. TDK Life on Record Trek 360 Handle Replacement: 手順 12、 1の画像 1
    • Push the metal part that holds the volume control knob away from you.

  13. TDK Life on Record Trek 360 Handle Replacement, Handle: 手順 13、 1の画像 1
    • Remove the four 13 mm Phillips #1 screws.

  14. TDK Life on Record Trek 360 Handle Replacement: 手順 14、 2の画像 1 TDK Life on Record Trek 360 Handle Replacement: 手順 14、 2の画像 2
    • Use your left hand to hold the top portion of the speaker in place.

    • Using your right hand, pull the handle away from the device.

終わりに

To reassemble your device, follow these instructions in reverse order.

作成者

2人の作成者と共同で作成されました。

Eduardo Barrios

メンバー登録日: 09/14/15

323 ポイント

2のガイドは作成済み

チーム

CSU Fullerton, Team 1-2, Bruce Fall 2015 CSU Fullerton, Team 1-2, Bruce Fall 2015人のメンバー

CSUF-BRUCE-F15S1G2

3 メンバー

5のガイドは作成済み

0 件のコメント

コメントを追加

統計データ:

過去 24時間: 0

過去 7 日: 2

過去 30 日: 8

今までの合計 430