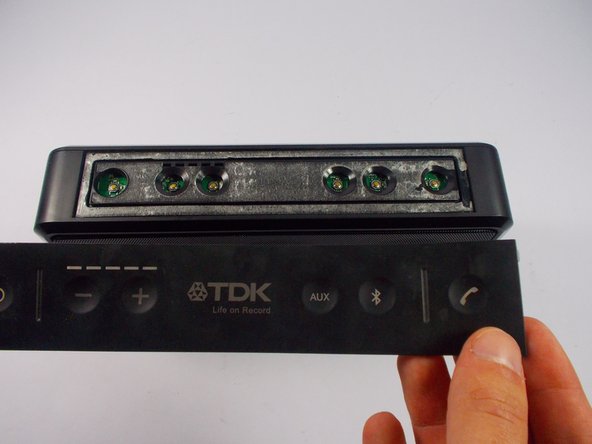
メインコンテンツにスキップ

TDK Life on Record A33 Control Pad Replacement

必要な工具と部品

  1. TDK Life on Record A33 Control Pad Replacement, Control Pad: 手順 1、 1の画像 1
    • Push the nylon or metal spudger under the corner of the control pad. This might take some patience, but it gets easier once the spudger gets under the control pad.

  2. TDK Life on Record A33 Control Pad Replacement: 手順 2、 1の画像 1
    • Slide the nylon or metal spudger along the long edge of the control panel, up to the next edge.

    • This may need to be done several times to get the control pad loose enough to come off. If needed, it can be done on more than just one edge, especially if you're having trouble picking up the edge in the next step.

  3. TDK Life on Record A33 Control Pad Replacement: 手順 3、 2の画像 1 TDK Life on Record A33 Control Pad Replacement: 手順 3、 2の画像 2
    • Grab the corner of the control pad and peel it off slowly. You should be able to see the circuit board.

    • When replacing the control pad, the glue that is on the speaker should be able to hold the control pad. However, glue can be used if it is not sticking well enough. Make sure the glue does not get on the circuit board.

終わりに

To reassemble your device, follow these instructions in reverse order.

ある他の人がこのガイドを完成しました。

作成者

2人の作成者と共同で作成されました。

Matthew Festa

メンバー登録日: 10/16/15

808 ポイント

3のガイドは作成済み

チーム

UMass Dartmouth, Team 4-2, Catania Fall 2015 UMass Dartmouth, Team 4-2, Catania Fall 2015人のメンバー

UMASSD-CATANIA-F15S4G2

4 メンバー

5のガイドは作成済み

0 件のコメント

コメントを追加

統計データ:

過去 24時間: 0

過去 7 日: 2

過去 30 日: 16

今までの合計 4,723