メインコンテンツにスキップ

Syntus ST150 Ultrasonic Plate Replacement

必要な工具と部品

  1. Syntus ST150 Ultrasonic Plate Replacement, Ultrasonic Plate: 手順 1、 1の画像 1
    • First, make sure the water tank inside the diffuser is completely dry to avoid any water from contacting the internal components.

    • Make sure the diffuser is disconnected from the power source to avoid electrical hazards.

  2. Syntus ST150 Ultrasonic Plate Replacement: 手順 2、 2の画像 1 Syntus ST150 Ultrasonic Plate Replacement: 手順 2、 2の画像 2
    • With a Phillips #1 screwdriver, remove the three 10 mm screws on the bottom of the diffuser.

  3. Syntus ST150 Ultrasonic Plate Replacement: 手順 3、 3の画像 1 Syntus ST150 Ultrasonic Plate Replacement: 手順 3、 3の画像 2 Syntus ST150 Ultrasonic Plate Replacement: 手順 3、 3の画像 3
    • Lift the water tank while holding the base of the diffuser.

    • Disconnect the three cables form the board.

    • Make sure when reassembling the diffuser to plug in each cable to its assigned port.

  4. Syntus ST150 Ultrasonic Plate Replacement: 手順 4、 3の画像 1 Syntus ST150 Ultrasonic Plate Replacement: 手順 4、 3の画像 2 Syntus ST150 Ultrasonic Plate Replacement: 手順 4、 3の画像 3
    • To separate the board from the water tank, unscrew the three Phillips #1 10 mm screws securing the board.

  5. Syntus ST150 Ultrasonic Plate Replacement: 手順 5、 3の画像 1 Syntus ST150 Ultrasonic Plate Replacement: 手順 5、 3の画像 2 Syntus ST150 Ultrasonic Plate Replacement: 手順 5、 3の画像 3
    • With a Phillips #0 screwdriver, remove the three 7 mm screws from the ultrasonic sensor cover.

    • Remove the cover to expose the ultrasonic sensor.

  6. Syntus ST150 Ultrasonic Plate Replacement: 手順 6、 3の画像 1 Syntus ST150 Ultrasonic Plate Replacement: 手順 6、 3の画像 2 Syntus ST150 Ultrasonic Plate Replacement: 手順 6、 3の画像 3
    • Detach the ultrasonic sensor from the water tank.

    • Detach the ultrasonic sensor connector from the board.

  7. Syntus ST150 Ultrasonic Plate Replacement: 手順 7、 1の画像 1
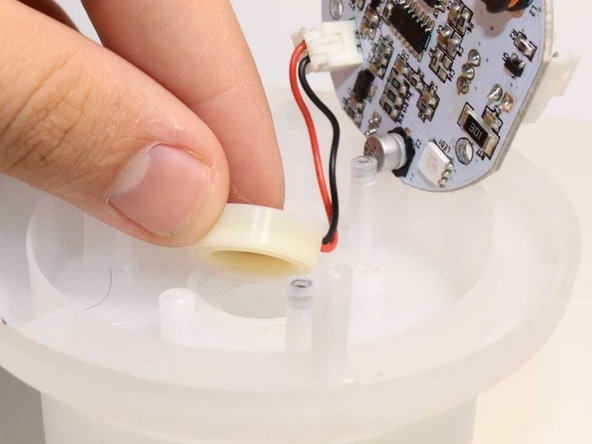
    • Remove the rubber cover from the ultrasonic plate.

  8. Syntus ST150 Ultrasonic Plate Replacement: 手順 8、 1の画像 1
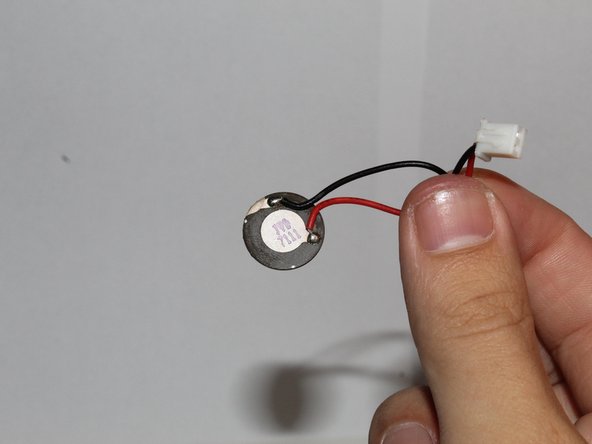
    • Now you can replace the ultrasonic plate of your diffuser.

終わりに

To reassemble your device, follow these instructions in reverse order.

作成者

1人の作成者と共同作成されました。

Alejandro R. Calderin Anzueta

メンバー登録日: 03/23/22

157 ポイント

1ガイドが承認済み

チーム

0 件のコメント

コメントを追加

統計データ:

過去 24時間: 0

過去 7 日: 4

過去 30 日: 21

今までの合計 526