メインコンテンツにスキップ

Swagtron T3 Cover Replacement

必要条件のみ
この修理ガイドは、他のガイドの前提条件として使用されます。それ自体は不完全で、単独で使用されることはありません。

必要な工具と部品

  1. Swagtron T3 Cover Replacement, Cover: 手順 1、 2の画像 1 Swagtron T3 Cover Replacement, Cover: 手順 1、 2の画像 2
    • Make sure the hoverboard is completely powered off and unplugged from any outlets.

    • Flip the Swagtron so that the footpads are facing the ground.

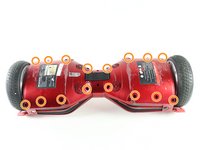
    • Unscrew the sixteen 9.4 mm Phillips #1 machine screws on the side of the Swagtron that is now facing upwards.

  2. Swagtron T3 Cover Replacement: 手順 2、 3の画像 1 Swagtron T3 Cover Replacement: 手順 2、 3の画像 2 Swagtron T3 Cover Replacement: 手順 2、 3の画像 3
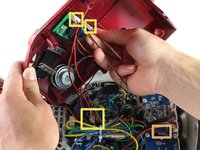
    • Be careful with the small blue capacitors indicated by the orange box. There are many of these capacitors in the device.

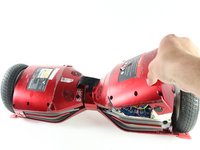
    • Slowly lift the backside cover.

    • Both sides lift up the same way, but the motherboard is under one side and the battery is under the other.

    • Detach the four cables connected to the cover by pinching the connector clips and pulling the cables out:

    • Three cables on the motherboard side.

    • Two red cables with white connectors and one white cable with a white connector.

    • One yellow cable with a black connector on the battery side.

    • After detachment, you should be able to completely remove the backside cover.

終わりに

To reassemble your device, follow these instructions in reverse order.

作成者

4人の作成者と共同で作成されました。

Klara Perkins

メンバー登録日: 04/10/17

412 ポイント

2のガイドは作成済み

チーム

Cal Poly, Team S13-G3, Forte Spring 2017 Cal Poly, Team S13-G3, Forte Spring 2017人のメンバー

CPSU-FORTE-S17S13G3

4 メンバー

4のガイドは作成済み

0 件のコメント

コメントを追加

統計データ:

過去 24時間: 0

過去 7 日: 3

過去 30 日: 32

今までの合計 5,121