メインコンテンツにスキップ

Sungale CyberUs Mother Board Replacement

必要な工具と部品

  1. Sungale CyberUs Mother Board Replacement, Screen: 手順 1、 1の画像 1
    • Make sure to have the device turned off to prevent any minor electric shock.

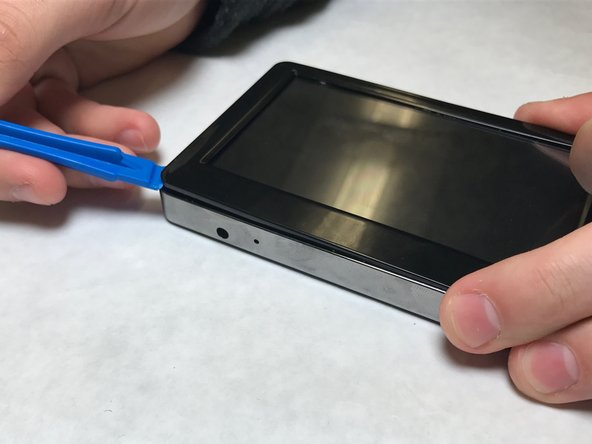
    • Hold the device so the left side is facing towards you (like in the picture shown) so the two 4mm PH001 screws are exposed and easier to access.

  2. Sungale CyberUs Mother Board Replacement: 手順 2、 1の画像 1
    • Remove both 4mm PH001 screws from the side panel.

  3. Sungale CyberUs Mother Board Replacement: 手順 3、 2の画像 1 Sungale CyberUs Mother Board Replacement: 手順 3、 2の画像 2
    • Carefully pry up one of the top corners of the screen with a plastic spudger (prying tool). Slide the tool along the edges to release it from the housing.

    • The screen may make some cracking noises as you pry it from the casing. This is expected.

    • The screen is still connected to the motherboard. Use force with caution.

  4. Sungale CyberUs Mother Board Replacement: 手順 4、 1の画像 1
    • Gently turn screen over, to the side, to reveal the ZIF connector attached to the motherboard.

  5. Sungale CyberUs Mother Board Replacement: 手順 5、 1の画像 1
    • Gently using tweezers, flip the black clip up. Pull the ZIF connector out.

    • You screen is still not completely detached from the device.

  6. Sungale CyberUs Mother Board Replacement: 手順 6、 2の画像 1 Sungale CyberUs Mother Board Replacement: 手順 6、 2の画像 2
    • Using the prying tool, slide the black clip out. Pull the ZIF connector out and to the left, the screen is now detached from the motherboard.

  7. Sungale CyberUs Mother Board Replacement, Battery: 手順 7、 1の画像 1
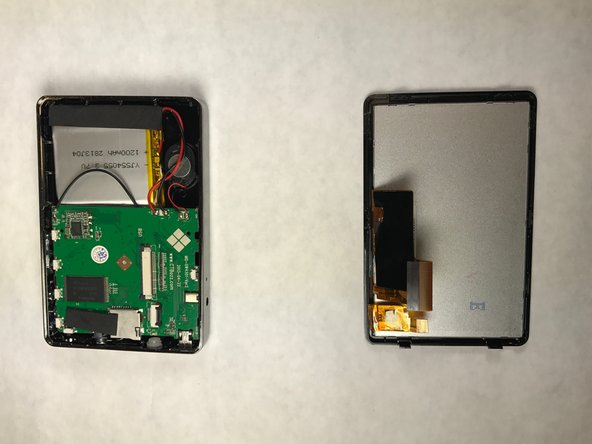
    • Now, carefully we will remove the battery. Find the leads, or the red and black wires going to the battery from the motherboard. To free the wires you must cut the wire near the battery leads. Make sure both ends are clean and have enough exposed wire.

  8. Sungale CyberUs Mother Board Replacement: 手順 8、 1の画像 1
    • You will have to clean the connections and solder the new battery back into place. Just as before, you want to reconnect the new battery to the motherboard.

  9. Sungale CyberUs Mother Board Replacement, Mother Board: 手順 9、 1の画像 1
    • In case of a burned out mother board, take the cables from the battery and the speaker (black and red cables) and detach them from the motherboard (you could only cut them and weld them when replacing with new motherboard).

    • Gently tug on wires to remove the connection from the logic board.

  10. Sungale CyberUs Mother Board Replacement: 手順 10、 1の画像 1
    • To remove mother board gently pull away from the top of the device to make sure the earphone jack it our of the slot.

  11. Sungale CyberUs Mother Board Replacement: 手順 11、 1の画像 1
    • Your mother board is now completely removed from the device.

終わりに

To reassemble your device, follow these instructions in reverse order.

作成者

4人の作成者と共同で作成されました。

Javier Tandazo

メンバー登録日: 10/03/16

243 ポイント

2のガイドは作成済み

チーム

IUPUI, Team 1-4, Harley Fall 2016 IUPUI, Team 1-4, Harley Fall 2016人のメンバー

IUPUI-HARLEY-F16S1G4

3 メンバー

8のガイドは作成済み

0 件のコメント

コメントを追加

統計データ:

過去 24時間: 0

過去 7 日: 1

過去 30 日: 1

今までの合計 125