メインコンテンツにスキップ

Sunbeam 2-Slice Extra Wide Slot Toaster Latch Spring Replacement

必要な工具と部品

  1. Sunbeam 2-Slice Extra Wide Slot Toaster Latch Spring Replacement, Latch Spring: 手順 1、 1の画像 1
    • Unplug the toaster from electrical outlet.

    • Never disassemble the toaster while it is plugged in. Doing so may result in an electric shock.

  2. Sunbeam 2-Slice Extra Wide Slot Toaster Latch Spring Replacement: 手順 2、 1の画像 1
    • Dump out any crumbs into a garbage to prevent crumbs from getting everywhere.

  3. Sunbeam 2-Slice Extra Wide Slot Toaster Latch Spring Replacement: 手順 3、 1の画像 1
    • Flip the toaster so the back of the toaster is showing.

    • Using the Phillips screwdriver, remove the four screws.

  4. Sunbeam 2-Slice Extra Wide Slot Toaster Latch Spring Replacement: 手順 4、 1の画像 1
    • Remove the handle from the latch.

    • This will require some force to pull off.

  5. Sunbeam 2-Slice Extra Wide Slot Toaster Latch Spring Replacement: 手順 5、 1の画像 1
    • Disconnect the wire shown in the picture. After disconnecting the wire, proceed to take the cover off.

  6. Sunbeam 2-Slice Extra Wide Slot Toaster Latch Spring Replacement: 手順 6、 1の画像 1
    • After taking the cover off of the toaster, this is how the toaster should appear.

    • Avoid touching any of the electrical parts of the toaster. The electrical parts are vulnerable to small static charge which may damage your toaster.

  7. Sunbeam 2-Slice Extra Wide Slot Toaster Latch Spring Replacement: 手順 7、 3の画像 1 Sunbeam 2-Slice Extra Wide Slot Toaster Latch Spring Replacement: 手順 7、 3の画像 2 Sunbeam 2-Slice Extra Wide Slot Toaster Latch Spring Replacement: 手順 7、 3の画像 3
    • Be sure to remember where the spring is attached to prevent frustration putting the new spring on.

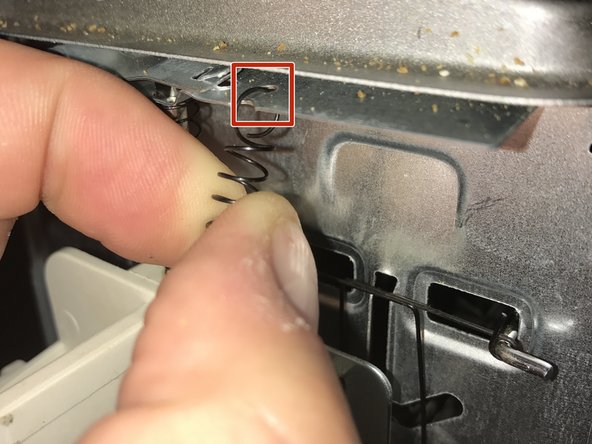
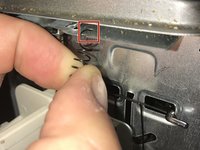
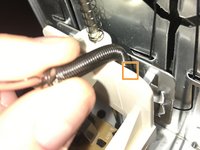
    • Locate the spring shown in the first picture.

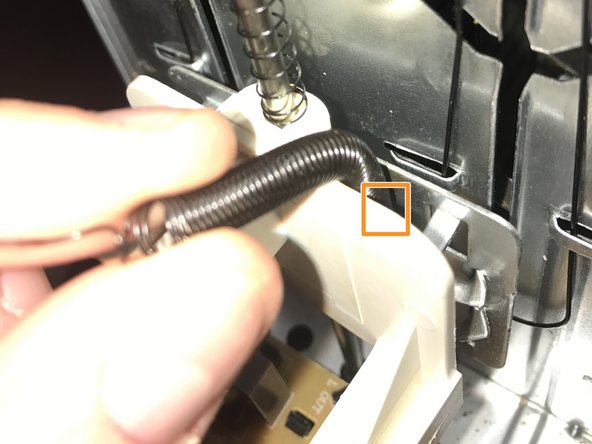
    • After locating the spring, remove the top part of the spring first. The top part of the spring can be seen in the second picture.

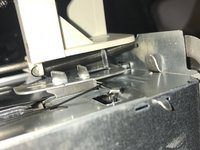
    • After locating the bottom part of the spring, this can be seen from the third picture, remove the bottom part of the spring.

終わりに

To reassemble the toaster after the spring is replaced, follow steps 3 through 7 in reverse. Place the new spring where you took the old spring off. Then add the cover, the handle, and the screws back to the toaster. After you have reassembled your toaster, to check if you put it back correctly, plug in your toaster and press down the latch. If the latch stays down you have successfully reassembled your toaster.

作成者

2人の作成者と共同で作成されました。

Ryan Winkler

メンバー登録日: 04/08/19

145 ポイント

1ガイドが承認済み

チーム

0 件のコメント

コメントを追加

統計データ:

過去 24時間: 2

過去 7 日: 3

過去 30 日: 24

今までの合計 1,382