メインコンテンツにスキップ

Sun King Solo Solar Lantern Device Seals Replacement

必要な工具と部品

  1. Sun King Solo Solar Lantern Device Seals Replacement, Locate and Remove the Screws: 手順 1、 1の画像 1
    • Place the lamp LED side down on a clean workspace.

    • Remove the screws holding the casing together using a Phillips #1 Screwdriver.

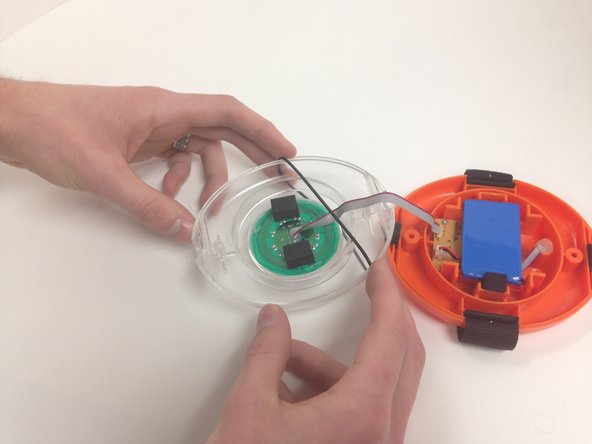
  2. Sun King Solo Solar Lantern Device Seals Replacement, Separate the Device: 手順 2、 1の画像 1
    • Gently pull the two halves of the lamp apart.

  3. Sun King Solo Solar Lantern Device Seals Replacement, O-ring Replacement: 手順 3、 2の画像 1 Sun King Solo Solar Lantern Device Seals Replacement, O-ring Replacement: 手順 3、 2の画像 2
    • On the clear upper half, remove the black O-ring

    • Place the new O-ring, making sure it is smooth all the way around

  4. Sun King Solo Solar Lantern Device Seals Replacement, Stand Holder Replacements: 手順 4、 1の画像 1
    • Remove the rubber stand holders.

    • Place the new stand holders, making sure the wings of the holder are in the second opening

終わりに

To reassemble your device, follow these instructions in reverse order.

作成者

3人の作成者と共同で作成されました。

Josef Simek

メンバー登録日: 10/23/14

120 ポイント

1ガイドが承認済み

チーム

Michigan Tech, Team 1-3, Lauer Fall 2014 Michigan Tech, Team 1-3, Lauer Fall 2014人のメンバー

MTU-LAUER-F14S1G3

3 メンバー

5のガイドは作成済み

0 件のコメント

コメントを追加

統計データ:

過去 24時間: 0

過去 7 日: 0

過去 30 日: 2

今までの合計 465