はじめに
Replace heating element, belt, complete teardown on a Speed Queen (Alliance) electric dryer.
必要な工具と部品
-
-
1) Unplug the dryer!
-
2) Tip the dryer onto its back and remove the panel below the door by removing the two screws in the lower corners.
-
-
-
3) At this point you can see the heating element in the back lower left corner. Make careful note of where the 3 harness wires connect. (Make a diagram or take a picture!)
-
If needed, the electrical schematic can be found in the space behind the control knobs.
-
Remove the two screws on the back of the plastic bezel on top of the controls. A hole will allow you to get a hold of the schematic taped to the bottom of the compartment.
-
-
-
-
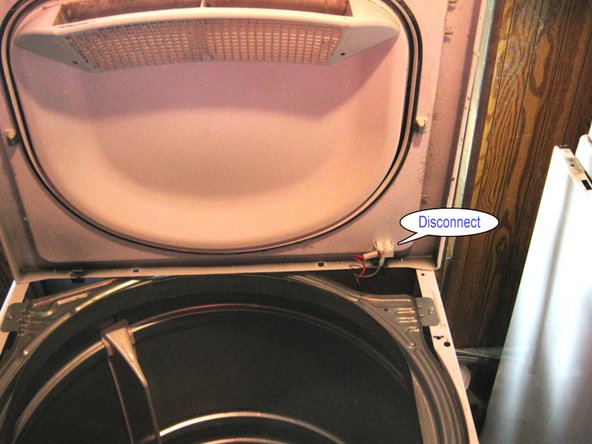
Remove the two screws securing the lower edges of the door assembly.
-
Rotate the lower edge up.
-
The door switch is at the upper right corner of the assembly and must be disconnected from the switch to completely free the door assembly. The wires go to connectors 1 (common) and 3 (NO).
-
NOTE: A bad door switch will prevent dryer operation.
-
-
-
The drum is next. Make a diagram of how the belt is arranged on the belt tensioner and motor pulley. Reach behind the motor at the lower right and take the tension off the belt to remove the belt from the motor pulley.
-
At this point the belt can be replaced by slipping a new one over the drum and attaching it to the tensioner and belt pulley.
-
Be very careful that the belt is not twisted and it is close to the wear track on the drum where it was running.
-
Turn the drum slowly by hand to ensure everything runs smoothly.
-
If replacing a belt, you are done. Reassemble.
-
-
-
Otherwise, remove ONE screw securing the top of the dryer to the sides to give it a little vertical clearance on the drum and lift the drum out.
-
The top of the dryer will still be attached by the wiring harness but can be set aside far enough to get access for the next operation.
-
The back plate is now exposed. There 4 screws around the edges holding it in as well as two more in the upper right corner securing the dryer power cord terminal block and a ground wire.
-
There is also one connector going to the neutral on the power cord terminal block (make sure you reconnect it to neutral!).
-
After all these are disconnected the back plate will lift out.
-


To reassemble your device, follow these instructions in reverse order.
To reassemble your device, follow these instructions in reverse order.
7 の人々がこのガイドを完成させました。