メインコンテンツにスキップ

Sony Xperia Z3 Dual Headphone Jack Replacement

必要な工具と部品

  1. Sony Xperia Z3 Dual Headphone Jack Replacement, Headphone Jack: 手順 1、 1の画像 1
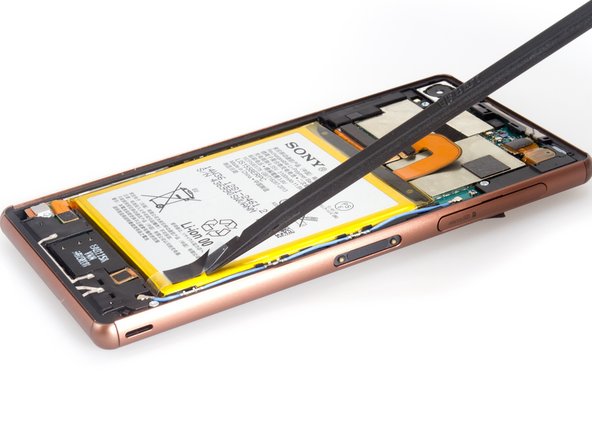
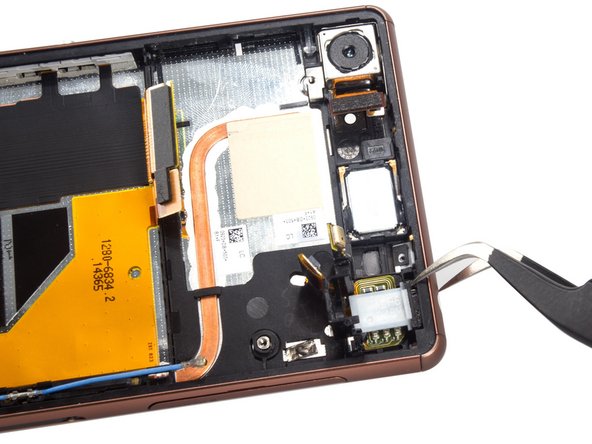
    • Power off the phone and remove two SIM card trays before headphone jack replacement.

  2. Sony Xperia Z3 Dual Headphone Jack Replacement: 手順 2、 3の画像 1 Sony Xperia Z3 Dual Headphone Jack Replacement: 手順 2、 3の画像 2 Sony Xperia Z3 Dual Headphone Jack Replacement: 手順 2、 3の画像 3
    • Heat to soften back cover adhesive sticker.

    • Use suction cup to open a gap and insert into the guitar pick.

    • Slide the guitar pick to cut the sticker all around every side.

  3. Sony Xperia Z3 Dual Headphone Jack Replacement: 手順 3、 1の画像 1
    • Remove back cover.

  4. Sony Xperia Z3 Dual Headphone Jack Replacement: 手順 4、 3の画像 1 Sony Xperia Z3 Dual Headphone Jack Replacement: 手順 4、 3の画像 2 Sony Xperia Z3 Dual Headphone Jack Replacement: 手順 4、 3の画像 3
    • Remove battery easily.

  5. Sony Xperia Z3 Dual Headphone Jack Replacement: 手順 5、 1の画像 1
    • Twist off two screws by Philips screwdriver at first.

  6. Sony Xperia Z3 Dual Headphone Jack Replacement: 手順 6、 3の画像 1 Sony Xperia Z3 Dual Headphone Jack Replacement: 手順 6、 3の画像 2 Sony Xperia Z3 Dual Headphone Jack Replacement: 手順 6、 3の画像 3
    • Remove three pieces of securing bracket.

  7. Sony Xperia Z3 Dual Headphone Jack Replacement: 手順 7、 3の画像 1 Sony Xperia Z3 Dual Headphone Jack Replacement: 手順 7、 3の画像 2 Sony Xperia Z3 Dual Headphone Jack Replacement: 手順 7、 3の画像 3
    • Release all the connectors connecting with motherboard.

    • Pry it up from left side. Please be careful with some hidden keys, they held the motherboard really tightly.

  8. Sony Xperia Z3 Dual Headphone Jack Replacement: 手順 8、 2の画像 1 Sony Xperia Z3 Dual Headphone Jack Replacement: 手順 8、 2の画像 2
    • Remove securing cover beside headphone jack.

  9. Sony Xperia Z3 Dual Headphone Jack Replacement: 手順 9、 3の画像 1 Sony Xperia Z3 Dual Headphone Jack Replacement: 手順 9、 3の画像 2 Sony Xperia Z3 Dual Headphone Jack Replacement: 手順 9、 3の画像 3
    • Remove the flex cover on the headphone jack. It's a part of the assembly and comes with denoise MIC and sensors.

    • Cut the adhesive sticker between headphone jack and midframe.

    • Remove headphone jack finally.

終わりに

To reassemble your device, follow these instructions in reverse order.

4 の人々がこのガイドを完成させました。

作成者

2人の作成者と共同で作成されました。

Sophia

メンバー登録日: 03/25/14

43,810 ポイント

62のガイドは作成済み

0 件のコメント

コメントを追加

統計データ:

過去 24時間: 0

過去 7 日: 1

過去 30 日: 4

今までの合計 7,002