この翻訳は、ソースガイドの最新の更新を反映していない可能性があります。 翻訳の更新に協力してください。 または ソースガイドを参照してください。
はじめに
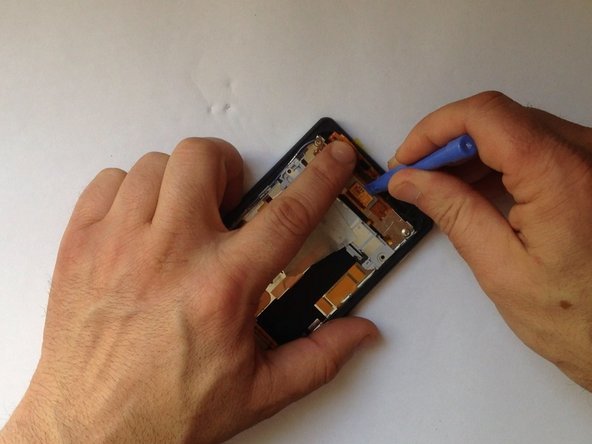
ディスプレイアセンブリ(LCDディスプレイとタッチスクリーンのモジュール)を解体して交換する方法です。
必要な工具と部品
ビデオの概要
-
-
バッテリーのフレックスケーブルの接続を外して、プラスネジを2本外します。
-
リチウムーポリマーバッテリーは3.8V、3200mAhです。
-
バッテリーのバーツ番号: LIS1543ERPC
-
-
-
-
再度、接着タブをバッテリーカバーの裏側に装着します。
-
これで修理は完了です。
-
上手く作業は進みましたか?
-


デバイスを再組み立てする際は、これらのインストラクションを逆の順番に従って作業を進めてください。
デバイスを再組み立てする際は、これらのインストラクションを逆の順番に従って作業を進めてください。
61 の人々がこのガイドを完成させました。
以下の翻訳者の皆さんにお礼を申し上げます:
84%

Midori Doiさんは世界中で修理する私たちを助けてくれています! あなたも貢献してみませんか?
翻訳を始める ›

チーム

22 件のコメント
Worked! I very much recommend watching the video as well as read the manual to get a complete picture. My total time spent was multiple hours, but largely because it's the first time I'm doing a repair that involves so much glue. Gained a few gray hairs there.
Two stumbles:
I missed the line "The load Speaker has some adhesive holding it to the chassis so a little heat on the front will help.", which cost me a lot of time and worry as I was trying to force the speaker assembly out. Eventually got it out, and it's fine. Ribbon cables will be the death of me some day.
I did not keep the little bit of tape on the display ribbon safe and clean and ended up not using it at all. The written manual doesn't show its reuse, the video does.
Also: getting (almost) all of the glue goop off the back was a tragedy.
so cool, is simple.
My Xperia Z2 touch screen is fixed at a phone repaircenter. I dont know what they do but since that day it looks like my touchscreen living his own life. Especially if i type some text with the stock keyboard. Its very frustrating and my question is.....can i do something about it myself?
Sorry for my bad English btw
Before gluing the screen to work well sensors and all that, you need to put some black tape on the camera or sensors?
Is it and seen online tutorials or is not necessary
I did not glue and it was fine.
Hi,
i need to change my LCD , but i can't find an original parts for my Z2
can you tell me where i can buy a genuine original sony remplacment LCd+Digitizer ?
thanks
Sony does not sell direct. To get a " genuine " replacement , you have to have the authorized service repair do it. Just buy one off ebay.
Hey!
Thanks for this tutorial. Without this tutorial i would probably done something bad to my phone, but with it everything works!
I had a problem with separating backcover with battery, two screws that holds battery in place in my device didnt hold battery in place, when i pryed open backcover battery instead staying inside her place (inside device) she was glued to backcover and only flex cable was holding it to device. I think that way it was more difficult to separate battery from backcover, so if this happend to you too dont lose hope and have patience. I dont know why it was like that, but when i was closing cover i put effort to check anything was wrong with socket screws etc, but didnt find anything worth mentioning.
Please someone help me?
Where do I get the original touch display LCD to buy? For Sony Xperia Z2 D6543 or D6503
Pierre Psy - 返信
Hi bought LCDs from ebay and they worked well, but one hade weak tape so I neede to replace it. My last LCD I bought for another Z2 was from a repairstore in town.
Claes -
hi, i started disassembling my phone and 1 screw the one in right low side doenst move at all. can u help me guys
Do you have different size screwdrivers? It is sometimes possible to loosen ascrew with the wrong size screwdriver but much easier with the correct one. I think i have used Philips 0 or 00.
Claes -
replacement screen doesn't have Sony logo as pictured above.. installing tomorrow
Cody Viall - 返信
screen is garbage if you were scared off by all the reviews on amazon it is the same here (ghost touches, screen flickers like a crt tv, colors are washed out) installation was done professionally yet still has touch problems
Cody Viall - 返信
U got it from ifixit ??
I have bought two screens from Honkong/Shenzen over e-bay and they where good. The next two I bought from a repairshop in Stockholm also with a good quality.
Claes -
I also recommend watching the video as well as read the text in this guide. The guide missed out on a lot of details that I saw in the video. Without the video I think I would have been lost. For example "now it's time to test the new spare part". What? The guide doesn't show how to do that! But in the video it's easy to follow along.
It says that this was very hard, but I would say that it's moderate.
Sim is working only for some time after this repair, any solutions pls, I even rebooted+reset to be sure, need help fast,