メインコンテンツにスキップ

Sony Xperia XA Back Camera Replacement

必要な工具と部品

  1. Sony Xperia XA Back Camera Replacement, Back Cover: 手順 1、 1の画像 1
    • Apply heat on the back surface of the phone.

    • Continue to heat the device as needed throughout the replacement process.

    • The device can get very hot, so be careful when handling it.

  2. Sony Xperia XA Back Camera Replacement: 手順 2、 1の画像 1
    • Stick the small suction cup on the bottom half of the back surface of the phone.

  3. Sony Xperia XA Back Camera Replacement: 手順 3、 3の画像 1 Sony Xperia XA Back Camera Replacement: 手順 3、 3の画像 2 Sony Xperia XA Back Camera Replacement: 手順 3、 3の画像 3
    • With the bottom of the device facing you, lift up on the suction cup handle.

    • Use the plastic opening tool around all sides to pry off the back cover.

  4. Sony Xperia XA Back Camera Replacement: 手順 4、 3の画像 1 Sony Xperia XA Back Camera Replacement: 手順 4、 3の画像 2 Sony Xperia XA Back Camera Replacement: 手順 4、 3の画像 3
    • Pull the back of the phone case away from the device.

    • You will hear popping sounds of glue being ripped from the phone.

    • You will hear the sound of the back unlatching from the device.

    • You will need to apply adhesive or glue along the device to have maximum seal in reassembly.

    • RAF antenna may be attached to the back cover upon removal.

  5. Sony Xperia XA Back Camera Replacement: 手順 5、 1の画像 1
    • Apply heat to the copper RAF antenna.

    • This step and the following step only apply if the RAF antenna does not come off when taking the back cover off.

  6. Sony Xperia XA Back Camera Replacement: 手順 6、 1の画像 1
    • Peel back the RAF antenna.

  7. Sony Xperia XA Back Camera Replacement, Motherboard: 手順 7、 2の画像 1 Sony Xperia XA Back Camera Replacement, Motherboard: 手順 7、 2の画像 2
    • Pry up the copper connector next to the battery with the plastic opening tool.

  8. Sony Xperia XA Back Camera Replacement: 手順 8、 2の画像 1 Sony Xperia XA Back Camera Replacement: 手順 8、 2の画像 2
    • Remove the five black 4mm screws with a Phillips #00 Screwdriver.

  9. Sony Xperia XA Back Camera Replacement: 手順 9、 3の画像 1 Sony Xperia XA Back Camera Replacement: 手順 9、 3の画像 2 Sony Xperia XA Back Camera Replacement: 手順 9、 3の画像 3
    • Pry up the black camera case with the plastic opening tool and then remove the case.

  10. Sony Xperia XA Back Camera Replacement: 手順 10、 2の画像 1 Sony Xperia XA Back Camera Replacement: 手順 10、 2の画像 2
    • Pop off the small connector on the right side of the motherboard with the plastic opening tool.

  11. Sony Xperia XA Back Camera Replacement: 手順 11、 2の画像 1 Sony Xperia XA Back Camera Replacement: 手順 11、 2の画像 2
    • Use the spudger to take off the connector in the top right of the motherboard.

  12. Sony Xperia XA Back Camera Replacement: 手順 12、 3の画像 1 Sony Xperia XA Back Camera Replacement: 手順 12、 3の画像 2 Sony Xperia XA Back Camera Replacement: 手順 12、 3の画像 3
    • Use the flat end of the spudger to peel up the copper tab to the right of the back camera.

    • Peel back the tab past the connector.

    • Tab is stuck with adhesive.

  13. Sony Xperia XA Back Camera Replacement: 手順 13、 3の画像 1 Sony Xperia XA Back Camera Replacement: 手順 13、 3の画像 2 Sony Xperia XA Back Camera Replacement: 手順 13、 3の画像 3
    • Pry up the camera's connector to the motherboard with the nylon spudger.

  14. Sony Xperia XA Back Camera Replacement: 手順 14、 2の画像 1 Sony Xperia XA Back Camera Replacement: 手順 14、 2の画像 2
    • Use the spudger to loosen the black connector from the top right of the motherboard.

  15. Sony Xperia XA Back Camera Replacement: 手順 15、 3の画像 1 Sony Xperia XA Back Camera Replacement: 手順 15、 3の画像 2 Sony Xperia XA Back Camera Replacement: 手順 15、 3の画像 3
    • Pull out the square shaped connector using tweezers.

  16. Sony Xperia XA Back Camera Replacement: 手順 16、 2の画像 1 Sony Xperia XA Back Camera Replacement: 手順 16、 2の画像 2
    • Use the spudger to detach the three copper connectors on the bottom area of the motherboard.

  17. Sony Xperia XA Back Camera Replacement: 手順 17、 3の画像 1 Sony Xperia XA Back Camera Replacement: 手順 17、 3の画像 2 Sony Xperia XA Back Camera Replacement: 手順 17、 3の画像 3
    • Use the spudger to separate the motherboard from the frame.

    • Pull out the motherboard using your fingers.

  18. Sony Xperia XA Back Camera Replacement, Back Camera: 手順 18、 2の画像 1 Sony Xperia XA Back Camera Replacement, Back Camera: 手順 18、 2の画像 2
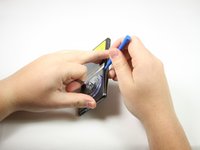
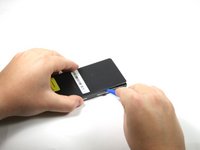
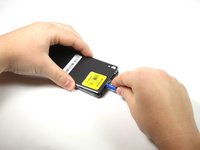
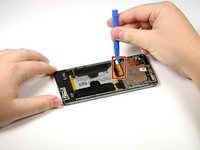
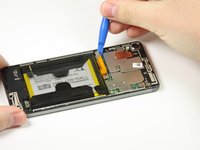
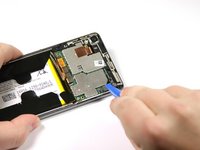
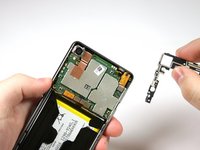
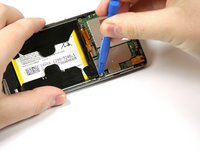
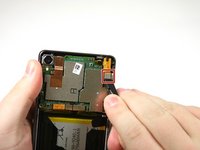
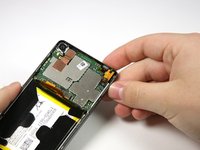
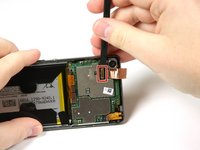
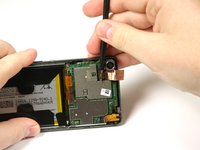
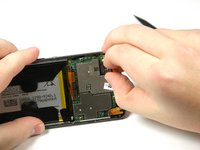
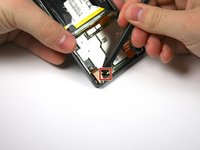
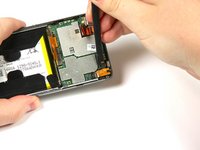
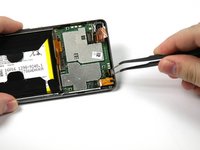
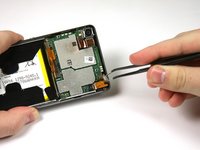
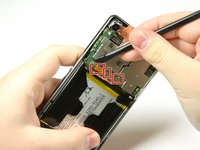
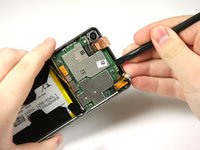
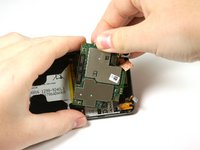
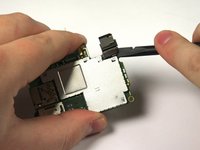
    • Use the nylon spudger to pry up the black camera connector from the motherboard.

    • The connector is attached with adhesive.

  19. Sony Xperia XA Back Camera Replacement: 手順 19、 1の画像 1
    • Use your fingers to gently pull the camera off the motherboard.

終わりに

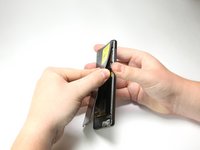
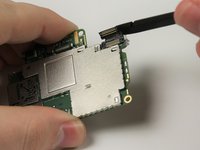
To reassemble your device, follow these instructions in reverse order.

ある他の人がこのガイドを完成しました。

作成者

2人の作成者と共同で作成されました。

Theresa Wilcoski

メンバー登録日: 04/18/18

325 ポイント

2のガイドは作成済み

チーム

Cal Poly, Team S17-G2, Livingston Spring 2018 Cal Poly, Team S17-G2, Livingston Spring 2018人のメンバー

CPSU-LIVINGSTON-S18S17G2

4 メンバー

8のガイドは作成済み

0 件のコメント

コメントを追加

統計データ:

過去 24時間: 1

過去 7 日: 2

過去 30 日: 6

今までの合計 814