メインコンテンツにスキップ

Sony Walkman WM-AF48 Headphone Jack Replacement

必要な工具と部品

  1. Sony Walkman WM-AF48 Headphone Jack Replacement, Getting started: 手順 1、 1の画像 1
    • Remove any batteries or cassettes from the Walkman.

  2. Sony Walkman WM-AF48 Headphone Jack Replacement, Remove the outer cover: 手順 2、 3の画像 1 Sony Walkman WM-AF48 Headphone Jack Replacement, Remove the outer cover: 手順 2、 3の画像 2 Sony Walkman WM-AF48 Headphone Jack Replacement, Remove the outer cover: 手順 2、 3の画像 3
    • Using a spudger, separate the back cover from the front.

    • Remove the back cover evenly on all sides. The best method is to insert the spudger and gently twist it slightly to separate the two parts, slowly working your way around the entire outer shell.

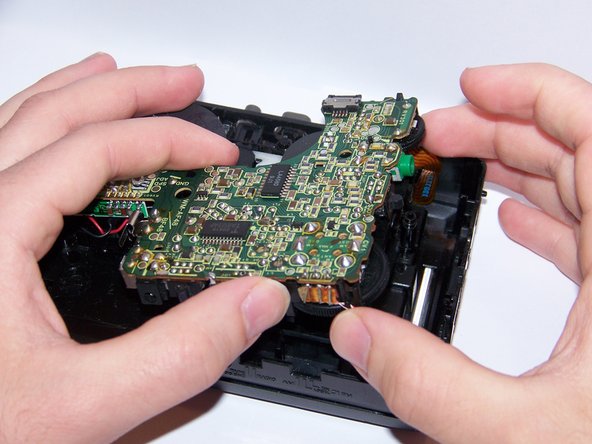
  3. Sony Walkman WM-AF48 Headphone Jack Replacement, Remove the motherboard: 手順 3、 2の画像 1 Sony Walkman WM-AF48 Headphone Jack Replacement, Remove the motherboard: 手順 3、 2の画像 2
    • Gently pull the ribbon from the jack just above the film revolver, near the edge.

    • Carefully lift the motherboard out of the outer shell.

    • Be careful to only handle the motherboard by the edges. Avoid touching the metal parts.

  4. Sony Walkman WM-AF48 Headphone Jack Replacement, Remove the headphone jack: 手順 4、 1の画像 1
    • Locate the four metal points on the motherboard that hold the headphone jack in place.

    • Using a soldering iron, remove the headphone jack by de-soldering the four points that hold it in place.

終わりに

To reassemble your device, follow these instructions in reverse order.

7 の人々がこのガイドを完成させました。

作成者

1人の作成者と共同作成されました。

Wilson Riforgiat

メンバー登録日: 09/11/14

924 ポイント

4のガイドは作成済み

チーム

USF Sarasota-Manatee, Team 1-4, Stewart Fall 2014 USF Sarasota-Manatee, Team 1-4, Stewart Fall 2014人のメンバー

USFSM-STEWART-F14S1G4

4 メンバー

19のガイドは作成済み

0 件のコメント

コメントを追加

統計データ:

過去 24時間: 1

過去 7 日: 4

過去 30 日: 25

今までの合計 5,516