メインコンテンツにスキップ

Sony Vaio Tap 21 SVT212A11L Screen Replacement

必要な工具と部品

  1. Sony Vaio Tap 21 SVT212A11L Screen Replacement, Screen: 手順 1、 2の画像 1 Sony Vaio Tap 21 SVT212A11L Screen Replacement, Screen: 手順 1、 2の画像 2
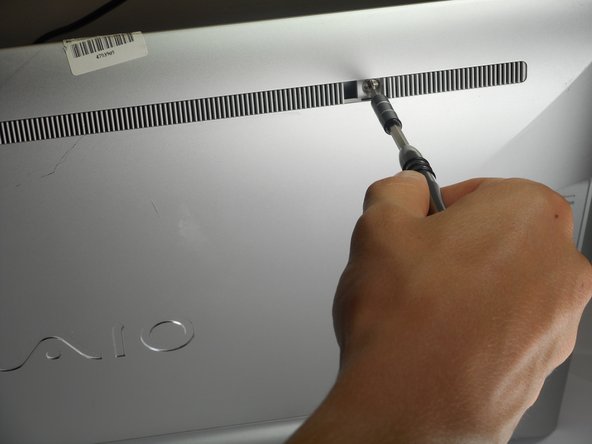
    • Insert the plastic opening tool at an angle into the grill and lift the tab by applying force down and to the left as you are lifting it out of place.

    • Use your plastic opening tool to remove the right plastic tab blocking the screw mounts behind the device.

    • The plastic tab is located on a plastic stretch of grill running along the upper half of the back of the device.

    • You can find the tab looking for a solid fill within the grill. The tab is solid within the slits.

  2. Sony Vaio Tap 21 SVT212A11L Screen Replacement: 手順 2、 2の画像 1 Sony Vaio Tap 21 SVT212A11L Screen Replacement: 手順 2、 2の画像 2
    • Insert the plastic opening tool at an angle into the grill and lift the tab by applying force down and to the left as you are lifting it out of place.

    • Use your plastic opening tool to remove the right plastic tab blocking the screw mounts behind the device.

    • The plastic tab is located on a plastic stretch of grill running along the upper half of the back of the device.

    • You can find the tab looking for a solid fill within the grill. The tab is solid within the slits.

  3. Sony Vaio Tap 21 SVT212A11L Screen Replacement: 手順 3、 3の画像 1 Sony Vaio Tap 21 SVT212A11L Screen Replacement: 手順 3、 3の画像 2 Sony Vaio Tap 21 SVT212A11L Screen Replacement: 手順 3、 3の画像 3
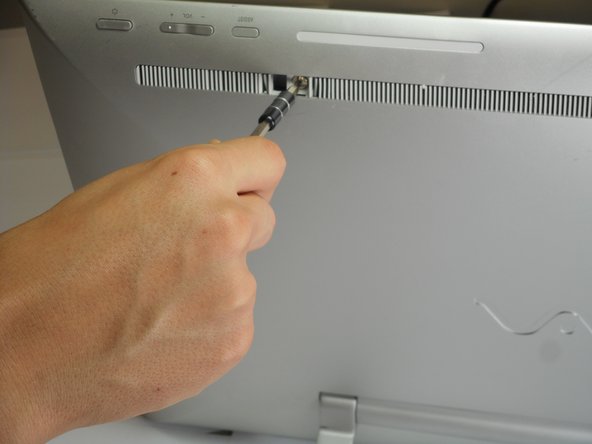
    • Remove the two 5mm screws on the back of the device using a JIS 0 screwdriver.

  4. Sony Vaio Tap 21 SVT212A11L Screen Replacement: 手順 4、 3の画像 1 Sony Vaio Tap 21 SVT212A11L Screen Replacement: 手順 4、 3の画像 2 Sony Vaio Tap 21 SVT212A11L Screen Replacement: 手順 4、 3の画像 3
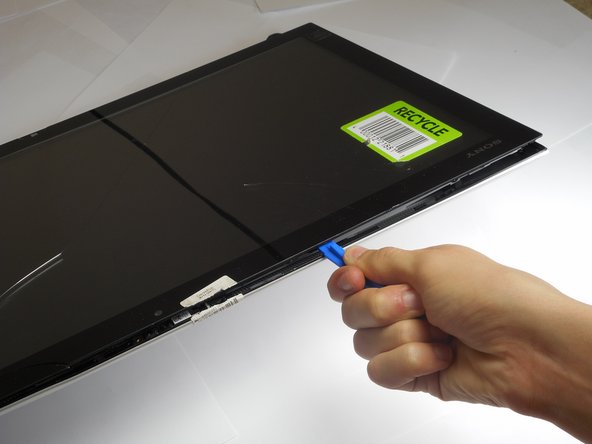
    • Face the screen of the device upwards.

    • Gently un-clip the screen around the four sides of the body with the plastic opening tool.

    • Use an up-down motion.

    • It would be easier to do this if the device is fully rested flat by pushing the device down. It should rest on the stand.

  5. Sony Vaio Tap 21 SVT212A11L Screen Replacement: 手順 5、 3の画像 1 Sony Vaio Tap 21 SVT212A11L Screen Replacement: 手順 5、 3の画像 2 Sony Vaio Tap 21 SVT212A11L Screen Replacement: 手順 5、 3の画像 3
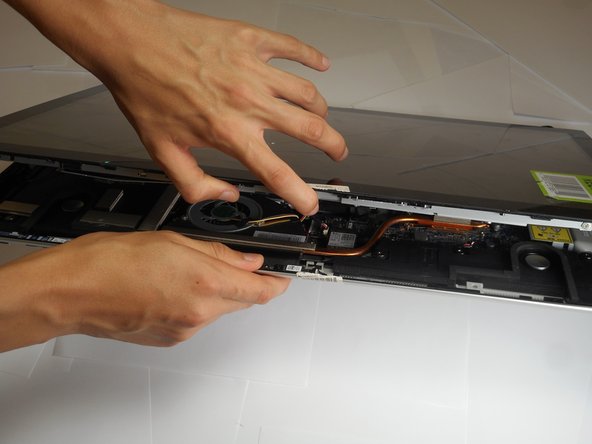
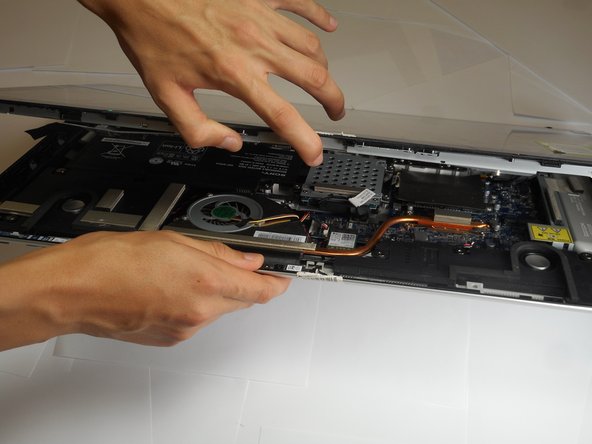
    • Lift the screen gently from the top of the device.

    • Make sure to lift the screen from the same side the screws were removed.

  6. Sony Vaio Tap 21 SVT212A11L Screen Replacement: 手順 6、 1の画像 1
    • Slowly and gently lay the screen on its face.

    • It's important that the cables are not damaged while doing this process. Ensure as you lay the screen on its face any cables are carefully moved insuring no stress is applied on the cables.

終わりに

To reassemble your device, follow these instructions in reverse order.

ある他の人がこのガイドを完成しました。

作成者

1人の作成者と共同作成されました。

Mauricio Retana

メンバー登録日: 10/02/17

763 ポイント

6のガイドは作成済み

チーム

Cal Poly, Team S4-G4, Livingston Fall 2017 Cal Poly, Team S4-G4, Livingston Fall 2017人のメンバー

CPSU-LIVINGSTON-F17S4G4

4 メンバー

12のガイドは作成済み

4 件のコメント

Where can I find a replacement screen for one of these Ive looked all over online

Bill Showers - 返信

Bill have you found a replacement screen? I just cracker mine. It still works, but would like to replace. Love this computer.

WENDY SPINELLI -

The title should be how to open Sony Vaio Tap 21 SVT212A11L  and not how to replace screen

fernandez600 - 返信

How can I get a screen for SVJ202A11L ?

VioPoss - 返信

コメントを追加

統計データ:

過去 24時間: 0

過去 7 日: 5

過去 30 日: 32

今までの合計 2,961