メインコンテンツにスキップ

Sony Vaio SVT151A11L USB Port Board Replacement

必要な工具と部品

  1. Sony Vaio SVT151A11L USB Port Board Replacement, Battery: 手順 1、 2の画像 1 Sony Vaio SVT151A11L USB Port Board Replacement, Battery: 手順 1、 2の画像 2
    • Flip the laptop over so that the battery on the underside of the device is revealed.

    • Unscrew the two 11mm slotted silver screws that can be found at the top of the battery.

  2. Sony Vaio SVT151A11L USB Port Board Replacement: 手順 2、 3の画像 1 Sony Vaio SVT151A11L USB Port Board Replacement: 手順 2、 3の画像 2 Sony Vaio SVT151A11L USB Port Board Replacement: 手順 2、 3の画像 3
    • Wedge the plastic opening tool between the back panel and the battery on the top left side of the device.

    • Push down on the plastic opening tool until the battery lifts from the back of the laptop.

    • Grab the battery and remove it from the device.

  3. Sony Vaio SVT151A11L USB Port Board Replacement, Back Panel: 手順 3、 3の画像 1 Sony Vaio SVT151A11L USB Port Board Replacement, Back Panel: 手順 3、 3の画像 2 Sony Vaio SVT151A11L USB Port Board Replacement, Back Panel: 手順 3、 3の画像 3
    • Unscrew the three 4mm screws using a JIS #0 screwdriver.

    • Unscrew the eight 7 mm screws using a JIS #0 screwdriver.

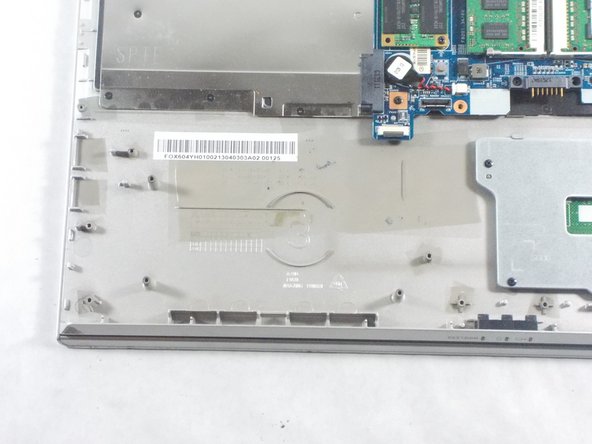
    • Grab and lift the edge of the panel to pull it free from the rest of the computer.

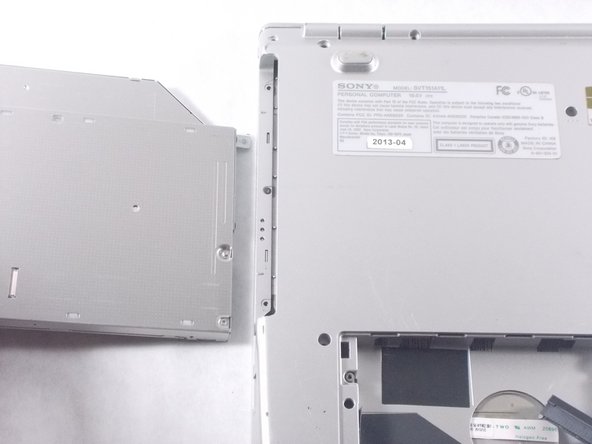
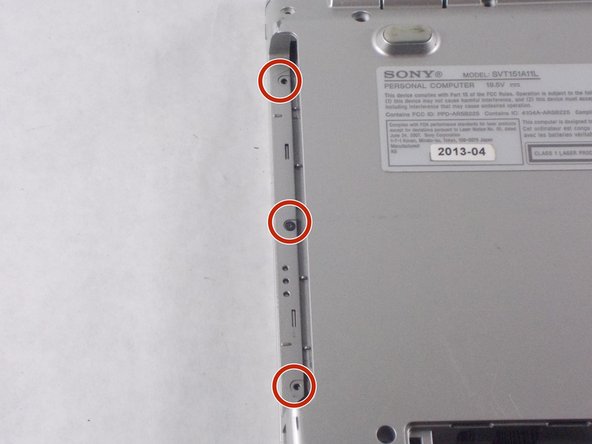
  4. Sony Vaio SVT151A11L USB Port Board Replacement: 手順 4、 3の画像 1 Sony Vaio SVT151A11L USB Port Board Replacement: 手順 4、 3の画像 2 Sony Vaio SVT151A11L USB Port Board Replacement: 手順 4、 3の画像 3
    • Grab the disk drive located at the edge of the computer and pull it it out.

    • Unscrew the three 7 mm screws with a JIS #0 screwdriver.

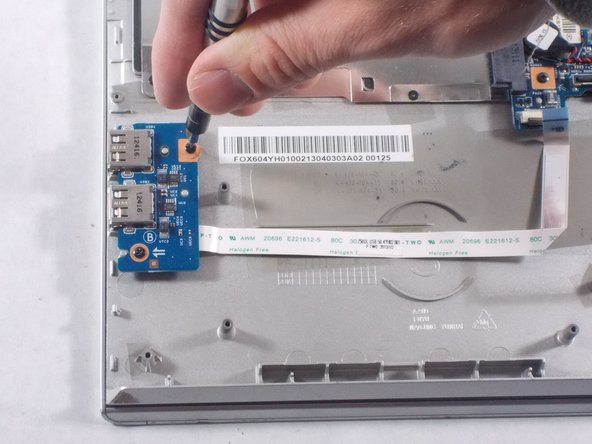
  5. Sony Vaio SVT151A11L USB Port Board Replacement, USB Port Board: 手順 5、 2の画像 1 Sony Vaio SVT151A11L USB Port Board Replacement, USB Port Board: 手順 5、 2の画像 2
    • Use a JIS #0 screwdriver to unscrew the two 4mm screws from the board.

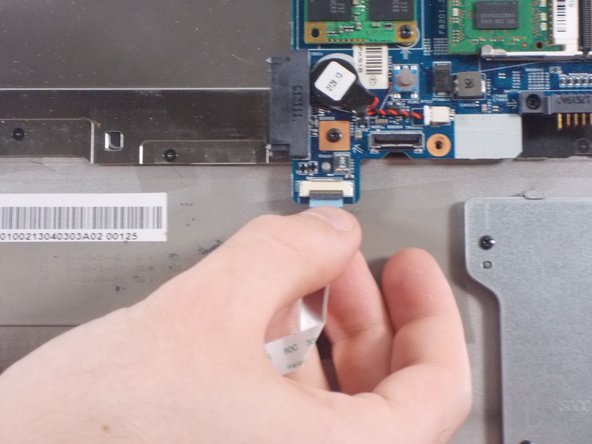
  6. Sony Vaio SVT151A11L USB Port Board Replacement: 手順 6、 3の画像 1 Sony Vaio SVT151A11L USB Port Board Replacement: 手順 6、 3の画像 2 Sony Vaio SVT151A11L USB Port Board Replacement: 手順 6、 3の画像 3
    • Lift board and peel the ribbon cable from the computer.

    • Lift and pull the end of the ribbon cable to remove it from the slot.

終わりに

To reassemble your device, follow these instructions in reverse order.

作成者

1人の作成者と共同作成されました。

Nathan McGarvey

メンバー登録日: 10/20/17

481 ポイント

4のガイドは作成済み

チーム

UMass Dartmouth, Team S4-G6, Julie Fall 2017 UMass Dartmouth, Team S4-G6, Julie Fall 2017人のメンバー

UMASSD-JULIE-F17S4G6

2 メンバー

12のガイドは作成済み

0 件のコメント

コメントを追加

統計データ:

過去 24時間: 0

過去 7 日: 2

過去 30 日: 25

今までの合計 1,037