メインコンテンツにスキップ

Sony Vaio PCG-F360 RAM Replacement

必要な工具と部品

  1. Sony Vaio PCG-F360 RAM Replacement, Battery: 手順 1、 1の画像 1
    • Position the laptop screen-side down as shown.

    • In this position the battery housing will be located on the right hand side.

  2. Sony Vaio PCG-F360 RAM Replacement: 手順 2、 1の画像 1
    • Lift the panel up and then out to gain access to the battery.

  3. Sony Vaio PCG-F360 RAM Replacement: 手順 3、 1の画像 1
    • Use the indentations to pull the old battery out.

  4. Sony Vaio PCG-F360 RAM Replacement: 手順 4、 1の画像 1
    • The battery is now removed and it is safe to move on to uninstalling other components.

  5. Sony Vaio PCG-F360 RAM Replacement, Keyboard: 手順 5、 3の画像 1 Sony Vaio PCG-F360 RAM Replacement, Keyboard: 手順 5、 3の画像 2 Sony Vaio PCG-F360 RAM Replacement, Keyboard: 手順 5、 3の画像 3
    • There are two screws on the left hand side of the laptop near the IR (Infared remote) receiver (see image). Remove them using a Phillips #00 Screwdriver.

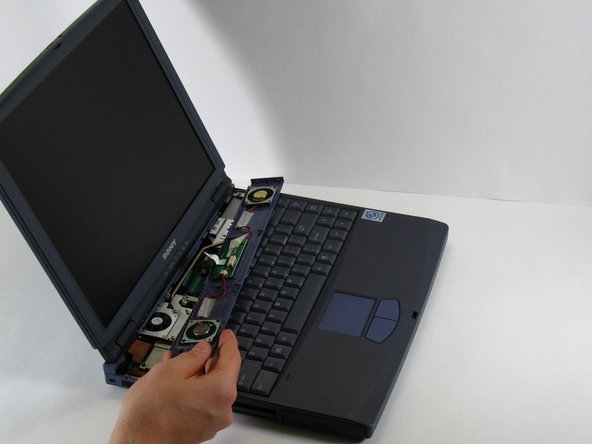
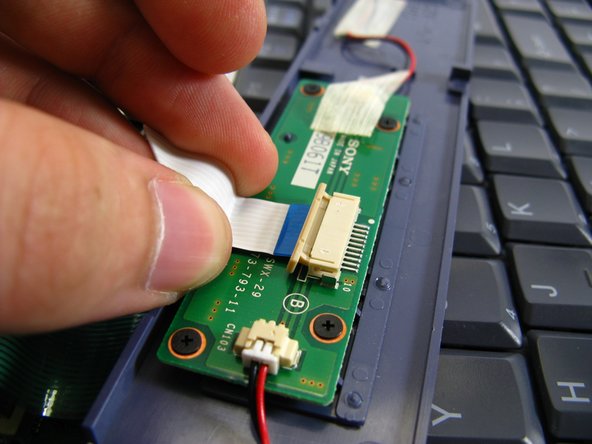
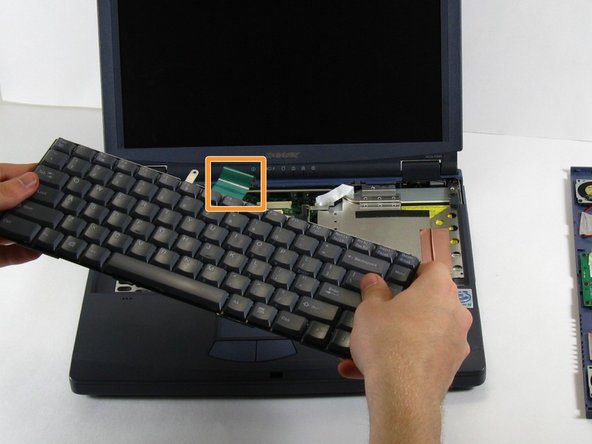
    • Slide the speaker panel towards the left, then carefully flip it over onto the keyboard.

    • Make sure not to pull the speaker panel away from the computer just yet - it is still connected!

  6. Sony Vaio PCG-F360 RAM Replacement: 手順 6、 3の画像 1 Sony Vaio PCG-F360 RAM Replacement: 手順 6、 3の画像 2 Sony Vaio PCG-F360 RAM Replacement: 手順 6、 3の画像 3
    • On the inside of the speaker panel, using a spudger, push the beige tab in the direction of the ribbon. It should only move a small amount.

    • Remove the ribbon by gently pulling on it, there should be little or no resistance.

    • Now the speaker panel can be set aside.

  7. Sony Vaio PCG-F360 RAM Replacement: 手順 7、 2の画像 1 Sony Vaio PCG-F360 RAM Replacement: 手順 7、 2の画像 2
    • Remove the metal screw that will be located at the red circle.

    • Pull on the green strip, and the keyboard should come free easily.

  8. Sony Vaio PCG-F360 RAM Replacement, RAM: 手順 8、 1の画像 1
    • Slide your RAM into the housing by aligning it with the plastic, tan colored, guides until it is firmly in place.

    • The computer in the picture only has the standard 64 MB of on-board RAM. This RAM is not removable from the motherboard, but additional RAM can be added.

終わりに

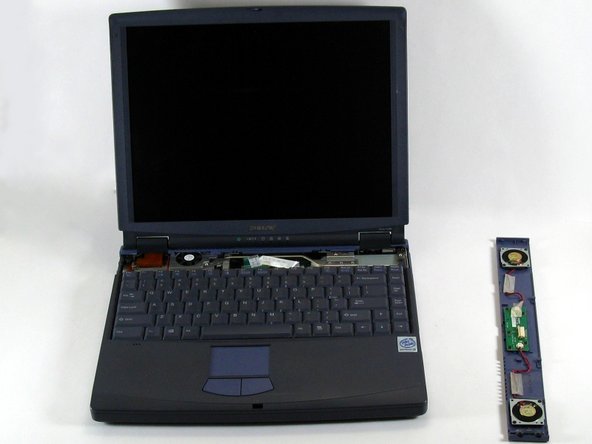
To reassemble your device, follow these instructions in reverse order.

作成者

7人の作成者と共同で作成されました。

ahintz

メンバー登録日: 04/21/10

28 ポイント

8のガイドは作成済み

チーム

Cal Poly, Team 16-3, Maness Spring 2010 Cal Poly, Team 16-3, Maness Spring 2010人のメンバー

CPSU-MANESS-S10S16G3

3 メンバー

8のガイドは作成済み

0 件のコメント

コメントを追加

統計データ:

過去 24時間: 0

過去 7 日: 4

過去 30 日: 16

今までの合計 1,684