メインコンテンツにスキップ

Sony Vaio PCG-61411L Hard Drive Replacement

必要な工具と部品

  1. Sony Vaio PCG-61411L Hard Drive Replacement, Battery: 手順 1、 3の画像 1 Sony Vaio PCG-61411L Hard Drive Replacement, Battery: 手順 1、 3の画像 2 Sony Vaio PCG-61411L Hard Drive Replacement, Battery: 手順 1、 3の画像 3
    • Be sure to disconnect the device charger and power down the device before beginning.

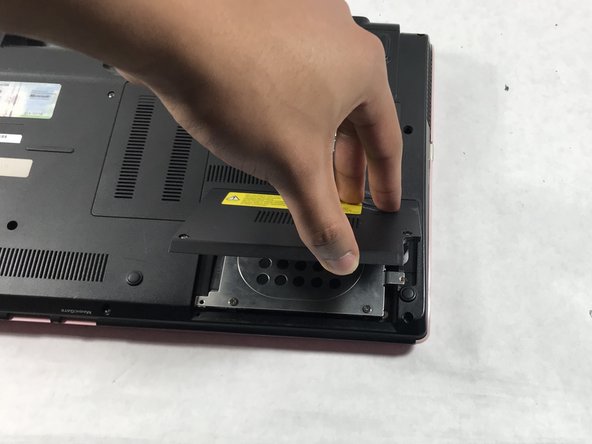
    • Turn the device over onto its back, where the battery is at the top of the device. Slide the "lock" switch to the right.

  2. Sony Vaio PCG-61411L Hard Drive Replacement: 手順 2、 3の画像 1 Sony Vaio PCG-61411L Hard Drive Replacement: 手順 2、 3の画像 2 Sony Vaio PCG-61411L Hard Drive Replacement: 手順 2、 3の画像 3
    • Slide the "release" switch to the left and gently lift the battery up to remove it.

    • Completely remove the battery from the device.

  3. Sony Vaio PCG-61411L Hard Drive Replacement, Hard Drive: 手順 3、 1の画像 1
    • The hard drive panel is located in the bottom right corner of the device.

  4. Sony Vaio PCG-61411L Hard Drive Replacement: 手順 4、 2の画像 1 Sony Vaio PCG-61411L Hard Drive Replacement: 手順 4、 2の画像 2
    • Using the PH #0 screwdriver, unscrew the two 6.5mm screws located in the bottom left and middle right of the panel. The screws remain in the panels.

    • Remove the panel by pulling it up towards yourself.

  5. Sony Vaio PCG-61411L Hard Drive Replacement: 手順 5、 3の画像 1 Sony Vaio PCG-61411L Hard Drive Replacement: 手順 5、 3の画像 2 Sony Vaio PCG-61411L Hard Drive Replacement: 手順 5、 3の画像 3
    • Using a PH0 screwdriver, remove the four 3mm silver screws located in the external hard drive cover.

    • Using a PH00 screwdriver, remove the final 3mm black screw located in the top right section of the hard drive cover.

    • Carefully remove the silver hard drive cover.

  6. Sony Vaio PCG-61411L Hard Drive Replacement: 手順 6、 3の画像 1 Sony Vaio PCG-61411L Hard Drive Replacement: 手順 6、 3の画像 2 Sony Vaio PCG-61411L Hard Drive Replacement: 手順 6、 3の画像 3
    • Detach the hard drive by disconnecting it from the motherboard, pulling it gently from left to right.

終わりに

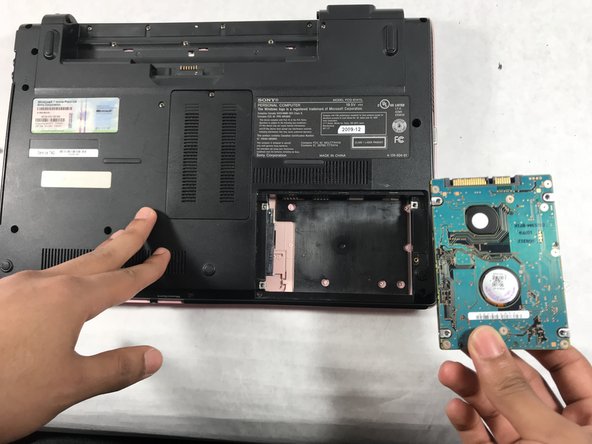
To reassemble your device, follow these instructions in reverse order.

ある他の人がこのガイドを完成しました。

作成者

1人の作成者と共同作成されました。

Sean Lyon

メンバー登録日: 03/01/18

381 ポイント

3のガイドは作成済み

チーム

UMass Dartmouth, Team S2-G1, Simcock Spring 2018 UMass Dartmouth, Team S2-G1, Simcock Spring 2018人のメンバー

UMASSD-SIMCOCK-S18S2G1

3 メンバー

5のガイドは作成済み

0 件のコメント

コメントを追加

統計データ:

過去 24時間: 0

過去 7 日: 5

過去 30 日: 16

今までの合計 1,583