メインコンテンツにスキップ

Sony Vaio PCG-4121GL Keyboard Replacement

必要な工具と部品

  1. Sony Vaio PCG-4121GL Keyboard Replacement, Battery: 手順 1、 2の画像 1 Sony Vaio PCG-4121GL Keyboard Replacement, Battery: 手順 1、 2の画像 2
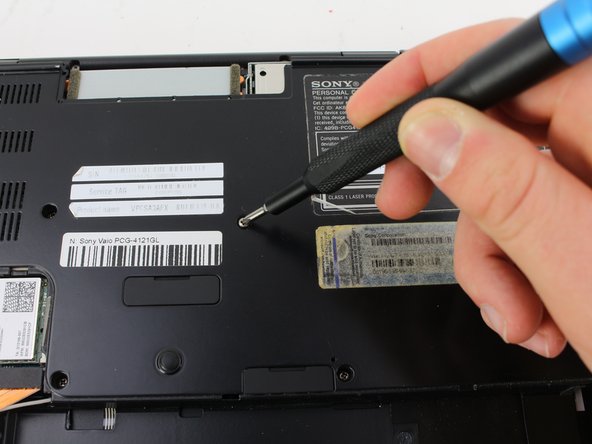
    • Remove the two 3mm Phillips #0 screws on the bottom of the computer that secure the plastic backing.

  2. Sony Vaio PCG-4121GL Keyboard Replacement: 手順 2、 3の画像 1 Sony Vaio PCG-4121GL Keyboard Replacement: 手順 2、 3の画像 2 Sony Vaio PCG-4121GL Keyboard Replacement: 手順 2、 3の画像 3
    • Pull the bottom plate towards yourself until it unhinges fully.

    • Once the plate is free from the backing remove it completely.

  3. Sony Vaio PCG-4121GL Keyboard Replacement: 手順 3、 1の画像 1
    • Look for the blue tab that is located to the bottom left of the battery.

  4. Sony Vaio PCG-4121GL Keyboard Replacement: 手順 4、 3の画像 1 Sony Vaio PCG-4121GL Keyboard Replacement: 手順 4、 3の画像 2 Sony Vaio PCG-4121GL Keyboard Replacement: 手順 4、 3の画像 3
    • Pull the blue tab towards yourself until you hear a click.

    • Once the blue tab is released, pull up on the battery.

    • Once the battery can move freely, take it out completely.

    • It may be helpful to have a spudger to make it easier to release the blue tab.

  5. Sony Vaio PCG-4121GL Keyboard Replacement, Keyboard: 手順 5、 2の画像 1 Sony Vaio PCG-4121GL Keyboard Replacement, Keyboard: 手順 5、 2の画像 2
    • Remove seven 3mm Phillips #0 screws from the bottom of the computer.

    • Remove eight 5mm Phillips #0 screws.

  6. Sony Vaio PCG-4121GL Keyboard Replacement: 手順 6、 3の画像 1 Sony Vaio PCG-4121GL Keyboard Replacement: 手順 6、 3の画像 2 Sony Vaio PCG-4121GL Keyboard Replacement: 手順 6、 3の画像 3
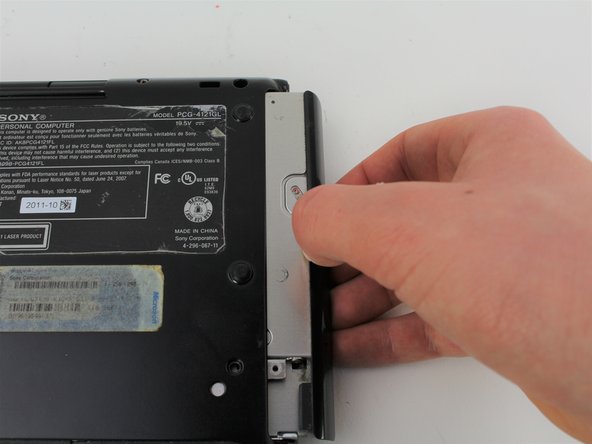
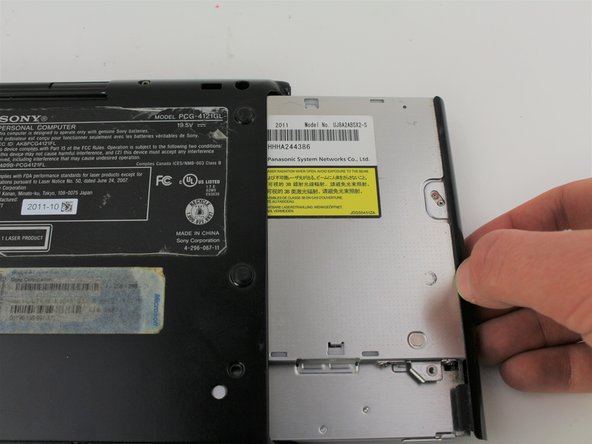
    • Carefully remove the disk drive from its compartment.

  7. Sony Vaio PCG-4121GL Keyboard Replacement: 手順 7、 2の画像 1 Sony Vaio PCG-4121GL Keyboard Replacement: 手順 7、 2の画像 2
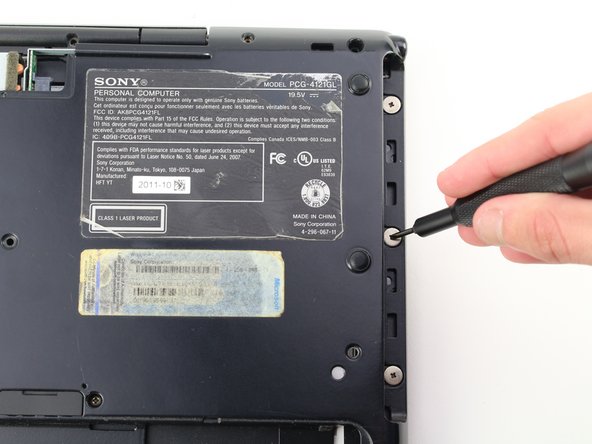
    • Remove the three 2mm Phillips #00 screws located on the top right edge.

  8. Sony Vaio PCG-4121GL Keyboard Replacement: 手順 8、 3の画像 1 Sony Vaio PCG-4121GL Keyboard Replacement: 手順 8、 3の画像 2 Sony Vaio PCG-4121GL Keyboard Replacement: 手順 8、 3の画像 3
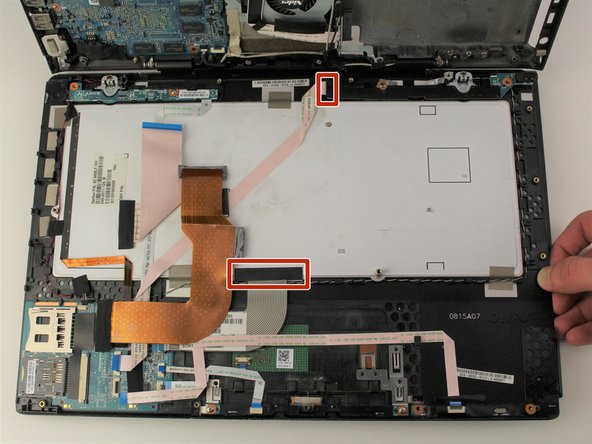
    • Gently pull apart the top and bottom plastic bodies.

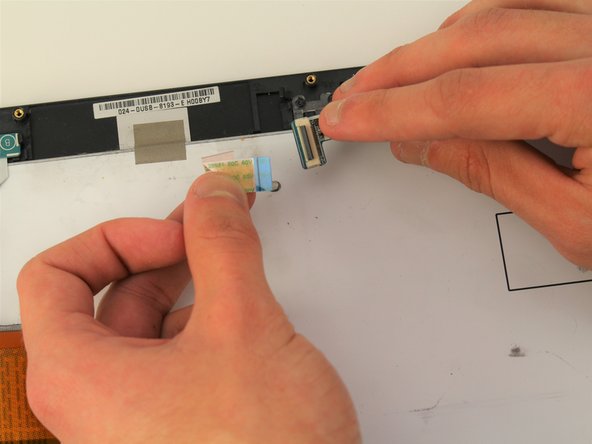
    • Carefully lift up tabs to detach cable connectors.

    • Slowly detach bottom component to avoid tearing wires/connectors.

  9. Sony Vaio PCG-4121GL Keyboard Replacement: 手順 9、 3の画像 1 Sony Vaio PCG-4121GL Keyboard Replacement: 手順 9、 3の画像 2 Sony Vaio PCG-4121GL Keyboard Replacement: 手順 9、 3の画像 3
    • Remove the tape strips along the edge of the keyboard.

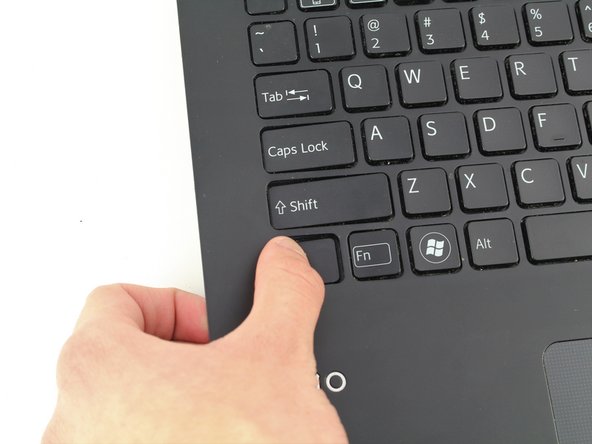
    • Once the keyboard is disconnected, slowly poke out keys one-by-one.

    • When the keyboard is free to move, remove it completely.

    • The keyboard is held in place with glue, once it is removed it is likely that it will not go back in the same way.

終わりに

To reassemble your device, follow these instructions in reverse order.

2 の人々がこのガイドを完成させました。

作成者

2人の作成者と共同で作成されました。

Miguel Camarena

メンバー登録日: 01/24/19

367 ポイント

3のガイドは作成済み

チーム

Cal Poly, Team S2-G2, White Winter 2019 Cal Poly, Team S2-G2, White Winter 2019人のメンバー

CPSU-WHITE-W19S2G2

4 メンバー

10のガイドは作成済み

コメント 1 件

Im having trouble putting the keyboard cables back

Ishaan Patel - 返信

コメントを追加

統計データ:

過去 24時間: 1

過去 7 日: 7

過去 30 日: 15

今までの合計 1,647