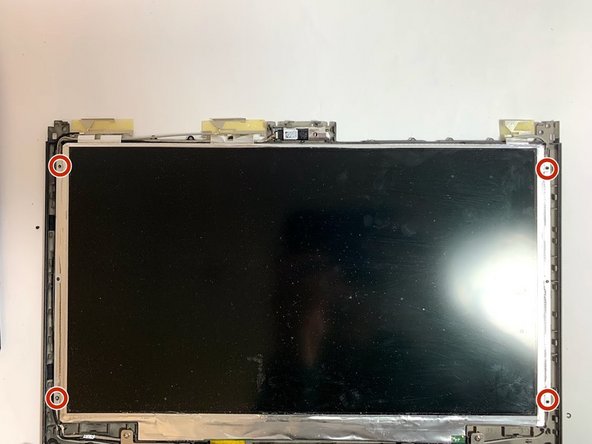
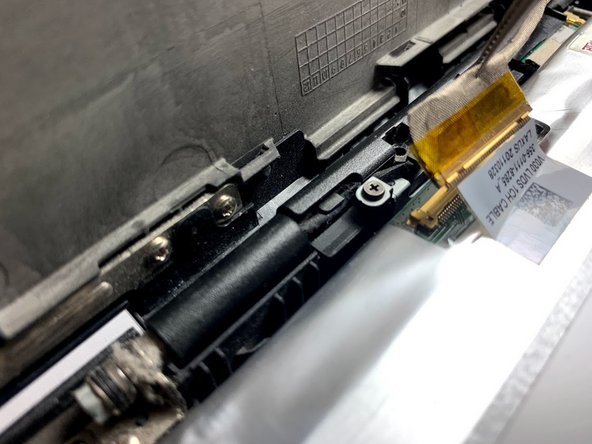
メインコンテンツにスキップ

Sony Vaio PCG-41216L Display Replacement

必要な工具と部品

  1. Sony Vaio PCG-41216L Display Replacement, Display: 手順 1、 2の画像 1 Sony Vaio PCG-41216L Display Replacement, Display: 手順 1、 2の画像 2
    • Remove the covers for the two 3mm Phillips head screws at the base of the screen.

    • Make sure the device is unplugged and turned off before proceeding to minimize the possibility of electrical damage to the device.

  2. Sony Vaio PCG-41216L Display Replacement: 手順 2、 3の画像 1 Sony Vaio PCG-41216L Display Replacement: 手順 2、 3の画像 2 Sony Vaio PCG-41216L Display Replacement: 手順 2、 3の画像 3
    • Use a metal spudger to separate the top cover on the back of the screen. It will be a long, thin plastic section that has the SONY logo in the middle of it. This enables the disassembly of the rest of the screen frame.

  3. Sony Vaio PCG-41216L Display Replacement: 手順 3、 2の画像 1 Sony Vaio PCG-41216L Display Replacement: 手順 3、 2の画像 2
    • Use the metal spudger on the sides of the frame to remove it from the screen.

    • Remove the four 3mm Phillips head screws that secure the screen to the exterior of the laptop.

  4. Sony Vaio PCG-41216L Display Replacement: 手順 4、 2の画像 1 Sony Vaio PCG-41216L Display Replacement: 手順 4、 2の画像 2
    • Carefully remove the screen from the supporting frame and lay it down on the keyboard of the laptop.

    • The wires connecting the screen to the body of the laptop will be exposed and fragile. It is important to proceed with caution.

  5. Sony Vaio PCG-41216L Display Replacement: 手順 5、 2の画像 1 Sony Vaio PCG-41216L Display Replacement: 手順 5、 2の画像 2
    • Locate the ribbon cable connecting the screen to the rest of the laptop.

    • It may be necessary to remove an adhesive seal in order to proceed.

  6. Sony Vaio PCG-41216L Display Replacement: 手順 6、 3の画像 1 Sony Vaio PCG-41216L Display Replacement: 手順 6、 3の画像 2 Sony Vaio PCG-41216L Display Replacement: 手順 6、 3の画像 3
    • Use a pair of tweezers to remove the ribbon cable from the screen.

終わりに

To reassemble your device, follow these instructions in reverse order.

ある他の人がこのガイドを完成しました。

作成者

3人の作成者と共同で作成されました。

Elmar Charoensaengsanga

メンバー登録日: 03/15/18

384 ポイント

2のガイドは作成済み

チーム

コメント 1 件

content de voir qu'il ne faut pas démonter l arrière du pc pour retirer la broche de l'écran merci pour ce topic

Serge Wilhelmy - 返信

コメントを追加

統計データ:

過去 24時間: 0

過去 7 日: 5

過去 30 日: 15

今までの合計 875