メインコンテンツにスキップ

Sony Vaio PCG-41216L Disk Drive Replacement

必要な工具と部品

  1. Sony Vaio PCG-41216L Disk Drive Replacement, Disk Drive: 手順 1、 2の画像 1 Sony Vaio PCG-41216L Disk Drive Replacement, Disk Drive: 手順 1、 2の画像 2
    • Flip the laptop over to begin the process.

    • Make sure the laptop is turned off and unplugged from the power cable.

  2. Sony Vaio PCG-41216L Disk Drive Replacement: 手順 2、 2の画像 1 Sony Vaio PCG-41216L Disk Drive Replacement: 手順 2、 2の画像 2
    • Remove the two 7mm Phillips #1 screws which hold the disk drive in place.

  3. Sony Vaio PCG-41216L Disk Drive Replacement: 手順 3、 2の画像 1 Sony Vaio PCG-41216L Disk Drive Replacement: 手順 3、 2の画像 2
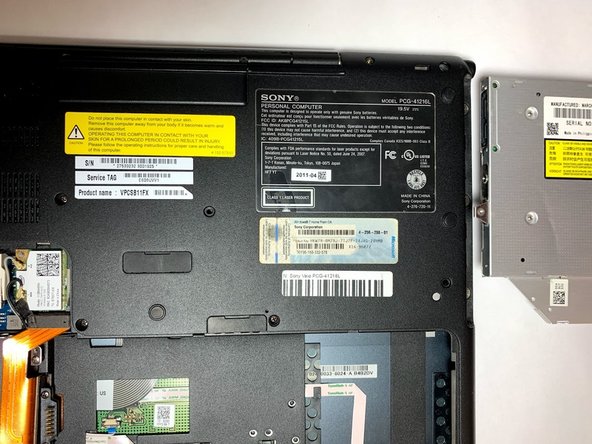
    • Carefully remove the disk drive by gripping the disk drive by the edges and pulling it out of the computer. Insert the replacement unit in the same orientation and reassemble the unit.

終わりに

To reassemble your device, follow these instructions in reverse order.

作成者

3人の作成者と共同で作成されました。

Aaron B

メンバー登録日: 01/10/19

220 ポイント

2のガイドは作成済み

チーム

0 件のコメント

コメントを追加

統計データ:

過去 24時間: 0

過去 7 日: 4

過去 30 日: 12

今までの合計 557