メインコンテンツにスキップ

Sony Vaio PCG-161L Hard Drive Replacement

必要な工具と部品

  1. Sony Vaio PCG-161L Hard Drive Replacement, Keyboard: 手順 1、 1の画像 1
    • Turn your device upside down and remove the 6 10mm screws attaching the back casing to the device using a phillips head screwdriver.

  2. Sony Vaio PCG-161L Hard Drive Replacement: 手順 2、 2の画像 1 Sony Vaio PCG-161L Hard Drive Replacement: 手順 2、 2の画像 2
    • Lift up underneath the keyboard using the iFixit opening tool to expose the ribbon wires connecting the keyboard to the motherboard.

  3. Sony Vaio PCG-161L Hard Drive Replacement: 手順 3、 2の画像 1 Sony Vaio PCG-161L Hard Drive Replacement: 手順 3、 2の画像 2
    • The two ribbon cables connecting the keyboard to the motherboard are held in using zero insertion force (ZIF) connectors.

    • Use a plastic opening tool or your fingernail to flip up the small retaining flaps, then pull the ribbon cables out of their connectors.

  4. Sony Vaio PCG-161L Hard Drive Replacement, Hard Drive: 手順 4、 1の画像 1
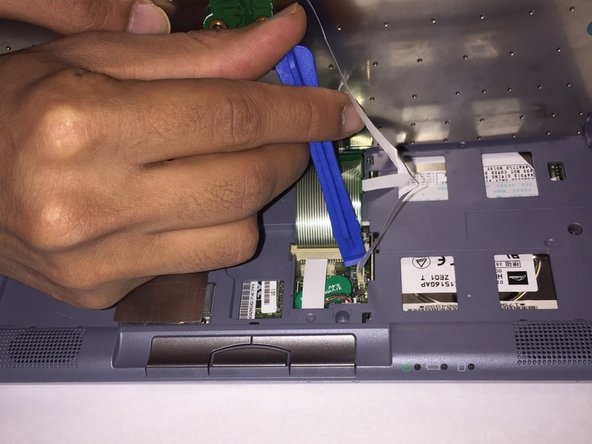
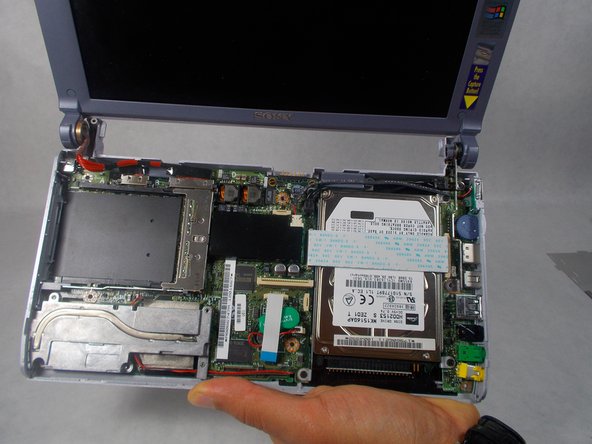
    • Remove the three 10 mm screws holding the casing to the top of the motherboard using a Phillips screwdriver.

  5. Sony Vaio PCG-161L Hard Drive Replacement: 手順 5、 1の画像 1
    • Remove the 6 mm screw on the left side of the battery that holds the casing to the device using a phillips head screwdriver.

  6. Sony Vaio PCG-161L Hard Drive Replacement: 手順 6、 1の画像 1
    • Turn the device upside down and remove the other 6 mm screw holding the casing to the device using a phillips head screwdriver.

  7. Sony Vaio PCG-161L Hard Drive Replacement: 手順 7、 2の画像 1 Sony Vaio PCG-161L Hard Drive Replacement: 手順 7、 2の画像 2
    • Remove the top casing by lifting up on the plastic.

    • There are no longer any wires connecting the casing to the motherboard. The casing can be fully removed and put to the side.

  8. Sony Vaio PCG-161L Hard Drive Replacement: 手順 8、 1の画像 1
    • The ribbon cable covering the hard drive and connecting to the motherboard is held in using zero insertion force (ZIF) connector.

    • Use the tip of a spudger or your fingernail to flip up the small retaining flaps, then pull the ribbon cable out.

  9. Sony Vaio PCG-161L Hard Drive Replacement: 手順 9、 1の画像 1
    • Remove the four 5 mm screws holding the hard drive to the motherboard.

  10. Sony Vaio PCG-161L Hard Drive Replacement: 手順 10、 1の画像 1
    • Remove the ribbon cable connecting the motherboard to the hard drive by pulling the female connector off of the pins attached the hard drive.

終わりに

To reassemble your device, follow these instructions in reverse order.

ある他の人がこのガイドを完成しました。

作成者

2人の作成者と共同で作成されました。

Roman Alshehri

メンバー登録日: 03/08/17

407 ポイント

4のガイドは作成済み

チーム

UMass Dartmouth, Team S3-G2, Botvin Spring 2017 UMass Dartmouth, Team S3-G2, Botvin Spring 2017人のメンバー

UMASSD-BOTVIN-S17S3G2

3 メンバー

8のガイドは作成済み

0 件のコメント

コメントを追加

統計データ:

過去 24時間: 0

過去 7 日: 0

過去 30 日: 25

今までの合計 992