メインコンテンツにスキップ

Sony VAIO SVE14AJ16L RAM Replacement

必要な工具と部品

  1. Sony VAIO SVE14AJ16L RAM Replacement, RAM: 手順 1、 1の画像 1
    • Turn your laptop off before starting.

    • Turn the laptop upside down onto the closed lid so that the bottom is facing you.

  2. Sony VAIO SVE14AJ16L RAM Replacement: 手順 2、 2の画像 1 Sony VAIO SVE14AJ16L RAM Replacement: 手順 2、 2の画像 2
    • Locate and remove the lone screw on the RAM cover with a Phillips #0 head screw driver.

    • Carefully pry the RAM cover up.

    • There will be some resistance, so use strength and not speed to remove the cover.

  3. Sony VAIO SVE14AJ16L RAM Replacement: 手順 3、 3の画像 1 Sony VAIO SVE14AJ16L RAM Replacement: 手順 3、 3の画像 2 Sony VAIO SVE14AJ16L RAM Replacement: 手順 3、 3の画像 3
    この手順で使用する道具:
    iFixit Opening Tool
    $1.99
    購入する
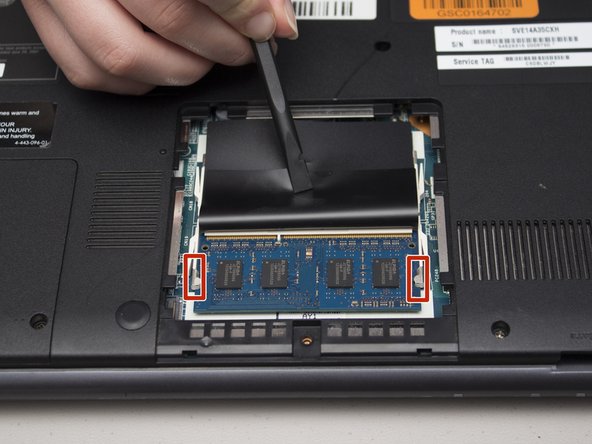
    • With the cover removed, peel back the black protective plastic to expose one of the two RAM sticks.

    • Make sure not to touch any part of the blue board itself, and only handle the stick from it's edges.

    • Gently, but firmly push back the two side anchors that hold in the RAM using either an iFixit Opening Tool or your fingernails.

  4. Sony VAIO SVE14AJ16L RAM Replacement: 手順 4、 2の画像 1 Sony VAIO SVE14AJ16L RAM Replacement: 手順 4、 2の画像 2
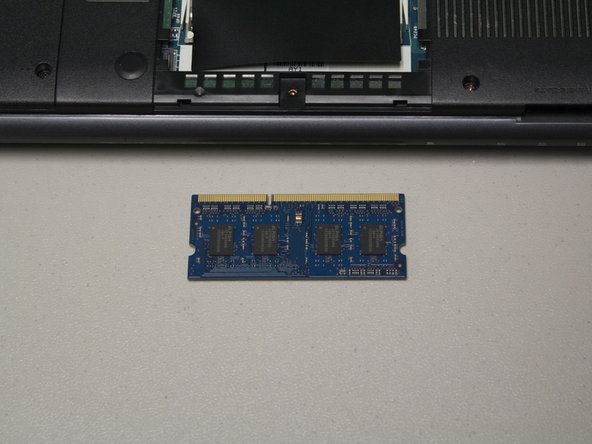
    • Once both anchors are released from the RAM stick, the stick will spring up at an angle

    • Finally, carefully pull the RAM stick away from the laptop at the same angle it is sitting at.

終わりに

To reassemble your device, follow these instructions in reverse order.

作成者

2人の作成者と共同で作成されました。

Dustin Smith

メンバー登録日: 09/21/18

236 ポイント

2のガイドは作成済み

チーム

University of North Texas, Team S1-G6, Riccardelli Fall 2018 University of North Texas, Team S1-G6, Riccardelli Fall 2018人のメンバー

UNT-RICCARDELLI-F18S1G6

4 メンバー

10のガイドは作成済み

0 件のコメント

コメントを追加

統計データ:

過去 24時間: 1

過去 7 日: 1

過去 30 日: 2

今までの合計 533