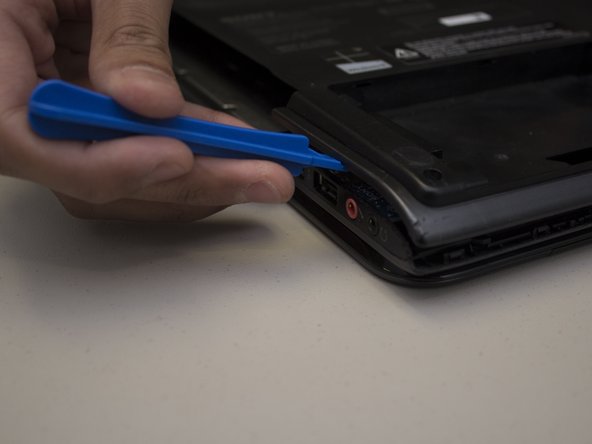
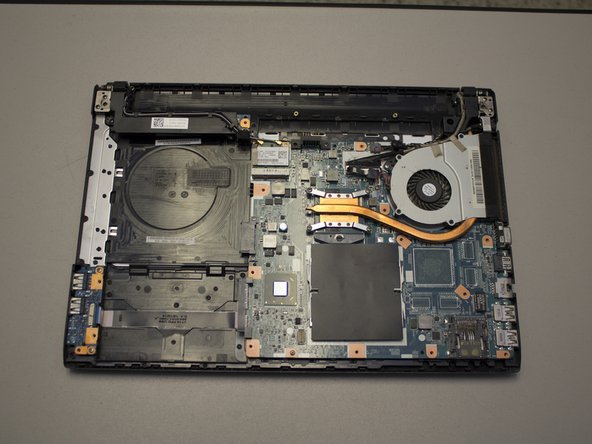
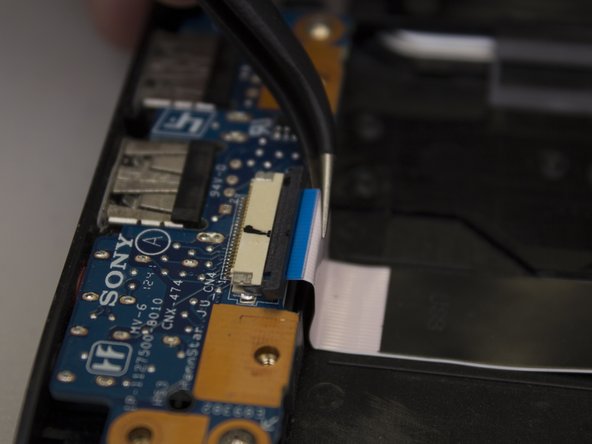
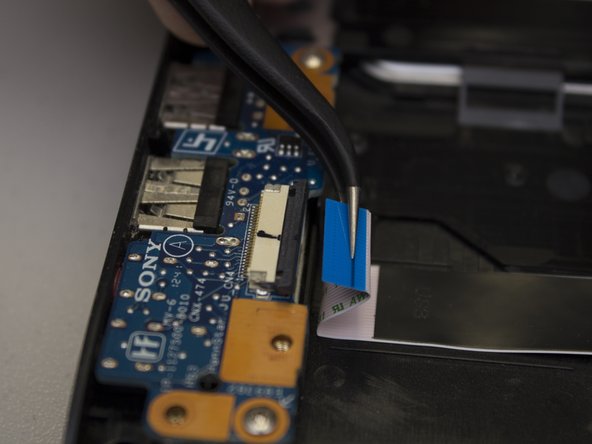
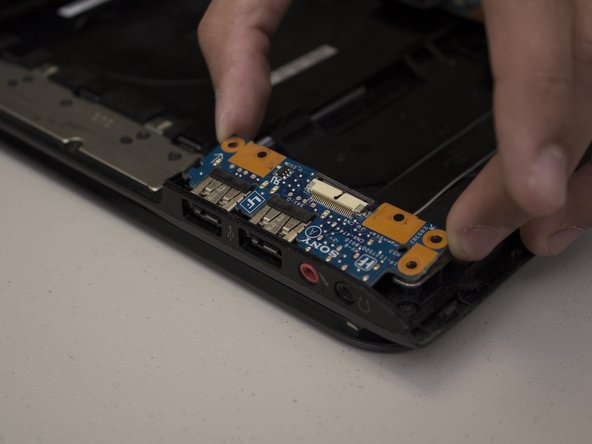
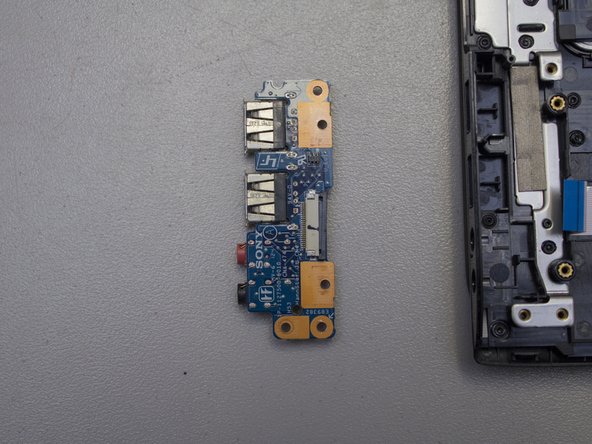
メインコンテンツにスキップ

Sony VAIO SVE14AJ16L I/O Card Replacement

必要な工具と部品

  1. Sony VAIO SVE14AJ16L I/O Card Replacement, I/O Card: 手順 1、 1の画像 1
    • Flip the laptop so the bottom is facing you.

  2. Sony VAIO SVE14AJ16L I/O Card Replacement: 手順 2、 2の画像 1 Sony VAIO SVE14AJ16L I/O Card Replacement: 手順 2、 2の画像 2
    • Remove the battery, hard drive cover, and RAM cover.

    • Unscrew the two Phillips screws to remove the hard drive from the computer

    • If you're unsure how to remove the covers for the hard drive, battery, and RAM, refer to the guides on replacing these components.

  3. Sony VAIO SVE14AJ16L I/O Card Replacement: 手順 3、 3の画像 1 Sony VAIO SVE14AJ16L I/O Card Replacement: 手順 3、 3の画像 2 Sony VAIO SVE14AJ16L I/O Card Replacement: 手順 3、 3の画像 3
    この手順で使用する道具:
    Magnetic Project Mat
    $19.95
    購入する
    • Remove the 13 Phillips #0 screws.

    • Make sure you have an organization system to remember which screws go where, as the majority are different sizes! The iFixit Magnetic Project Mat is an awesome tool for this exact reason!

    • Carefully pry apart the clipped-on bottom panel of the laptop to expose the internals using the iFixit opening tool.

  4. Sony VAIO SVE14AJ16L I/O Card Replacement: 手順 4、 1の画像 1
    • Locate the I/O card in the bottom left hand corner (or upper right hand corner depending on which direction you have the laptop) of the case.

  5. Sony VAIO SVE14AJ16L I/O Card Replacement: 手順 5、 3の画像 1 Sony VAIO SVE14AJ16L I/O Card Replacement: 手順 5、 3の画像 2 Sony VAIO SVE14AJ16L I/O Card Replacement: 手順 5、 3の画像 3
    この手順で使用する道具:
    Tweezers
    $4.99
    購入する
    • Carefully slide the black retainer bar towards the ribbon cable with a nylon supdger until parallel.

    • Carefully pull the ribbon cable out of its socket with a pair of tweezers.

  6. Sony VAIO SVE14AJ16L I/O Card Replacement: 手順 6、 3の画像 1 Sony VAIO SVE14AJ16L I/O Card Replacement: 手順 6、 3の画像 2 Sony VAIO SVE14AJ16L I/O Card Replacement: 手順 6、 3の画像 3
    • Remove the two screws on the corners of the I/O card using a Phillips #0 screwdriver.

    • Lift the edge of the card up and away from the laptop, then pull it away from the side ports.

終わりに

To put Humpty Dumpty together again, follow these instructions in the reverse order.

作成者

4人の作成者と共同で作成されました。

Carlos Landa

メンバー登録日: 09/28/18

219 ポイント

1ガイドが承認済み

チーム

University of North Texas, Team S1-G6, Riccardelli Fall 2018 University of North Texas, Team S1-G6, Riccardelli Fall 2018人のメンバー

UNT-RICCARDELLI-F18S1G6

4 メンバー

10のガイドは作成済み

0 件のコメント

コメントを追加

統計データ:

過去 24時間: 0

過去 7 日: 4

過去 30 日: 10

今までの合計 266