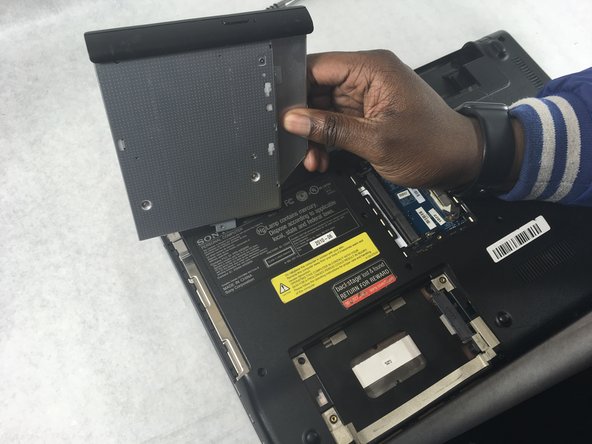
メインコンテンツにスキップ

Sony VAIO VPCEE26FX Optical Drive Replacement

必要な工具と部品

  1. Sony VAIO VPCEE26FX Optical Drive Replacement, Battery: 手順 1、 2の画像 1 Sony VAIO VPCEE26FX Optical Drive Replacement, Battery: 手順 1、 2の画像 2
    • Ensure that the laptop is powered off before disconnecting the battery.

    • Flip the laptop over so the underside of the laptop is facing up.

  2. Sony VAIO VPCEE26FX Optical Drive Replacement: 手順 2、 2の画像 1 Sony VAIO VPCEE26FX Optical Drive Replacement: 手順 2、 2の画像 2
    • Slide the two tabs towards each other until the battery disconnects slightly from its position.

    • Carefully lift the battery out of its position away from the laptop.

    • The battery is not pictured here, since it is missing from this particular device.

  3. Sony VAIO VPCEE26FX Optical Drive Replacement, Optical Drive: 手順 3、 1の画像 1
    • Use a JIS #0 screwdriver to remove the 4mm screw from its place.

  4. Sony VAIO VPCEE26FX Optical Drive Replacement: 手順 4、 2の画像 1 Sony VAIO VPCEE26FX Optical Drive Replacement: 手順 4、 2の画像 2
    • Remove the optical drive gently away from its holder on the laptop.

終わりに

To reassemble your device, follow these instructions in reverse order.

作成者

2人の作成者と共同で作成されました。

Christopher Hover

メンバー登録日: 03/21/19

679 ポイント

5のガイドは作成済み

チーム

UMass Dartmouth, Team S2-G3, Bailey Spring 2019 UMass Dartmouth, Team S2-G3, Bailey Spring 2019人のメンバー

UMASSD-BAILEY-S19S2G3

3 メンバー

10のガイドは作成済み

0 件のコメント

コメントを追加

統計データ:

過去 24時間: 0

過去 7 日: 2

過去 30 日: 7

今までの合計 436