メインコンテンツにスキップ

Sony UBP-UX80 Front Cover Replacement

必要な工具と部品

  1. Sony UBP-UX80 Front Cover Replacement, Top Cover: 手順 1、 3の画像 1 Sony UBP-UX80 Front Cover Replacement, Top Cover: 手順 1、 3の画像 2 Sony UBP-UX80 Front Cover Replacement, Top Cover: 手順 1、 3の画像 3
    • Use a Phillips #2 screwdriver to remove the two 10.5 mm screws that secure the two side panels onto the back of the player.

    • Slide both covers back about a 1/2 inch, then pull them away from the case.

  2. Sony UBP-UX80 Front Cover Replacement: 手順 2、 3の画像 1 Sony UBP-UX80 Front Cover Replacement: 手順 2、 3の画像 2 Sony UBP-UX80 Front Cover Replacement: 手順 2、 3の画像 3
    • Use a Phillips #2 screwdriver to remove the two 10.5 mm screws on the side of the case, each connecting to a tab on the cover.

    • Similar to the previous step, it is identical cases on both sides of the device.

    • Use a Phillips #2 screwdriver to remove the two 10.5 mm screws (one next to the Wi-Fi logo and one next to the Blu-ray logo).

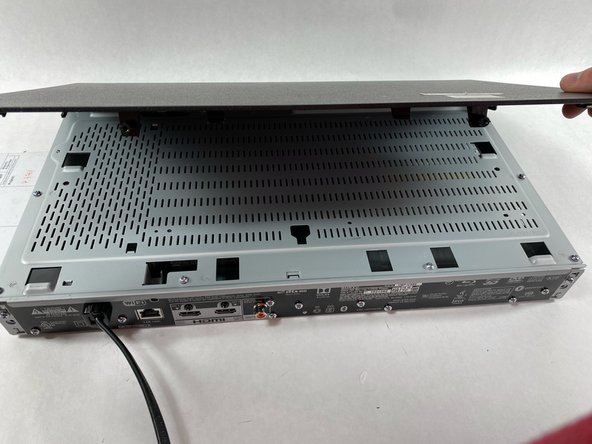
  3. Sony UBP-UX80 Front Cover Replacement: 手順 3、 2の画像 1 Sony UBP-UX80 Front Cover Replacement: 手順 3、 2の画像 2
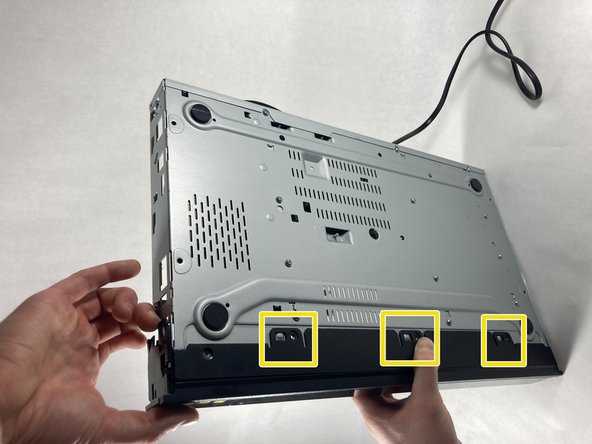
    • Press in the tabs found on the front-sides of the case (connected to the front panel).

    • Slide the top cover forward.

    • Lift off the case.

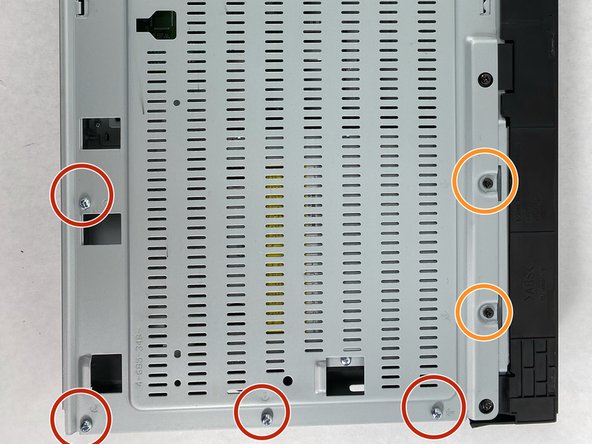
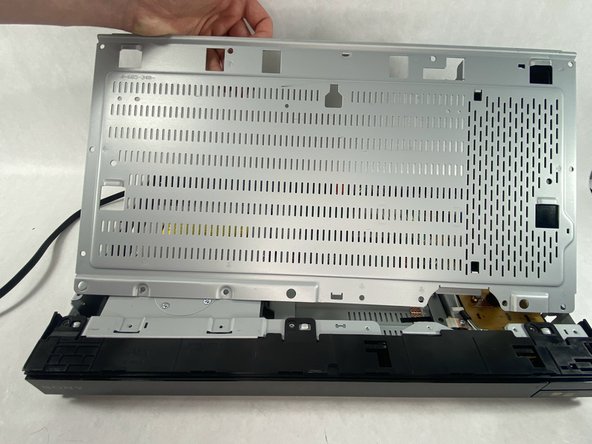
  4. Sony UBP-UX80 Front Cover Replacement: 手順 4、 3の画像 1 Sony UBP-UX80 Front Cover Replacement: 手順 4、 3の画像 2 Sony UBP-UX80 Front Cover Replacement: 手順 4、 3の画像 3
    • Find the eleven 10.5 mm silver screws and two 6 mm black screws on the perimeter of the silver cover plate.

    • Remove the silver screws using a Phillips #2 screwdriver and the black ones using a Phillips #1 screwdriver.

    • Life the back of the cover up and off of the chasis.

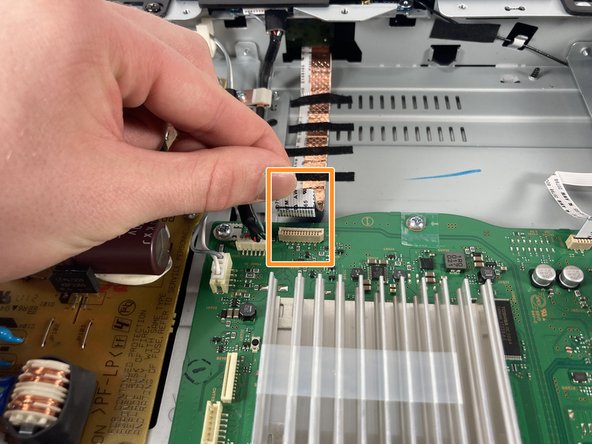
  5. Sony UBP-UX80 Front Cover Replacement, Front Cover: 手順 5、 3の画像 1 Sony UBP-UX80 Front Cover Replacement, Front Cover: 手順 5、 3の画像 2 Sony UBP-UX80 Front Cover Replacement, Front Cover: 手順 5、 3の画像 3
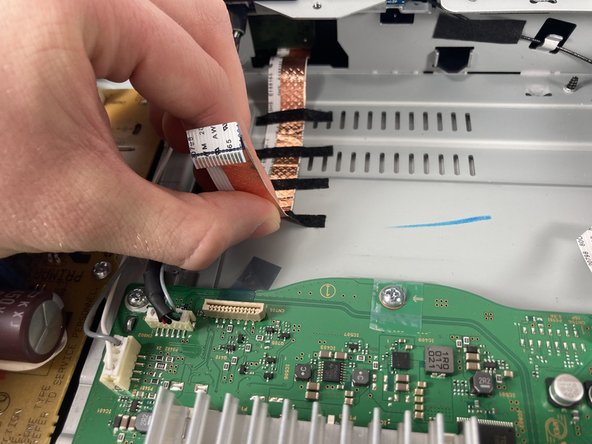
    • Toward the panel there is a ribbon cable with 4 small black pieces of tape holding it down

    • Pull directly up on the ribbon cable to disconnect it from the motherboard

    • Gently pull the cable back away from the motherboard pulling the tape off with it

  6. Sony UBP-UX80 Front Cover Replacement: 手順 6、 1の画像 1
    • Once all pieces of tape have been pulled up, the ribbon cable should look like this.

  7. Sony UBP-UX80 Front Cover Replacement: 手順 7、 2の画像 1 Sony UBP-UX80 Front Cover Replacement: 手順 7、 2の画像 2
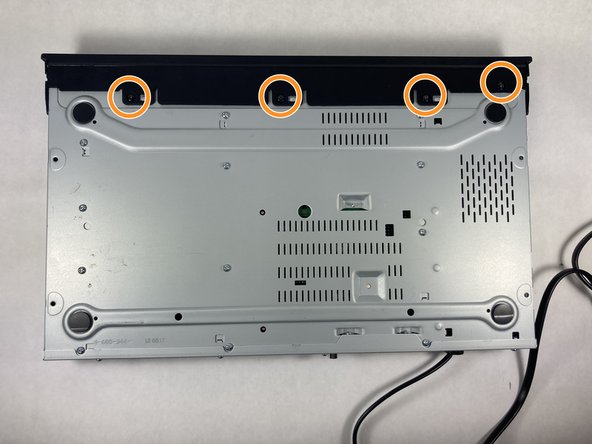
    • There are screws on every side of the front panel holding it in. Use a #2 Phillips head screwdriver to remove the nine screws.

    • Unscrew the three 10.5 mm long ph #2 screws on the top.

    • Unscrew the four 10.5 mm long ph #2 screws on the bottom.

  8. Sony UBP-UX80 Front Cover Replacement: 手順 8、 2の画像 1 Sony UBP-UX80 Front Cover Replacement: 手順 8、 2の画像 2
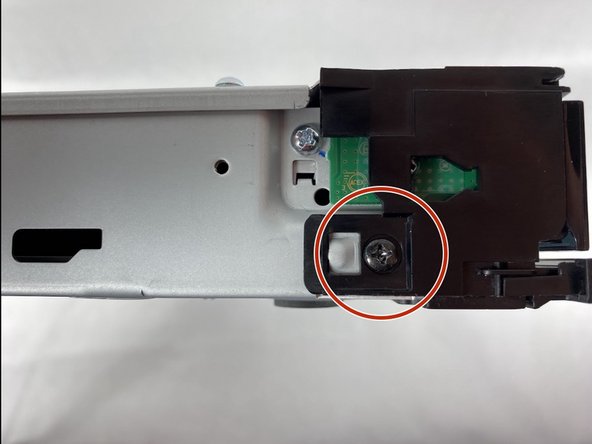
    • Use a Phillips #2 screwdriver to remove the 10.5 mm screws, one on each side of the device.

  9. Sony UBP-UX80 Front Cover Replacement: 手順 9、 3の画像 1 Sony UBP-UX80 Front Cover Replacement: 手順 9、 3の画像 2 Sony UBP-UX80 Front Cover Replacement: 手順 9、 3の画像 3
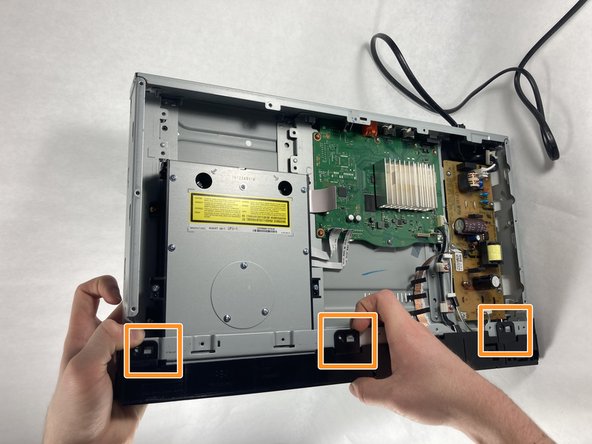
    • Lift tab on the left side of the device

    • Work your way right, lifting the next tabs. One on the bottom and one the Top

    • Continue working the tabs on the top and bottom, keeping them from snapping back in place.

  10. Sony UBP-UX80 Front Cover Replacement: 手順 10、 1の画像 1
    • Once all tabs are disconnected, pull the front panel forward to fully disconnect it

終わりに

To reassemble your device, follow these instructions in reverse order.

作成者

2人の作成者と共同で作成されました。

Nate Picard

メンバー登録日: 03/13/23

349 ポイント

3のガイドは作成済み

チーム

UMass Dartmouth, Team 2-5, Petersen Spring 2023 UMass Dartmouth, Team 2-5, Petersen Spring 2023人のメンバー

UMASSD-PETERSEN-S23S2G5

4 メンバー

8のガイドは作成済み

0 件のコメント

コメントを追加

統計データ:

過去 24時間: 0

過去 7 日: 4

過去 30 日: 15

今までの合計 79