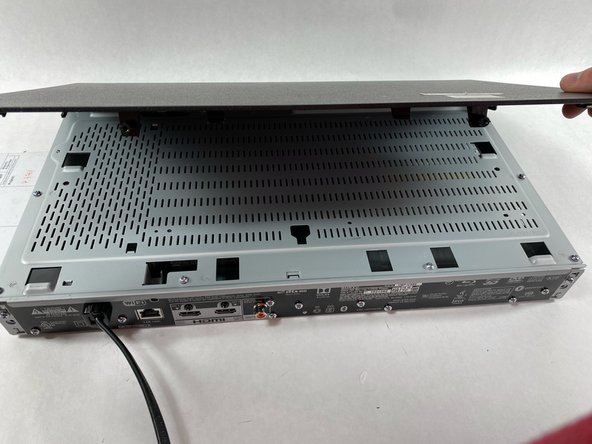
メインコンテンツにスキップ

Sony UBP-UX80 Disc Drive Assembly Replacement

必要な工具と部品

  1. Sony UBP-UX80 Disc Drive Assembly Replacement, Top Cover: 手順 1、 3の画像 1 Sony UBP-UX80 Disc Drive Assembly Replacement, Top Cover: 手順 1、 3の画像 2 Sony UBP-UX80 Disc Drive Assembly Replacement, Top Cover: 手順 1、 3の画像 3
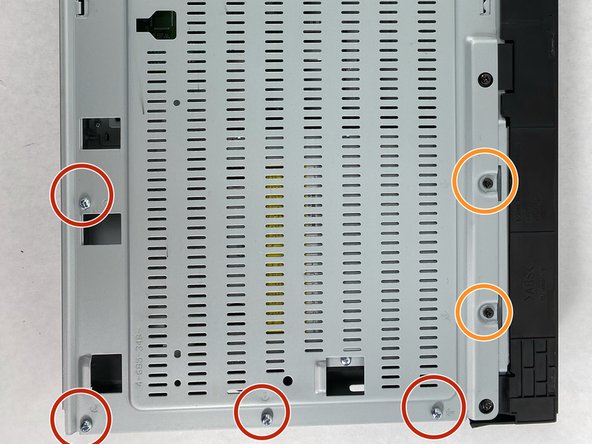
    • Use a Phillips #2 screwdriver to remove the two 10.5 mm screws that secure the two side panels onto the back of the player.

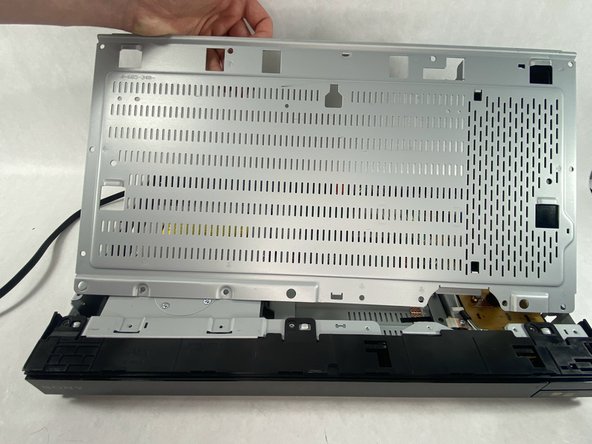
    • Slide both covers back about a 1/2 inch, then pull them away from the case.

  2. Sony UBP-UX80 Disc Drive Assembly Replacement: 手順 2、 3の画像 1 Sony UBP-UX80 Disc Drive Assembly Replacement: 手順 2、 3の画像 2 Sony UBP-UX80 Disc Drive Assembly Replacement: 手順 2、 3の画像 3
    • Use a Phillips #2 screwdriver to remove the two 10.5 mm screws on the side of the case, each connecting to a tab on the cover.

    • Similar to the previous step, it is identical cases on both sides of the device.

    • Use a Phillips #2 screwdriver to remove the two 10.5 mm screws (one next to the Wi-Fi logo and one next to the Blu-ray logo).

  3. Sony UBP-UX80 Disc Drive Assembly Replacement: 手順 3、 2の画像 1 Sony UBP-UX80 Disc Drive Assembly Replacement: 手順 3、 2の画像 2
    • Press in the tabs found on the front-sides of the case (connected to the front panel).

    • Slide the top cover forward.

    • Lift off the case.

  4. Sony UBP-UX80 Disc Drive Assembly Replacement: 手順 4、 3の画像 1 Sony UBP-UX80 Disc Drive Assembly Replacement: 手順 4、 3の画像 2 Sony UBP-UX80 Disc Drive Assembly Replacement: 手順 4、 3の画像 3
    • Find the eleven 10.5 mm silver screws and two 6 mm black screws on the perimeter of the silver cover plate.

    • Remove the silver screws using a Phillips #2 screwdriver and the black ones using a Phillips #1 screwdriver.

    • Life the back of the cover up and off of the chasis.

  5. Sony UBP-UX80 Disc Drive Assembly Replacement, Disc Drive Assembly: 手順 5、 2の画像 1 Sony UBP-UX80 Disc Drive Assembly Replacement, Disc Drive Assembly: 手順 5、 2の画像 2
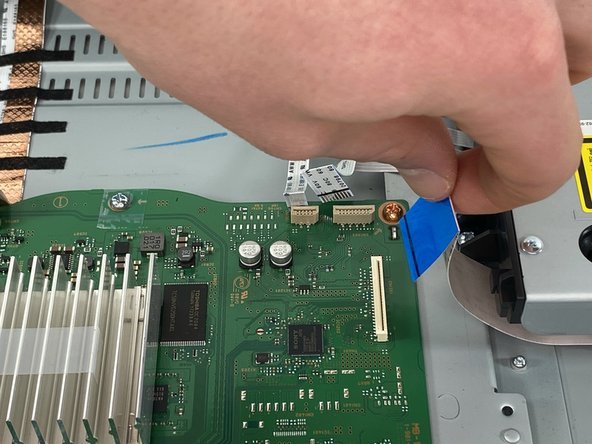
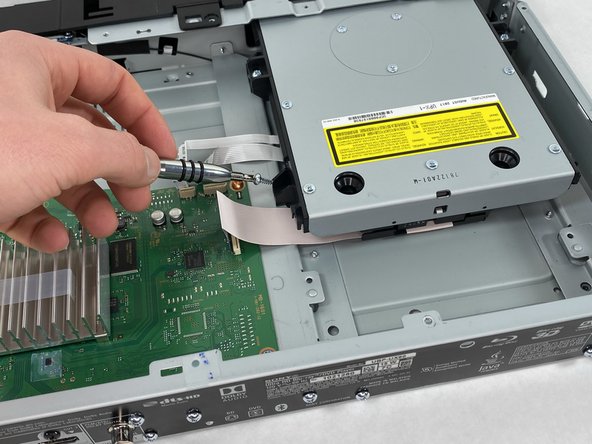
    • Find and remove the three ribbon connections leading to the motherboard.

    • Gently pull straight up. Be careful because ribbon cables are fragile.

  6. Sony UBP-UX80 Disc Drive Assembly Replacement: 手順 6、 2の画像 1 Sony UBP-UX80 Disc Drive Assembly Replacement: 手順 6、 2の画像 2
    • Use a Phillips #2 screwdriver to remove the four 10.5 mm screws.

  7. Sony UBP-UX80 Disc Drive Assembly Replacement: 手順 7、 2の画像 1 Sony UBP-UX80 Disc Drive Assembly Replacement: 手順 7、 2の画像 2
    • Lift the back of the assembly slightly, and pull it back and out of the case to remove it.

終わりに

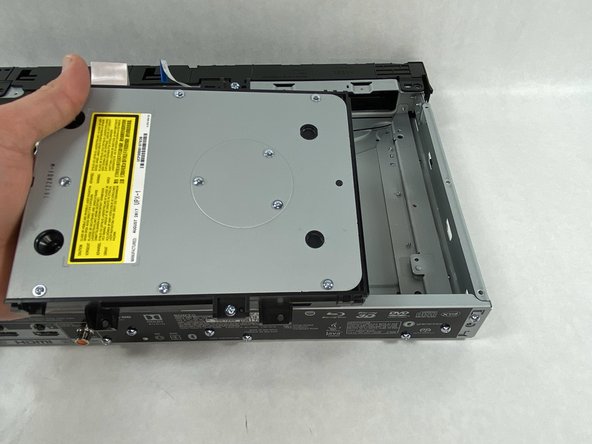
To reassemble your device, follow these instructions in reverse order.

作成者

2人の作成者と共同で作成されました。

Kenny Young

メンバー登録日: 03/13/23

413 ポイント

3のガイドは作成済み

チーム

UMass Dartmouth, Team 2-5, Petersen Spring 2023 UMass Dartmouth, Team 2-5, Petersen Spring 2023人のメンバー

UMASSD-PETERSEN-S23S2G5

4 メンバー

8のガイドは作成済み

0 件のコメント

コメントを追加

統計データ:

過去 24時間: 0

過去 7 日: 4

過去 30 日: 17

今までの合計 83