メインコンテンツにスキップ

Sony SRS-XE200 Microphone Replacement

必要な工具と部品

  1. Sony SRS-XE200 Microphone Replacement, Speaker Assembly: 手順 1、 2の画像 1 Sony SRS-XE200 Microphone Replacement, Speaker Assembly: 手順 1、 2の画像 2
    • Pry the outer cover of the speaker from the body using a spudger.

    • A clicking noise can be heard as the cover is detaching.

  2. Sony SRS-XE200 Microphone Replacement: 手順 2、 1の画像 1
    • Pry the rubber cap away from the body of the speaker using a spudger.

  3. Sony SRS-XE200 Microphone Replacement: 手順 3、 2の画像 1 Sony SRS-XE200 Microphone Replacement: 手順 3、 2の画像 2
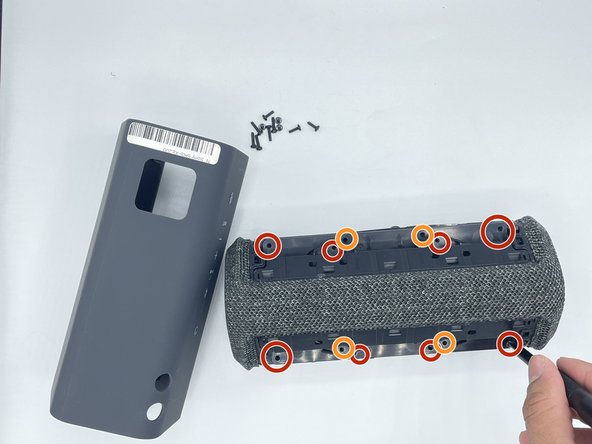
    • Remove the eight 1 mm screws that connect the motherboard case and the speaker case with a Phillips #1 screwdriver.

    • Remove the four 0.8 mm screws that connect the motherboard case and the speaker case with a Phillips #1 screwdriver.

  4. Sony SRS-XE200 Microphone Replacement: 手順 4、 2の画像 1 Sony SRS-XE200 Microphone Replacement: 手順 4、 2の画像 2
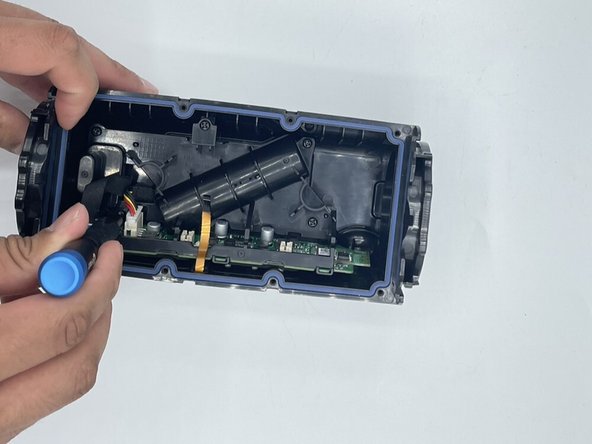
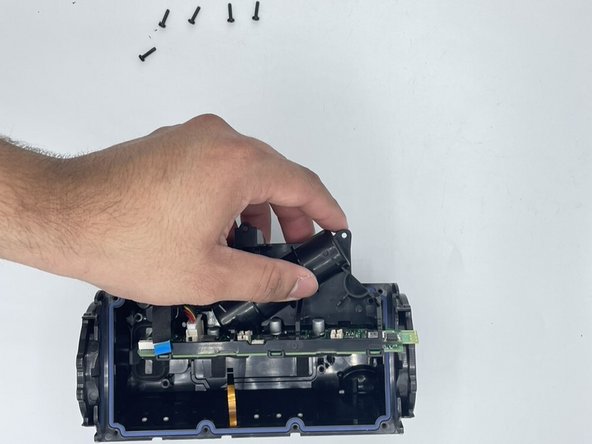
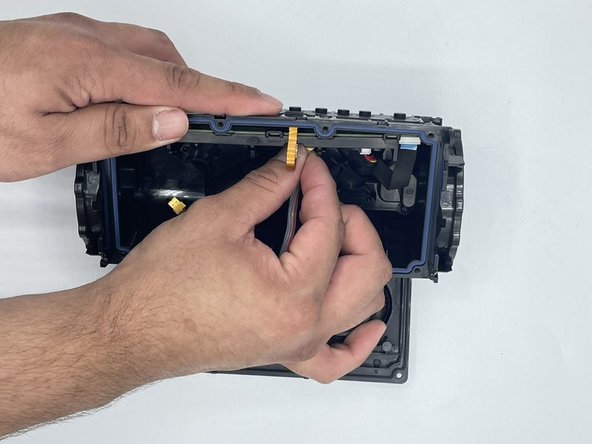
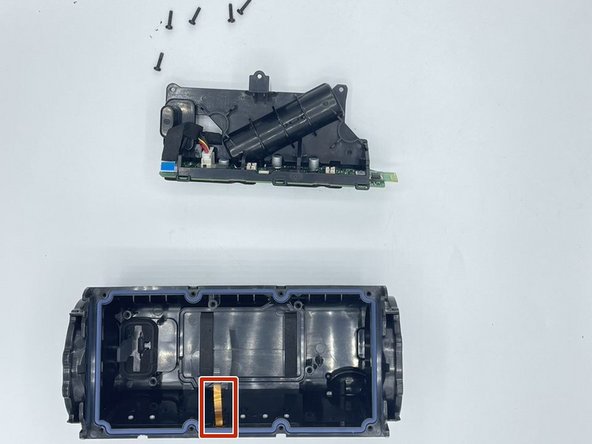
    • Unplug the colored wires from the motherboard to detach the speaker assembly.

  5. Sony SRS-XE200 Microphone Replacement, Battery: 手順 5、 3の画像 1 Sony SRS-XE200 Microphone Replacement, Battery: 手順 5、 3の画像 2 Sony SRS-XE200 Microphone Replacement, Battery: 手順 5、 3の画像 3
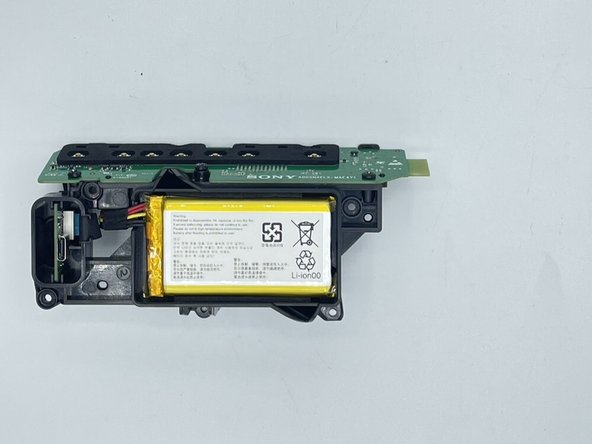
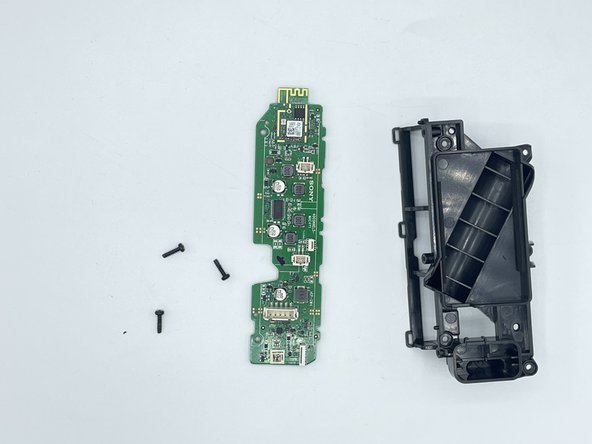
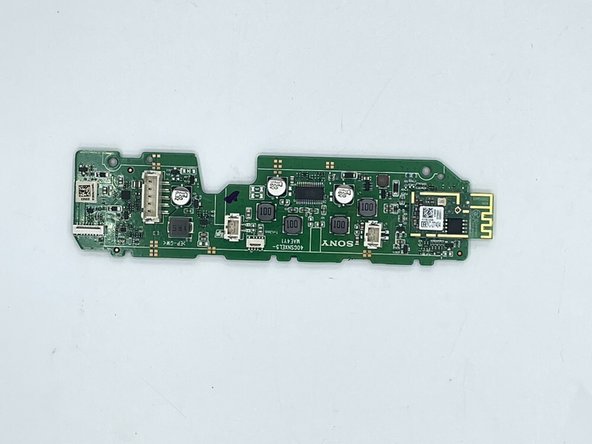
    • Remove the five 1 mm screws connecting the motherboard to the case with a Phillips #1 screwdriver.

    • Separate the motherboard from the case.

  6. Sony SRS-XE200 Microphone Replacement: 手順 6、 3の画像 1 Sony SRS-XE200 Microphone Replacement: 手順 6、 3の画像 2 Sony SRS-XE200 Microphone Replacement: 手順 6、 3の画像 3
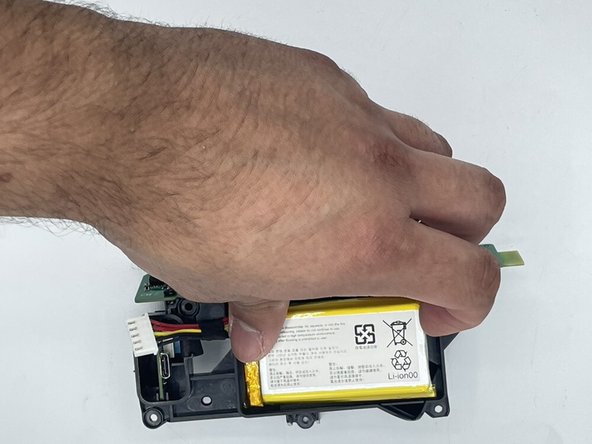
    • Remove the battery from the battery holder with a nylon spudger.

    • Unplug the battery from the motherboard.

  7. Sony SRS-XE200 Microphone Replacement, Charging Port: 手順 7、 2の画像 1 Sony SRS-XE200 Microphone Replacement, Charging Port: 手順 7、 2の画像 2
    • Remove the charging port.

  8. Sony SRS-XE200 Microphone Replacement, Microphone: 手順 8、 3の画像 1 Sony SRS-XE200 Microphone Replacement, Microphone: 手順 8、 3の画像 2 Sony SRS-XE200 Microphone Replacement, Microphone: 手順 8、 3の画像 3
    • Remove the two 0.8 mm screws connecting the motherboard to the microphone with a Phillips #1 screwdriver.

    • Remove the microphone.

  9. Sony SRS-XE200 Microphone Replacement: 手順 9、 1の画像 1
    • Pry the rubber cap away from the body of the speaker using a spudger.

  10. Sony SRS-XE200 Microphone Replacement: 手順 10、 2の画像 1 Sony SRS-XE200 Microphone Replacement: 手順 10、 2の画像 2
    • Remove the eight 1 mm screws that connect the motherboard case and the speaker case with a Phillips #1 screwdriver.

    • Remove the four 0.8 mm screws that connect the motherboard case and the speaker case with a Phillips #1 screwdriver.

  11. Sony SRS-XE200 Microphone Replacement: 手順 11、 3の画像 1 Sony SRS-XE200 Microphone Replacement: 手順 11、 3の画像 2 Sony SRS-XE200 Microphone Replacement: 手順 11、 3の画像 3
    • Remove the microphone from the case of the speaker.

    • Replace the microphone.

終わりに

To reassemble your device, follow these instructions in reverse order.

作成者

3人の作成者と共同で作成されました。

Vishant Savaliya

メンバー登録日: 02/09/23

361 ポイント

4のガイドは作成済み

チーム

University of North Texas, Team 2-6, Saru Jimmy Spring 2023 University of North Texas, Team 2-6, Saru Jimmy Spring 2023人のメンバー

UNT-SARU JIMMY-S23S2G6

4 メンバー

4のガイドは作成済み

0 件のコメント

コメントを追加

統計データ:

過去 24時間: 0

過去 7 日: 1

過去 30 日: 7

今までの合計 192