メインコンテンツにスキップ

Sony SRS-X5 USB/AUX plug in Replacement

必要な工具と部品

  1. Sony SRS-X5 USB/AUX plug in Replacement, Battery: 手順 1、 1の画像 1
    • To gain access to the 6 bottom screws remove the following. Remove the adhered 4 corner foam pads on the bottom of the speaker using the blue plastic opening tool to reveal the screws underneath. Remove the adhered 2 center plastic squares.

    • Make sure the speaker is unplugged and powered down before doing any work on the device.

  2. Sony SRS-X5 USB/AUX plug in Replacement: 手順 2、 2の画像 1 Sony SRS-X5 USB/AUX plug in Replacement: 手順 2、 2の画像 2
    • Unscrew the six 6mm screws with a Phillips head #1 screwdriver.

    • Remove the bottom panel of the speaker.

  3. Sony SRS-X5 USB/AUX plug in Replacement: 手順 3、 1の画像 1
    • Unplug the battery by gently pinching the plastic end connected to the smaller board and pull away.

    • Remove the battery.

  4. Sony SRS-X5 USB/AUX plug in Replacement, Speaker: 手順 4、 1の画像 1
    • To remove the speaker grill, first push down slightly on the 2 plastic hook tabs to release them, then push the middle plastic screw tab out.

  5. Sony SRS-X5 USB/AUX plug in Replacement: 手順 5、 1の画像 1
    • Remove the eight 0.5mm Phillips #1 screws from the speaker panel.

  6. Sony SRS-X5 USB/AUX plug in Replacement: 手順 6、 2の画像 1 Sony SRS-X5 USB/AUX plug in Replacement: 手順 6、 2の画像 2
    • Using the plastic opening tool, flip open the speaker panel.

  7. Sony SRS-X5 USB/AUX plug in Replacement: 手順 7、 3の画像 1 Sony SRS-X5 USB/AUX plug in Replacement: 手順 7、 3の画像 2 Sony SRS-X5 USB/AUX plug in Replacement: 手順 7、 3の画像 3
    • Unplug the 6-pin speaker connector and 2-pin microphone connector from the motherboard by squeezing the sides of the plastic ends.

  8. Sony SRS-X5 USB/AUX plug in Replacement, Bluetooth: 手順 8、 2の画像 1 Sony SRS-X5 USB/AUX plug in Replacement, Bluetooth: 手順 8、 2の画像 2
    • Unplug the cord connected to the motherboard by squeezing the plastic sides.

  9. Sony SRS-X5 USB/AUX plug in Replacement: 手順 9、 1の画像 1
    • Gently tug on the plastic ribbon connected to the bottom side of the speaker to unplug it.

  10. Sony SRS-X5 USB/AUX plug in Replacement: 手順 10、 1の画像 1
    • Remove the motherboard.

  11. Sony SRS-X5 USB/AUX plug in Replacement, USB/AUX plug in: 手順 11、 2の画像 1 Sony SRS-X5 USB/AUX plug in Replacement, USB/AUX plug in: 手順 11、 2の画像 2
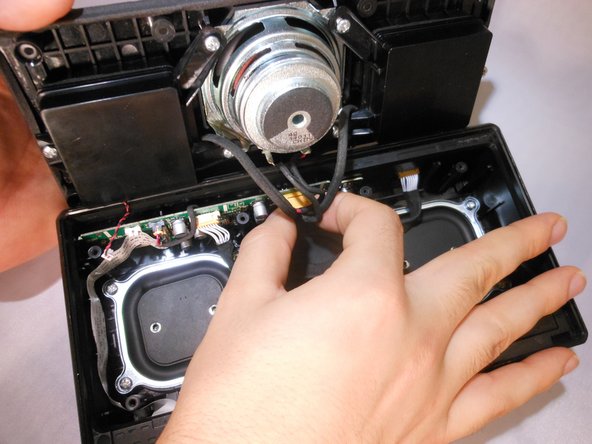
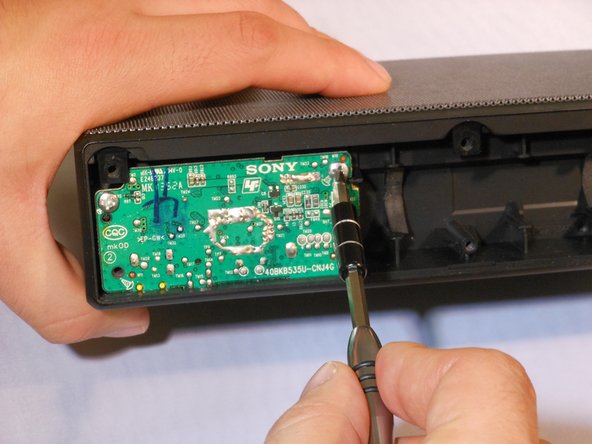
    • Using the Phillips #1 screwdriver, remove the two 6mm screws holding the AUX board in place.

  12. Sony SRS-X5 USB/AUX plug in Replacement: 手順 12、 1の画像 1
    • Remove the aux board. Be careful as the board might need some wiggling to get out.

終わりに

To reassemble your device, follow these instructions in reverse order.

ある他の人がこのガイドを完成しました。

作成者

4人の作成者と共同で作成されました。

Jeffrey Yalung

メンバー登録日: 09/28/16

448 ポイント

3のガイドは作成済み

チーム

Eastern Washington University, Team 2-6, Mathisen Fall 2016 Eastern Washington University, Team 2-6, Mathisen Fall 2016人のメンバー

EWU-MATHISEN-F16S2G6

4 メンバー

5のガイドは作成済み

2 件のコメント

hi there, where can i buy aux board for replacement? thank you

Khánh Trần - 返信

Donde puedo conseguir la tarjeta?

Alan Castaneda - 返信

コメントを追加

統計データ:

過去 24時間: 0

過去 7 日: 4

過去 30 日: 14

今までの合計 1,619