メインコンテンツにスキップ

Sony RDR HX750 HX950 Disassembly

必要な工具と部品

  1. Sony RDR HX750 HX950 Disassembly, Remove cover: 手順 1、 3の画像 1 Sony RDR HX750 HX950 Disassembly, Remove cover: 手順 1、 3の画像 2 Sony RDR HX750 HX950 Disassembly, Remove cover: 手順 1、 3の画像 3
    • Remove the screws from the back and sides of the top cover.

  2. Sony RDR HX750 HX950 Disassembly, Remove Hard Disk: 手順 2、 3の画像 1 Sony RDR HX750 HX950 Disassembly, Remove Hard Disk: 手順 2、 3の画像 2 Sony RDR HX750 HX950 Disassembly, Remove Hard Disk: 手順 2、 3の画像 3
    • Remove the four screws that secure the hard drive mounting bracket to the bottom of the unit.

    • Unplug the two cables from the rear of the hard drive.

    • Remove the four screws from the bottom of the hard drive mounting bracket.

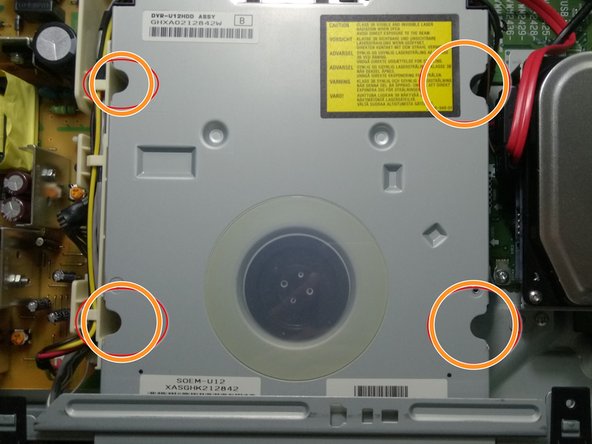
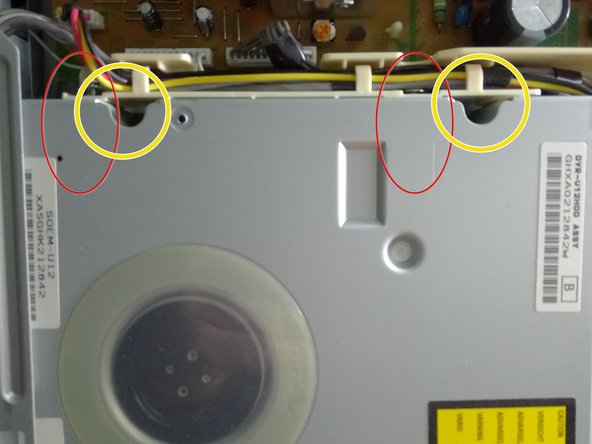
  3. Sony RDR HX750 HX950 Disassembly, Remove DVD player: 手順 3、 3の画像 1 Sony RDR HX750 HX950 Disassembly, Remove DVD player: 手順 3、 3の画像 2 Sony RDR HX750 HX950 Disassembly, Remove DVD player: 手順 3、 3の画像 3
    • Remove the screws from the back

    • Remove the screws from the DVD cover

    • Remove the screws from the plastic cable holder

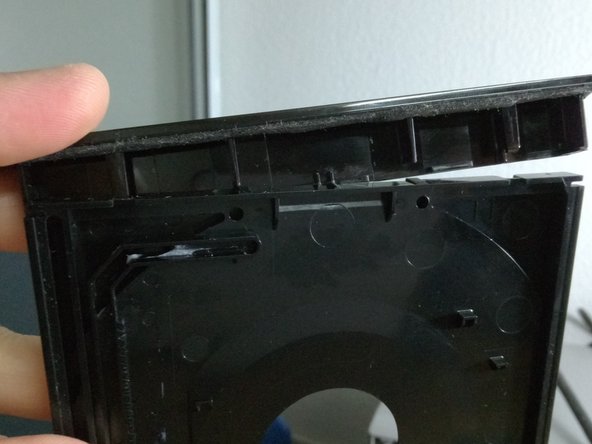
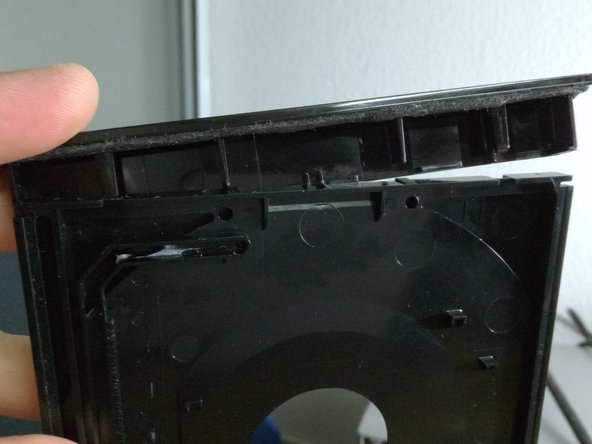
  4. Sony RDR HX750 HX950 Disassembly, Remove front Panel: 手順 4、 3の画像 1 Sony RDR HX750 HX950 Disassembly, Remove front Panel: 手順 4、 3の画像 2 Sony RDR HX750 HX950 Disassembly, Remove front Panel: 手順 4、 3の画像 3
    • Insert the paper under each "click" to remove the front panel.

    • Once each "click" is loose, push the front panel gently.

    • The table of the compact disk has a little plastic piece in front that goes up to come out with a "click"

  5. Sony RDR HX750 HX950 Disassembly, Remove  DVD block: 手順 5、 3の画像 1 Sony RDR HX750 HX950 Disassembly, Remove  DVD block: 手順 5、 3の画像 2 Sony RDR HX750 HX950 Disassembly, Remove  DVD block: 手順 5、 3の画像 3
    • Unplug the cables show in photo.

    • Disconnect the cable hidden on the side.

    • Remove the piece on the cd reader

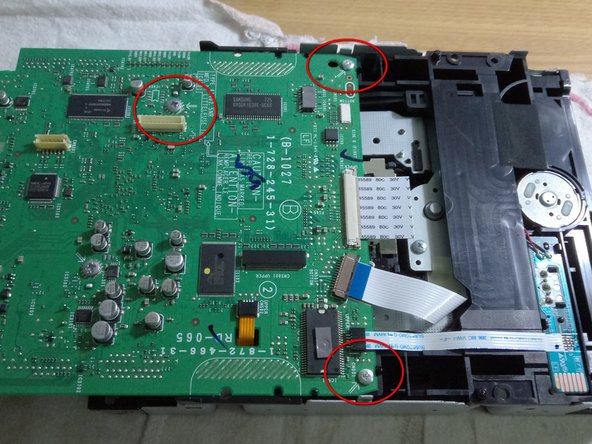
  6. Sony RDR HX750 HX950 Disassembly, Remove cover of dvd player: 手順 6、 3の画像 1 Sony RDR HX750 HX950 Disassembly, Remove cover of dvd player: 手順 6、 3の画像 2 Sony RDR HX750 HX950 Disassembly, Remove cover of dvd player: 手順 6、 3の画像 3
    • Under the DVD block, remove the screws as shown.

    • Remove the screws on the board.

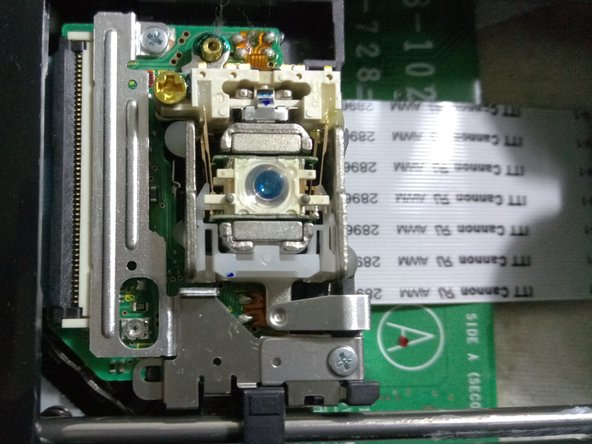
    • Now the laser can be accessed.

  7. Sony RDR HX750 HX950 Disassembly, Sony RDR HX750 laser: 手順 7、 3の画像 1 Sony RDR HX750 HX950 Disassembly, Sony RDR HX750 laser: 手順 7、 3の画像 2 Sony RDR HX750 HX950 Disassembly, Sony RDR HX750 laser: 手順 7、 3の画像 3
    • Inserir instruções aqui.

終わりに

To open this dvd recorder folow this tutorial

2 の人々がこのガイドを完成させました。

作成者

8人の作成者と共同で作成されました。

Cafony

メンバー登録日: 02/17/15

687 ポイント

4のガイドは作成済み

コメント 1 件

Hello,HX950 work only with hdd 250Gb,or another,with 500 or 1000Gb ???

Cornelus - 返信

コメントを追加

統計データ:

過去 24時間: 4

過去 7 日: 23

過去 30 日: 58

今までの合計 5,405