はじめに
If your Sony Pulse Elite Edition Headphones (99037) are not working properly and you have tried all other troubleshooting methods, then look no further. This guide describes how to replace the motherboard in the Sony Pulse Elite Edition Headphones. If you are dealing with fuzzy or incorrect audio being played, you might only need to replace the speaker itself, or a different piece. Note that soldering is required to complete this instruction set.
必要な工具と部品
-
-
Locate the left side designation on the headband-earpiece junction.
-
The battery is in the right earpiece.
-
The motherboard is in the left earpiece.
-
-
-
Gently pull around the perimeter of the left ear cushion until it comes off.
-
-
-
Use the PH00 Screwdriver to remove the three Phillips 6mm screws around the perimeter of the ear cup.
-
Gently pull the outer ear rim off of the headset assembly.
-
-
-
-
Using tweezers, gently pry the red and black speaker wires from the attached socket.
-
-
-
Using the Phillips #00 screwdriver, remove the four Phillips 5 mm screws from the two motherboard brackets.
-
Keep the two brackets and screws in a safe place.
-
-
-
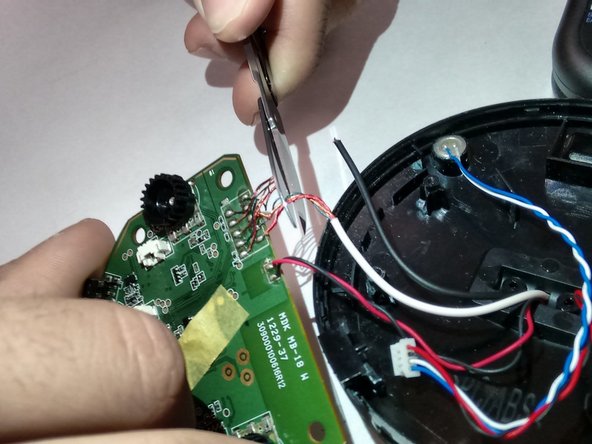
Using tweezers, unclip the blue, white, and red wire harness from the motherboard. This harness is for the microphone.
-
Using the tweezers, unclip the red and black wire harness from the motherboard. This harness is for the speakers.
-
-
-
Using wire cutters, cut all of the permanent wires from the motherboard.
-
Strip the wires on the ear piece portion about a quarter of an inch from their cut ends.
-
-
-
Strip the wires on the ends of the new motherboard wires about a half inch from the end.
-
Solder each individual wire from the new motherboard to the corresponding wire on the ear piece.
-
Completely wrap each solder joint with electrical tape so that the exposed wires only contact their corresponding wires.
-


To reassemble your device, follow these instructions in reverse order.
To reassemble your device, follow these instructions in reverse order.
2 の人々がこのガイドを完成させました。
チーム

Clemson, Team 14-2, Shirley Spring 2015 Clemson, Team 14-2, Shirley Spring 2015人のメンバー
CLEM-SHIRLEY-S15S14G2
5 メンバー
12のガイドは作成済み