この翻訳は、ソースガイドの最新の更新を反映していない可能性があります。 翻訳の更新に協力してください。 または ソースガイドを参照してください。
分解
この分解は修理ガイドでは ありません。 お持ちのPlayStationを修理する際は、iFixitの修理ガイドをご利用ください。
これが、PS1です。
PS1を裏返して置き、ネジを6本外します。
トップカバーを取り外します。とても簡単です。
この手順は未翻訳です。 翻訳を手伝う。
Disconnect both CD-ROM connectors.
CD connector one and the socket it connects to.
CD connector two and the socket it connects to.
Note: part number DEVICE OPTICAL KSM-440AEM
Remove the CD-ROM reader. You should be able to pull it out gently, although you may have to wiggle it around a bit to loosen the rubber holders.
Detach both cables. They go to the power supply and to the memory cards and controller connectors.
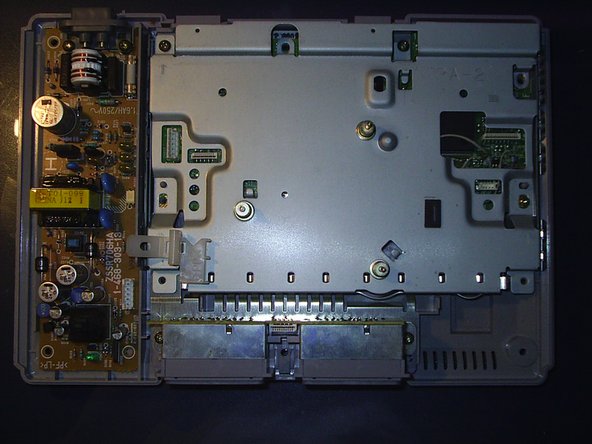
ネジを4本外し、メタルカバーを取り外します。
Now you have the motherboard!
And the power supply.
Remove the four screws from the motherboard and the power supply.
一度ネジが外れたら、電源を取り外します。
Remove the motherboard, and both of the screws from the memory card/ controller connection mechanism.
Now, you have all your PlayStation 1 parts!
Main Board
Lower Casing
EMI Shield
Power Supply
Disk Reader
Memory Card/ Controller Mechanism
以下の翻訳者の皆さんにお礼を申し上げます:
33%
railgun
railgunさんは世界中で修理する私たちを助けてくれています! あなたも貢献してみませんか? 翻訳を始める ›
9人の作成者と共同で作成されました。
メンバー登録日: 05/06/10
182 ポイント
1ガイドが承認済み
バッジ: 0
That’s a PAL PS1. May be different from NTSC models.
Daniel Powers - 2019年2月17日 返信
サイズを選択し、以下のコードをコピーして、このガイドを小さなウィジェットとしてサイト/フォーラムに埋め込みます。
過去 24時間: 4
過去 7 日: 36
過去 30 日: 122
今までの合計 27,940