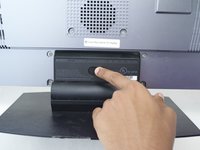
メインコンテンツにスキップ

Sony PlayStation 3D Display 3D Sync Transmitter Replacement

必要な工具と部品

  1. Sony PlayStation 3D Display 3D Sync Transmitter Replacement, Rear Case: 手順 1、 2の画像 1 Sony PlayStation 3D Display 3D Sync Transmitter Replacement, Rear Case: 手順 1、 2の画像 2
    • Remove the base by pushing in the button and sliding out the unit.

  2. Sony PlayStation 3D Display 3D Sync Transmitter Replacement: 手順 2、 3の画像 1 Sony PlayStation 3D Display 3D Sync Transmitter Replacement: 手順 2、 3の画像 2 Sony PlayStation 3D Display 3D Sync Transmitter Replacement: 手順 2、 3の画像 3
    • Remove USB port cover from back plate with a metal spudger.

    • This will prevent the cover from falling under the back plate once it is removed.

  3. Sony PlayStation 3D Display 3D Sync Transmitter Replacement: 手順 3、 2の画像 1 Sony PlayStation 3D Display 3D Sync Transmitter Replacement: 手順 3、 2の画像 2
    • With the Phillips #02 screwdriver, remove the six 6 mm length x 6 mm head screws from the back plate.

    • With the Phillips #02 screwdriver, remove the ten 6 mm length x 8 mm head screws from the back plate.

    • These screws have different threads and need to be kept separate.

  4. Sony PlayStation 3D Display 3D Sync Transmitter Replacement: 手順 4、 3の画像 1 Sony PlayStation 3D Display 3D Sync Transmitter Replacement: 手順 4、 3の画像 2 Sony PlayStation 3D Display 3D Sync Transmitter Replacement: 手順 4、 3の画像 3
    • Remove back plate with a plastic opening tool by slowing prying around the entire plate.

    • Be gentle to avoid breaking the plastic clips which hold the plate.

    • Once separated the plate easily lifts off.

  5. Sony PlayStation 3D Display 3D Sync Transmitter Replacement, 3D Sync Transmitter: 手順 5、 2の画像 1 Sony PlayStation 3D Display 3D Sync Transmitter Replacement, 3D Sync Transmitter: 手順 5、 2の画像 2
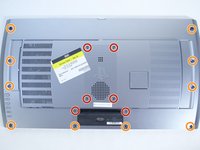
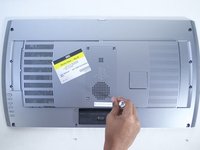
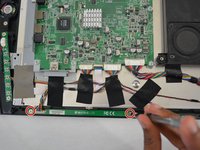
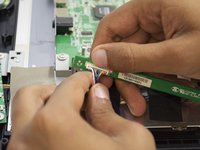
    • With the Phillips #01 screwdriver, remove the two 5 mm length x 7 mm head screws that hold the 3D Sync Transmitter in place.

  6. Sony PlayStation 3D Display 3D Sync Transmitter Replacement: 手順 6、 1の画像 1
    • Carefully pry off the 3D Sync Transmitter with the plastic opening tool.

    • Use the plastic opening tool to pry at both ends and not from the center as to avoid breaking the 3D Sync Transmitter.

  7. Sony PlayStation 3D Display 3D Sync Transmitter Replacement: 手順 7、 2の画像 1 Sony PlayStation 3D Display 3D Sync Transmitter Replacement: 手順 7、 2の画像 2
    • Pry the tab slightly up with your thumbnail and pull the connector away from the board.

終わりに

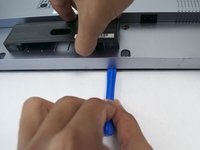
To reassemble your device, follow these instructions in reverse order.

2 の人々がこのガイドを完成させました。

作成者

7人の作成者と共同で作成されました。

Tia McNaughton

メンバー登録日: 10/01/15

379 ポイント

3のガイドは作成済み

チーム

Cal Poly, Team 12-16, Maness Fall 2015 Cal Poly, Team 12-16, Maness Fall 2015人のメンバー

CPSU-MANESS-F15S12G16

4 メンバー

8のガイドは作成済み

0 件のコメント

コメントを追加

統計データ:

過去 24時間: 0

過去 7 日: 5

過去 30 日: 11

今までの合計 2,241